
Written by
Wilsey YoungSummary: This post shows how to lock BitLocker encrypted drive without restarting in Windows 10. iBoysoft DiskGeeker for Windows is recommended when users want to encrypt with BitLocker and manage BitLocker drives more easily on Windows Home and other editions that do not support BitLocker.
BitLocker is a full disk encryption feature built into certain versions of the Windows operating system. It helps protect your data by encrypting the entire drive or specific volume, making it unreadable without correct authentications, such as a password or BitLocker recovery key. This BitLocker encryption helps safeguard important data especially when your computer is lost, stolen, or accessed by unauthorized users.
Most BitLocker users would rather unlock the BitLocker encrypted drive than turn off BitLocker to access and modify its data. An unlocked BitLocker drive means the drive can be used as normal but the data is still protected by encryption.
However, by default, there is no "Lock drive" GUI options or tools to lock the BitLocker encrypted drive in Windows 10. To lock it, you have to restart the Windows 10. Is there any way to lock BitLocker encrypted drive without restarting in Windows 10? Some BitLocker users wonder and quest for possible solutions.
You can share this post with your friends!
Reddit discussions on "How to lock BitLocker encrypted drive without restarting?"
One BitLocke user posted on Reddit and asked if there's any way to lock a BitLocker encrypted drive without rebooting the PC, as he didn't find any tools or options through the context menus.
You can check the Reddit post below to join the discussions and learn more details about how to lock BitLocker encrypted drive without restarting.
Re-Locking Bitlocker Drive Once Unlocked
by u/ToshikoHahn in windows
How to lock BitLocker encrypted drive without restarting in Windows 10
The following are three ways to lock BitLocker encrypted drive without restarting in Windows 10:
Option 1: Lock BitLocker encrypted drive without restarting via iBoysoft DiskGeeker for Windows
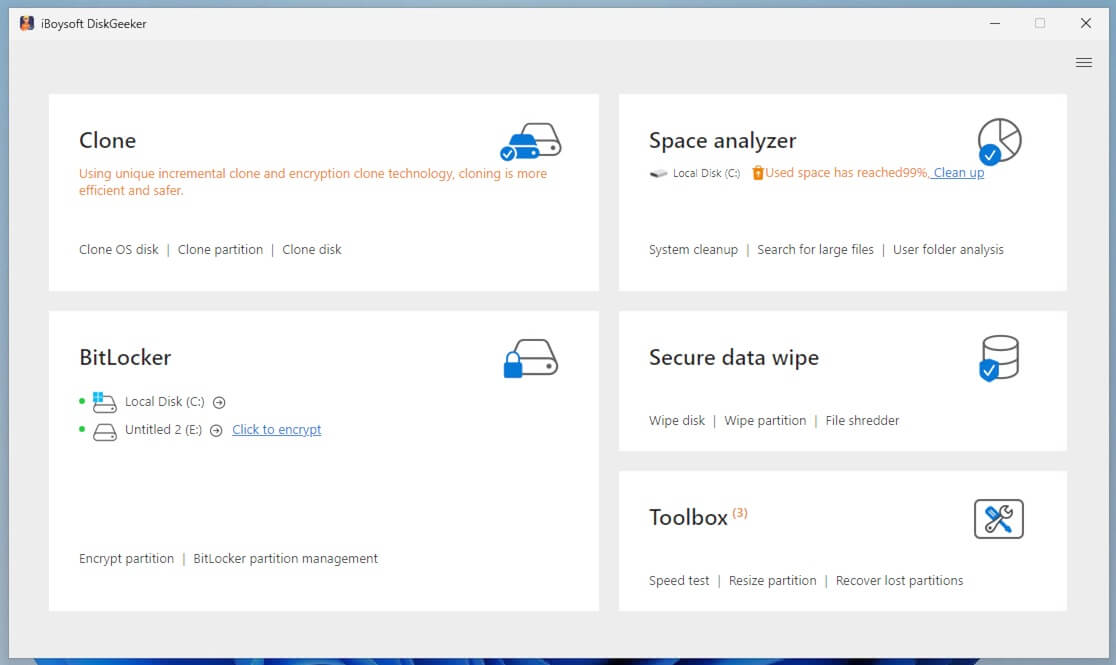
Although there are no built-in GUI options or tools for you to lock a BitLocker encrypted drive in Windows 10, you can rely on a third-party BitLocker tool that not only supports centralized management of BitLocker drives but also convenient BitLocker encryption, and this is where iBoysoft DiskGeeker for Windows comes into play.
iBoysoft DiskGeeker for Windows is a professional and user-friendly disk management tool containing BitLocker module, which allows you to use BitLocker drive encryption to encrypt NTFS, FAT32, or exFAT partitions on Windows, particularly for Windows editions that do not support BitLocker, such as Windows 11/10/8.1/8.7 Home and Windows 7 professional.
For those who want to lock the BitLocker encrypted drive without restarting in Windows 10, iBoysoft DiskGeeker for Windows boasts a “BitLocker partition management” function that enables you to lock and unlock the BitLocker drives more easily.
You can follow the tutorial below to learn how to lock BitLocker encrypted drive without restarting in Windows 10:
- Download, install, and launch iBoysoft DiskGeeker for Windows.
- Click the “BitLocker partition management” from the BitLocker module in the main interface.
- You can click the top right box and select "Show all partitions," "Only show encrypted partitions," or "Only show unencrypted partitions."
- You can directly open, lock, and unlock a BitLocker encrypted drive via iBoysoft DiskGeeker for Windows.
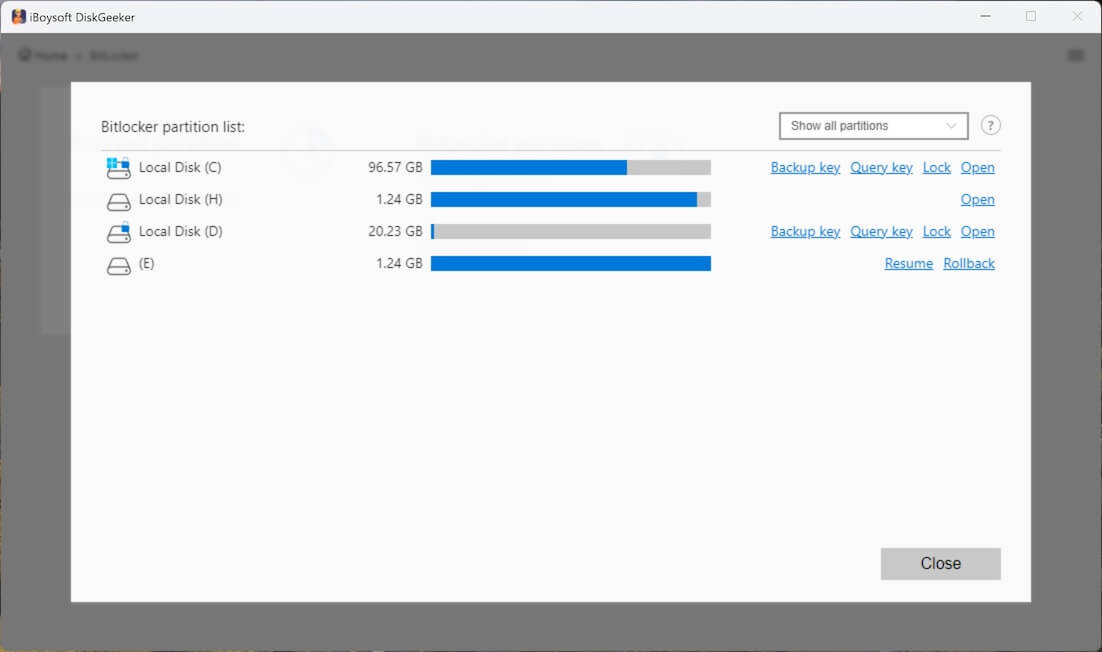
- The "Back up" button allows you to save the BitLocker recovery key to a chosen location, and the "Query key" helps you locate the key quickly.
You can share this wonderful disk management tool with friends!
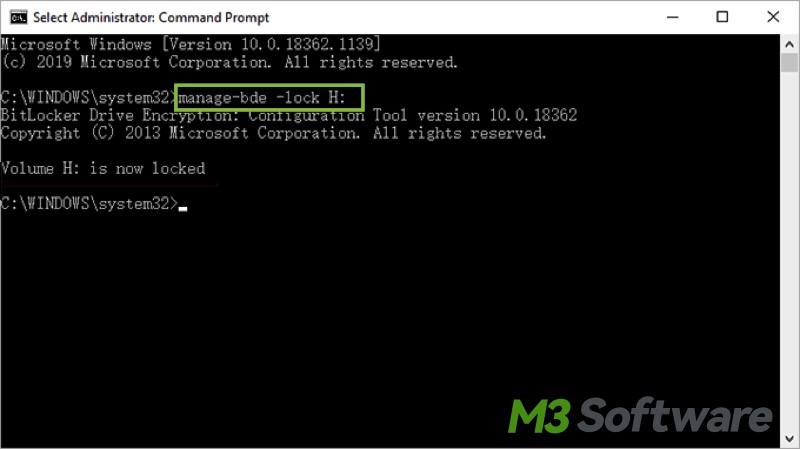
Option 2: Lock Bitlocker encrypted drive without restarting via CMD
Run and execute command line as an administrator in cmd allows you to lock the BitLocker encrypted drive without restarting in Windows 10, and here's how:
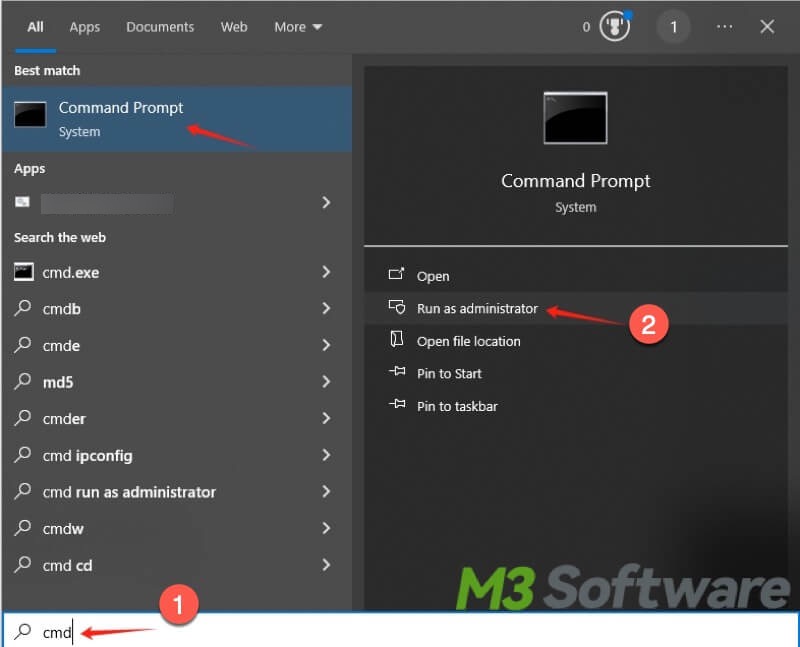
- Press the "Windows+S" keys to open the start menu search bar and type "cmd" in it.
- Choose "Run as administrator" from the menu to allow administrator privilege.
- Type the command "manage-bde -lock X:" and hit the "Enter" key. You need to replace X with the actual drive letter of your BitLocker encrypted drive.
Option 3: Lock Bitlocker encrypted drive without restarting via the added lock option
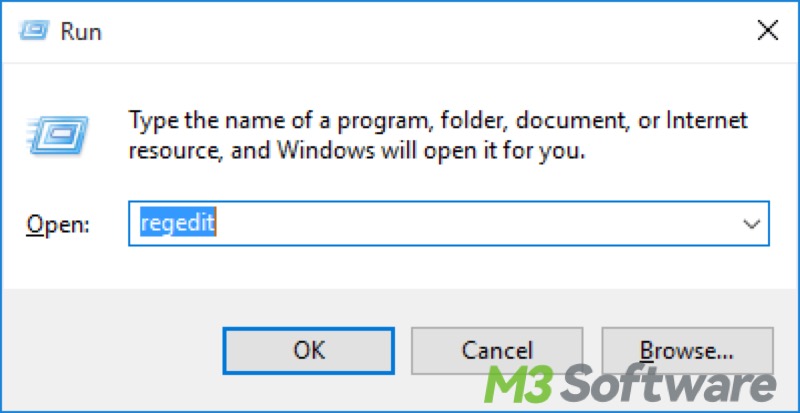
The following steps allow you to add a “Lock Drive” option in the right-click menu of the BitLocker encrypted drive in File Explorer.
Follow the steps below to open Registry Editor and locate the "shell" folder:
- Press the "Win+R" keys together to open the "Run" dialog box.
- Type "regedit" in the box and press "Enter" to open the Registry Editor.
- Once the Registry Editor opens, expand the folder by following the path: HKEY_CLASSES_ROOT\Drive\shell
Follow the steps below to create "runas" key and change its value data:
- Right-click on the "Shell" folder, move the cursor to "New" and left-click on "Key" from the menu.
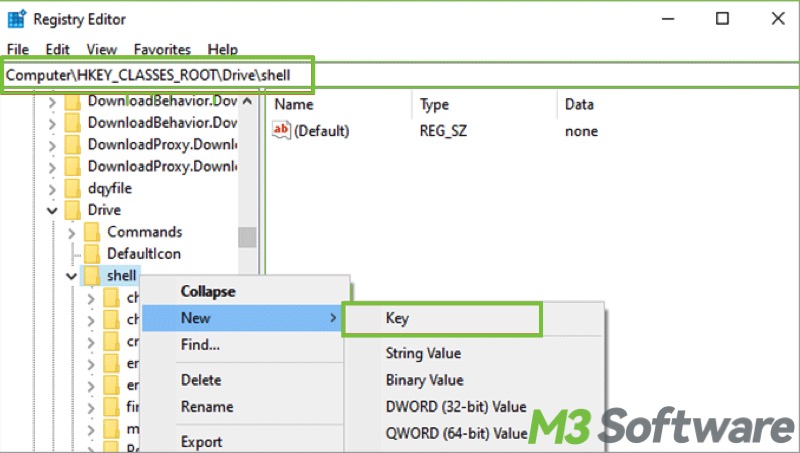
- Rename the newly created key runas and press the "enter."
- Select "runas", double-click on the "Default" option on the right pane to name it Lock Drive under "Value data", and click "OK" to save.

The following steps show how to create "command" key and change value data:
- Right-click on "Runas", move the cursor to "New", and left-click on "Key".
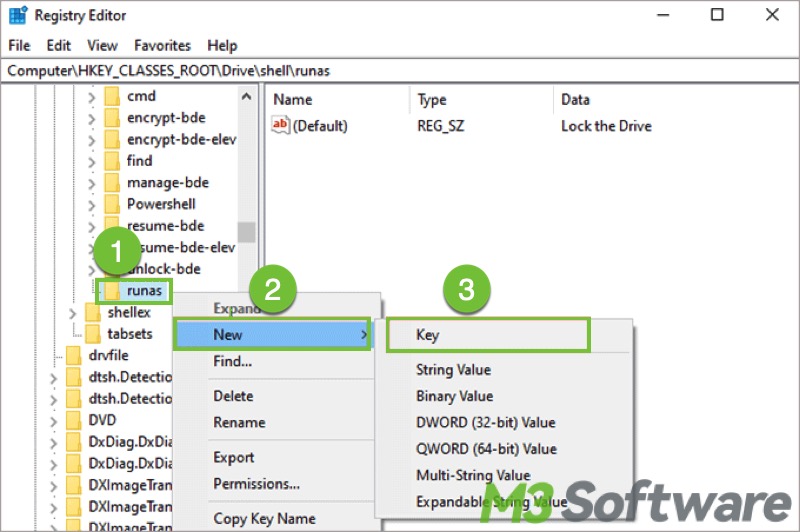
- Rename the newly created key command and hit the "Enter."
- In "command", double click on "Default" and type the following path in the "Value data" box: c:\windows\System32\manage-bde.exe X: -lock (X is the drive letter of your BitLocker encrypted drive).
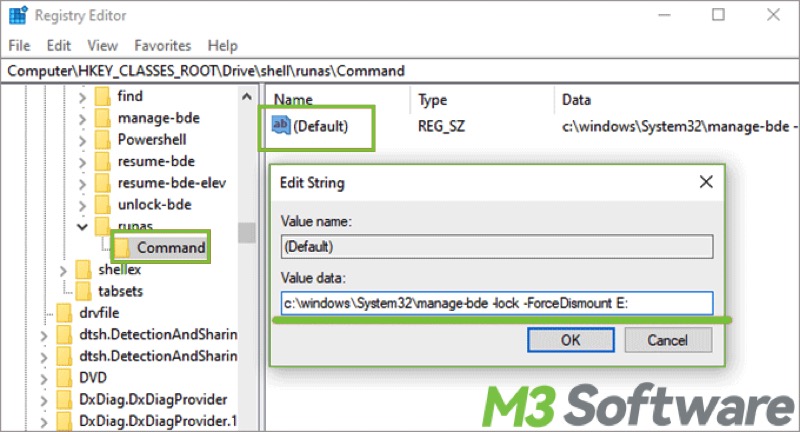
- Click “OK” to save and close the Regedit Editor
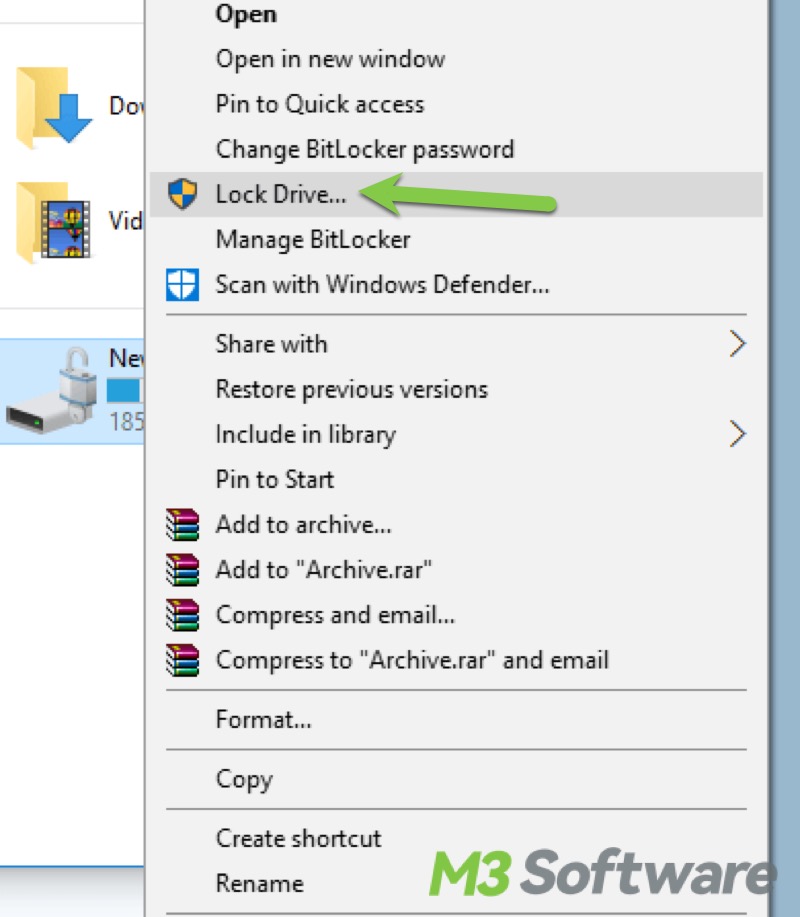
- Right-click on this BitLocker encrypted drive in File Explorer and you will find there is a "Lock Drive" option in the right-click menu. You can lock the BitLocker encrypted drive by this added lock drive option.
You can click the buttons below to share this post!