
Written by
Yuri ZhangSummary: This post addresses how to remove BitLocker from external hard drive and SSD containing Settings, Control Panel, and Command Prompt. Dig more in m3datarecovery. iBoysoft DiskGeeker helps via cloning to backup before removing BitLocker.
An external drive, or external hard drive, is a portable storage device that connects to a computer via a USB, Thunderbolt, eSATA, or FireWire interface. The most common types of external drives include Hard Disk Drives (HDDs) and Solid-State Drives (SSDs).
BitLocker is a full-disk encryption feature included with Microsoft Windows versions starting with Windows Vista. It is designed to protect data by providing encryption for entire volumes. While BitLocker is an excellent tool for securing data, there may come a time when you need to remove it from an external drive or SSD. Let's delve how to remove BitLocker from external hard drive in Windows.
Why remove BitLocker or decrypt the BitLocker drive?
Firstly while BitLocker encryption is efficient, it can cause a slight performance decrease, especially on older systems. Secondly, if you're reallocating the drive to a less secure environment, you might not need encryption.
Thirdly, for instance, you are using iBoysoft DiskGeeker for Windows (download button as follows) to do disk cloning for safe data backup. Simplifying the process of data backup can be a reason to decrypt the drive.
Also during data recovery, it's better to remove BitLocker to speed up the recovery.
Fourthly, Some systems or software might have compatibility issues with encrypted drives. You can remove BitLocker in case of compatibility issues.
Share this to remember expertise by heart.
Pre-requisites before you proceed with removing BitLocker
Ensure that you have administrative privileges on the computer by pressing Win + X and selecting Control Panel > User Accounts > Manage another account. Look for your account in the list. If it says "Administrator" under your account name, you have administrative privileges.
Know the BitLocker password or have the BitLocker recovery key by accessing the Microsoft account recovery key page. At the same time, back up any important data on the drive with iBoysoft DiskGeeker for Windows software to avoid data loss during the process. By the way, ensure your laptop is connected to a power source if you are decrypting or removing to prevent interruption due to power failure.
Steps to remove BitLocker from an external drive or SSD
Step 1: Plug and connect the external drive or SSD to your computer.
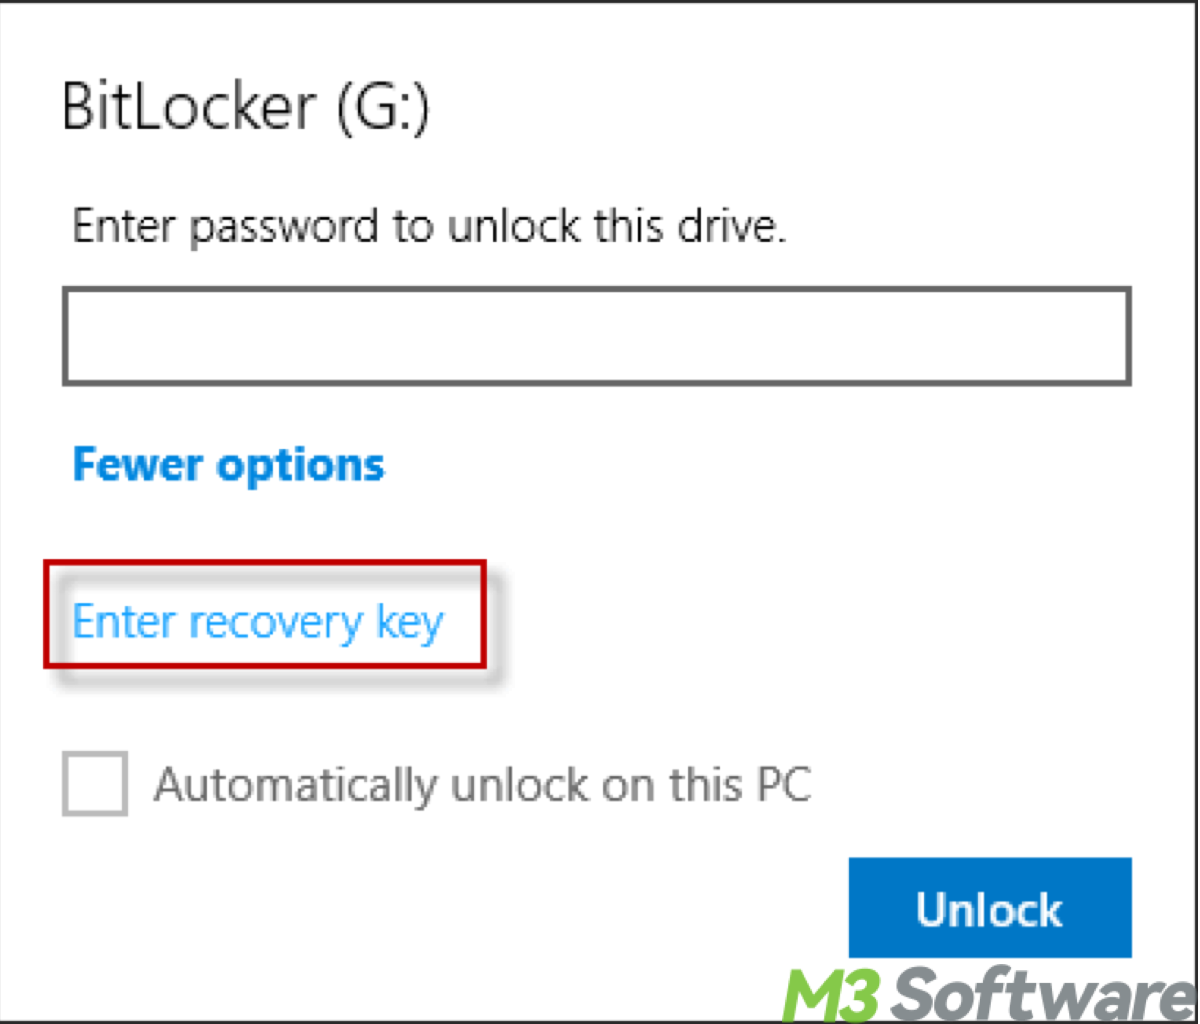
Step 2: If the drive is locked, you can unlock it by double-clicking on the drive in File Explorer and entering the password when prompted. Or right-click the drive, select “Unlock Drive,” and then choose “Enter recovery key.” then enter the BitLocker password.
Step 3: You can turn off BitLoccker using Windows Settings (Windows 10/11) by pressing Windows + I > Update & Security > Device encryption or Update & Security > BitLocker Drive Encryption. Or right-click on the drive in File Explorer and select “Manage BitLocker.” Confirm your decision if prompted. Alternatively, go to Control Panel > System and Security > BitLocker Drive Encryption and find your drive in the list. Then click on “Turn off BitLocker” next to the drive you want to decrypt.
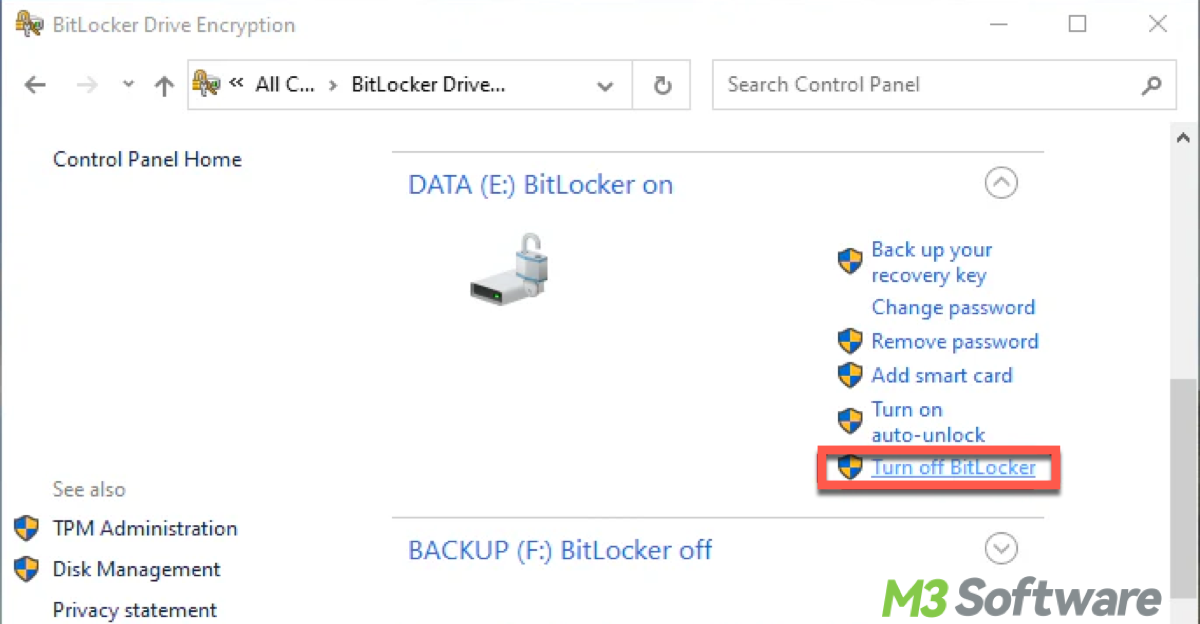
Step 4: A new window will appear, asking for confirmation to turn off BitLocker. Confirm this action. Enter the BitLocker password or use the recovery key if prompted. The decryption process will start.
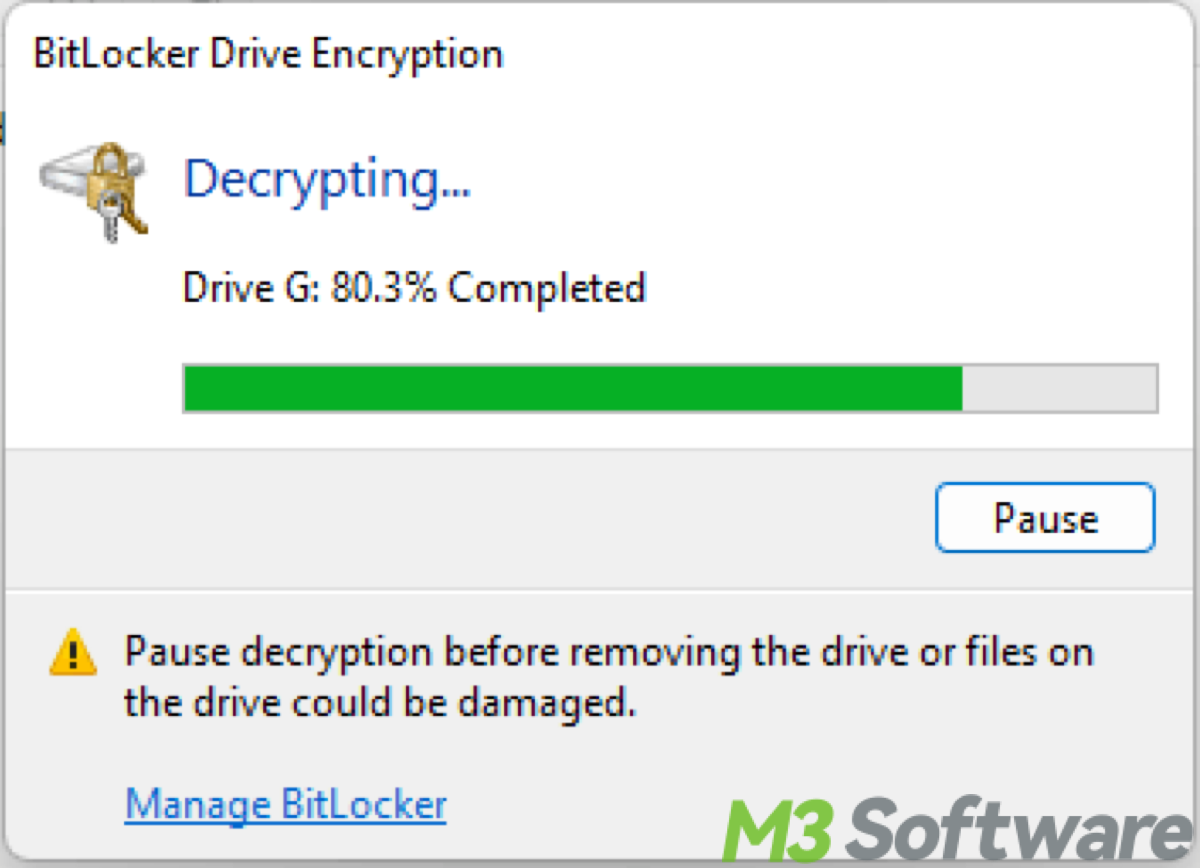
Step 5: Wait until the decryption process is complete. Do not disconnect the drive during this process. Decryption can take time, especially for large drives. Be patient and allow the process to complete fully.
Share this to inspire others kindly.
How to remove BitLocker using Command Prompt
This method is preferred by advanced users and IT professionals for scripting and easy automation.
- Connect the external drive or SSD to your computer and unlock it using the password if necessary.
- Press Windows + X and select “Command Prompt (Admin)” or “Windows PowerShell (Admin).”
- Type the following command to decrypt the drive and replace X: with the drive letter of your external drive or SSD:manage-bde -off X:
- The decryption process will start. Monitor the progress in the Command Prompt window. Ensure your computer remains on and connected to power (if applicable) during this process.
Conclusion
Removing BitLocker from an external drive or SSD in Windows is a straightforward process, but it requires some patience and caution. By following the steps outlined above, you can successfully decrypt your drive and remove BitLocker encryption. Always remember to back up your data and ensure you have the necessary credentials (password or recovery key) before proceeding.
Also read How to Retrieve BitLocker Recovery Key Using PowerShell
Spread this post and comment down below to leave your valuable opinions or questions!