
Written by
Wilsey YoungSummary: This post primarily discusses using Command Prompt to convert RAW to NTFS without losing data. iBoysoft Data Recovery for Windows can help you restore lost data from RAW storage devices on Windows.
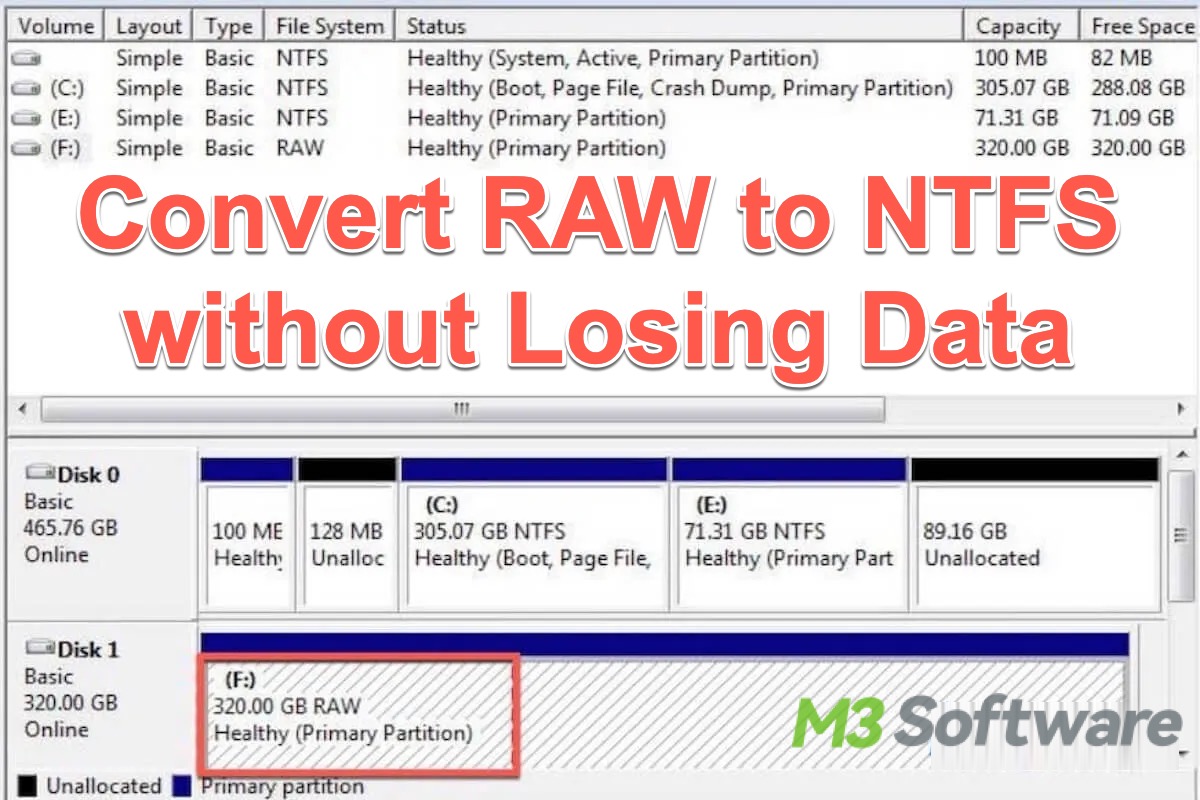
I upgraded my computer from Win7 to Win 10 and I have 2 hard drives: one is "C" that has OS and one is "G" that has many pictures and videos, etc. Both drives had an NTFS file system. But after the upgrade, my "G" drive becomes RAW while the "C" drive appears okay. I've heard that I can format this HDD from cmd to fix this RAW issue, but I just don't know how. Please help me is there any Command Prompt to convert RAW to NTFS without losing data?
When googling things about the RAW file system, you may notice that some results said that Command Prompt can convert RAW back to NTFS. However, a few mentioned that you will lose important data if you fix RAW drives by directly converting RAW to NTFS. Therefore, to be supplementary, this article will go into detail about how to convert RAW to NTFS without data loss when you use the Command Prompt.
The following buttons allow you to share this post quickly
What does RAW drive mean and what are the common causes?
When a storage device appears as RAW, it indicates the storage device has no recognized file system, or its file system has become corrupted or uninitiated. As a result, users can not read and access the data as the Windows OS cannot identify and mount it.
Common causes of the RAW drive
- File system corruption: Power failures, improper shutdowns, or system crashes can lead to file system corruption, causing the drive to become RAW.
- Bad sectors: Physical damage or bad sectors on the drive can make the file system unreadable.
- Partition table damage: The damaged partition table may make the drive unreadable.
- Formatting issues: The interrupted formatting can cause the drive to appear as RAW
- Remove the drive without safely ejecting: Improperly removing a drive without safely ejecting it can corrupt the file system.
Use Command Prompt to fix the RAW drive without losing data
The Command Prompt is a command-line interpreter application built into Windows OS. Users can rely on its text-based interface to execute commands directly for advanced system management, automation, troubleshooting, and more.
Solution 1: Repair the RAW drive with the CHKDSK command
Before you look for any RAW to NTFS converter software, why not first have a check what's wrong with your drive? CHKDSK is a Windows utility that is used to check and repair common drive file system errors. And if your NTFS drive suddenly becomes RAW, you can repair it with the CHKDSK command to convert RAW back to NTFS. But usually, it will fail and you will get the message "The type of the file system is RAW. CHKDSK is not available for RAW drives."
Solution 2: Change the drive letter with CMD
If your drive was formatted NTFS, you can recover RAW partitions and send them back to NTFS by assigning a new drive letter. This process will try to load and repair the file system of your drive, and you can change RAW to NTFS without formatting. Just try the following steps out.
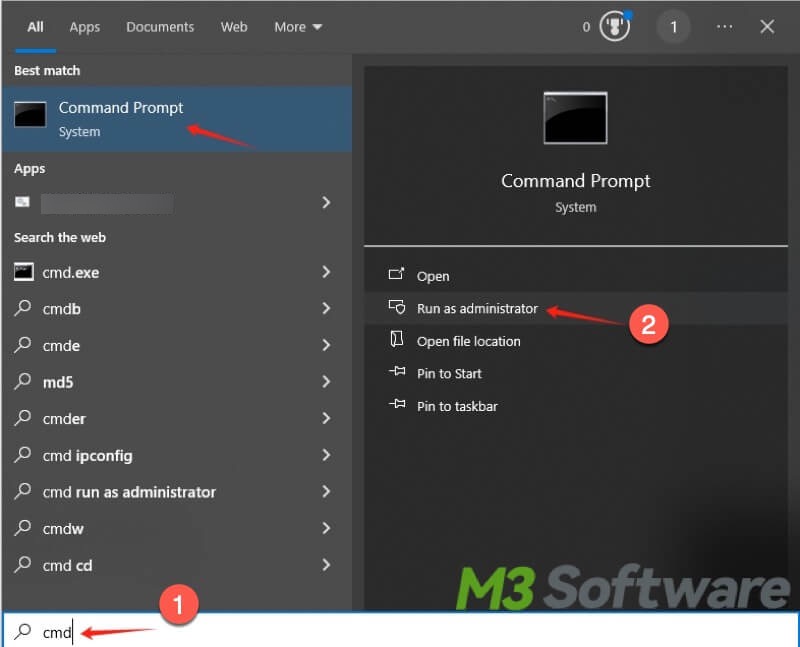
- Search "cmd" in the Windows search box and select “Run it as administrator.”
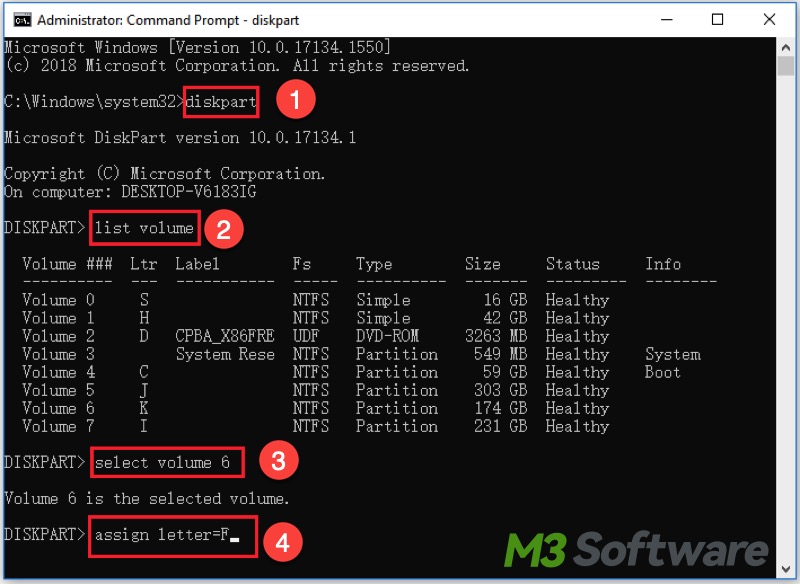
- Type in "diskpart" in the Command Prompt window and press “Enter” key on your keyboard.
- Type in "list volume" and press Enter to list all volumes on your computer.
- Type in "select volume * "and press Enter. (Replace "*" with the volume number of the RAW.)
- Type in "assign letter=X" and press Enter. (Replace "X" with the drive letter you like.)
- After successfully changing the drive letter, key in "exit" and press Enter.
Solution 3: Convert RAW to NTFS with the DiskPart command
Sometimes changing the drive letter will fail if the key sectors are irreparable, so you can convert RAW to NTFS by using the DiskPart command. Nevertheless, just as the article said above, a direct Command Prompt conversion will wipe your hard drive and erase all your data on this drive. Thus, to fix the RAW drive to NTFS without losing the existing data, you can recover lost data from this RAW drive with data recovery software first and iBoysoft Data Recovery for Windows is highly recommended.
iBoysoft Data Recovery for Windows is a professional and easy-to-operate data recovery tool that can help recover lost data from the RAW USB drive, RAW SD card, RAW memory card, etc. In addition to RAW HDD data recovery, it can recover documents, emails, videos, and other files from formatted, inaccessible, or corrupted drives. This software is compatible with Windows 11/10/8/7/Vista/XP and Windows Server.
Step 1: Recover lost data from the RAW drive via iBoysoft Data Recovery for Windows
- Install and launch iBoysoft Data Recovery for Windows on your computer.
- Choose the RAW Drive Recovery module, select the RAW drive, and click "Next" to scan for data on this drive.
- Preview the scanning results and choose the files you want to get back.
- Click "Recover" and save them to another drive.
You can share this post by clicking the buttons below
Step 2: Reformat the RAW drive from CMD
After recovering data from this drive, you can format your hard drives with CMD. By using the DiskPart command, you can easily fix this RAW drive on your Windows 10/8/7, as well as convert RAW to NTFS/FAT32 without losing data.
- Click on Start, type "cmd" in the Search box, and press “Enter.”
- Right-click "cmd.exe" and choose "Run as Administrator".
- Type "diskpart" in the Command Prompt window and press Enter.
- Type "list volume" and press Enter. According to the list information, check which volume is the RAW. (For example, volume 1)
- Type "select volume 1" and press Enter. You need to change "1" with the RAW volume number.
- Type "format fs=ntfs" and press Enter.
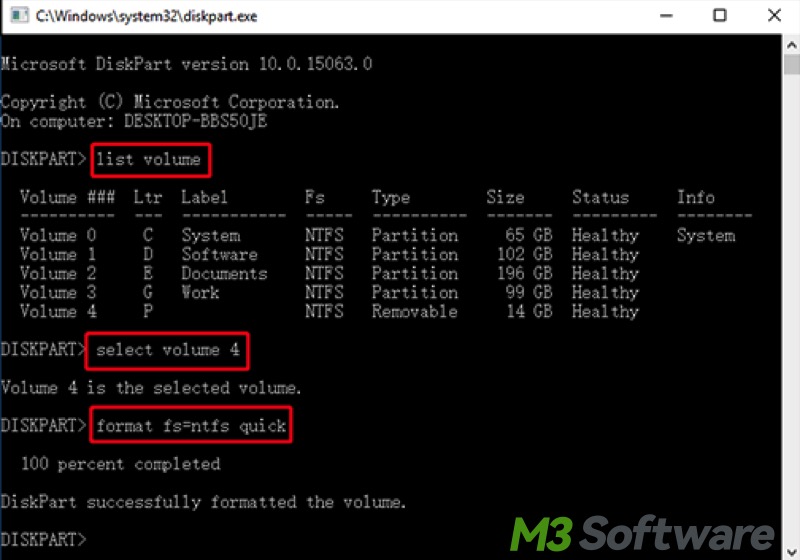
- Type "exit" and press enter.
Note: By selecting the target FAT32 or exFAT partition in Step 4 and 5, you can also use this command line to convert FAT32 to NTFS or convert exFAT to NTFS. But one thing to notice, back up your data first!
Solution 4: Convert RAW to NTFS by reformatting
If you are not confident in using Command Prompt or think it is too complex, you can convert RAW to NTFS by reformatting. It's an easier RAW to NTFS converter utility on your PC. But to make it clear, reformatting will wipe your data like the DiskPart command and you'd better recover lost data from this RAW drive with iBoysoft Data Recovery for Windows first.
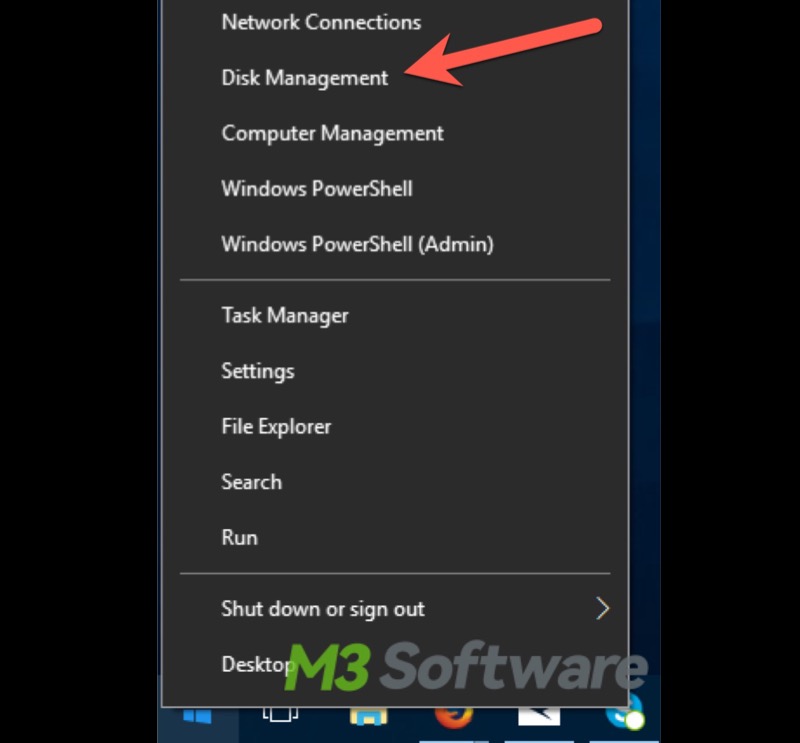
- Right-click on the Start menu or press the Windows+X keys to choose Disk Management.
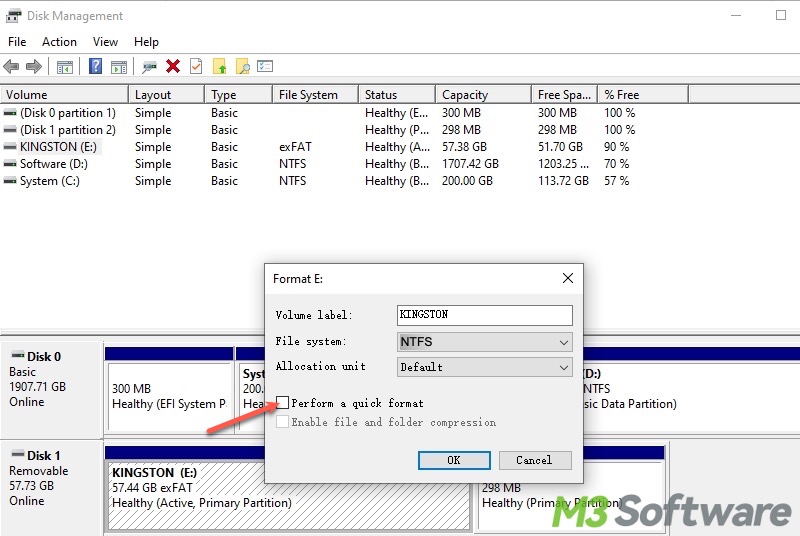
- Select the RAW USB drive, right-click, and choose "Format".

- Choose the NTFS file system and assign a volume label to this drive. Then click "Start" to convert RAW to NTFS.
Solution 5: Ask for help from the data recovery service
If your NTFS drive is corrupted into RAW after a recent Windows update, you need some other solutions to repair corrupted NTFS external hard drives. Or it is possible that the listed solutions didn't make any difference and your drive is physically damaged. Under this circumstance, you need to send it to a data recovery lab if you want to convert RAW to NTFS without losing data.
Do you like this post? Why not share with your friends?