
Written by
Yuri ZhangSummary: This article dwells upon how to filter files in Windows using File Explorer searching commands and iBoysoft DiskGeeker's space analysis. All searching techniques are involved comprehensively.
I often find myself staring at a messy screen full of folders and files, completely overwhelmed. No matter how organized I think I am, when I urgently need that one file, be it a document, image, or download, it always feels buried under a digital mountain.
When I started using Windows' file filtering features, it changed everything. Here's how I made my file searches faster, easier, and way less stressful. Let's dive into how to filter files in Windows by file name, size, type, and even content, no matter how much information you forget.
How to filter files in Windows Explorer
Filtering files means showing only the files that meet certain criteria, like file type, date, or size, to help you find what you need quickly. Here's the exact procedure:
Step 1: Press Windows key + E to open File Explorer, or click the folder icon on your taskbar. Navigate to the folder where you want to filter files.
Step 2: (Optional but recommended) Click the View tab at the top, select Details to see columns like Name, Date modified, Type, and Size.
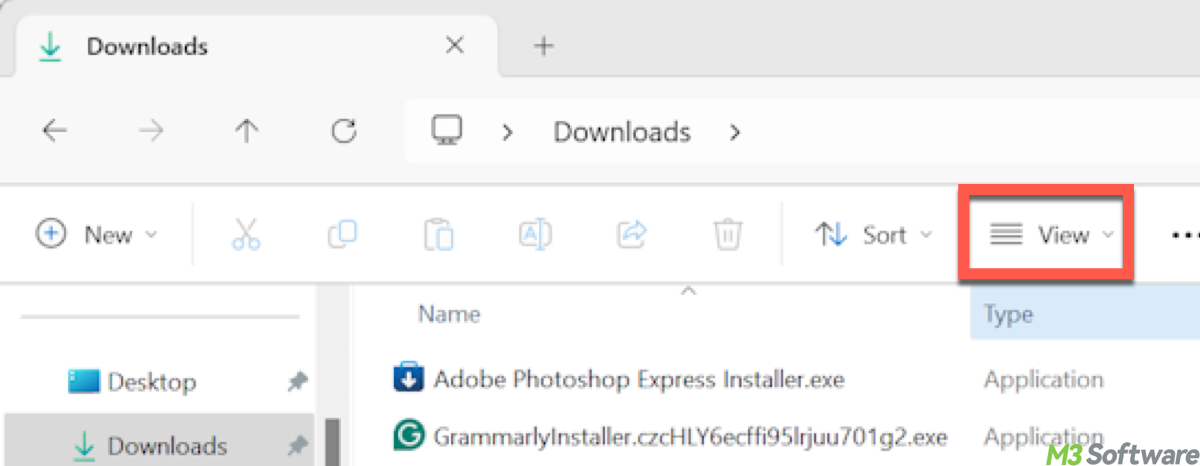
Step 3: Click the search box in the upper right corner of File Explorer. And use these common filters by typing them directly. There is a table for reference:
| Filter Type | Syntax/Commands Example | What It Does |
| File type | Shows only PDF files | |
| File name | report* | Shows files starting with “report” |
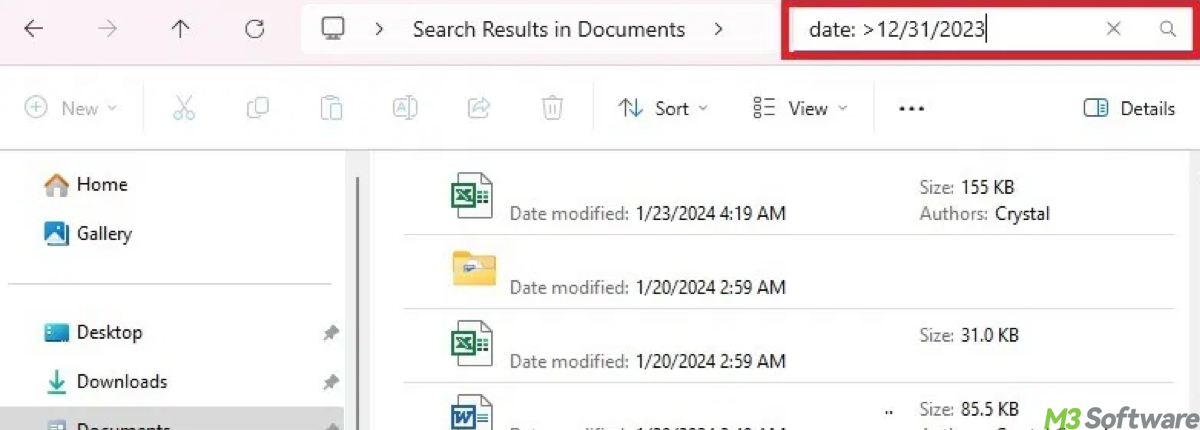
| Date modified | date:>=2024-01-01 or date:>=01/01/2024 | Files modified on or after Jan 1, 2024 |
| Size | size:>10MB | Files larger than 10 megabytes |
| File kind | kind:music | Filters music/audio files |
Tips: You can change some parameters tailored to your needs, such as *.mp4(or any other file extension), date:2024-01-01..2024-05-01 (this filters files modified between Jan 1 and May 1, 2024), or size:>4.5MB. or size:>1GB etc. if you want to filter large files in Windows Explorer.
Step 4: You can mix filters. For example: *.docx date:>=2023 size:<5MB which shows Word documents modified since 2023 that are smaller than 5 MB.
(Optional tips): To sort or group filter results, click the column headers like Date modified or Size to sort ascending or descending. And right-click in the folder background, choose Group by, and pick a category (e.g., Type, Date) to organize files into groups.
Share this if you think it's well-rounded and intelligible.
How to search file contents in Windows Explorer
Sometimes, knowing the file name isn't enough. We need to find specific text inside files. First, it's necessary to enable content indexing for file types:
- Open Control Panel > Indexing Options.
- Click Modify and check the folders to index.
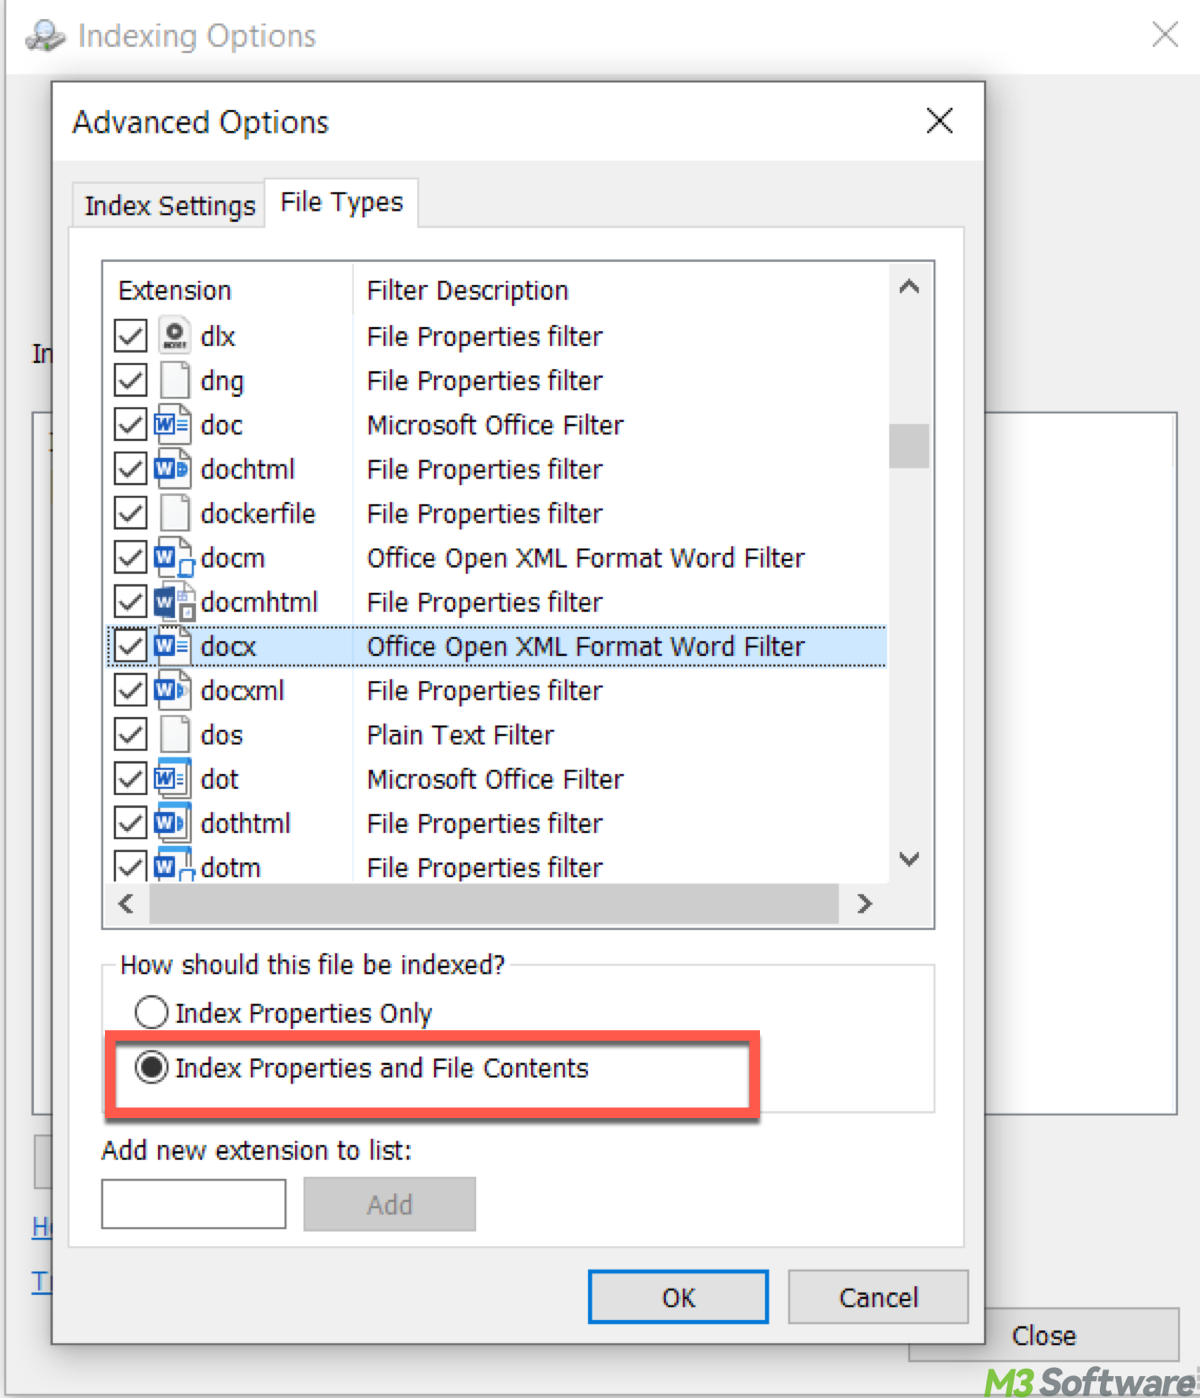
- Click Advanced, then the File Types tab.
- Make sure your file types (like .txt, .docx) are checked.
- Select Index Properties and File Contents.
- Click OK to rebuild the index (this may take some time).
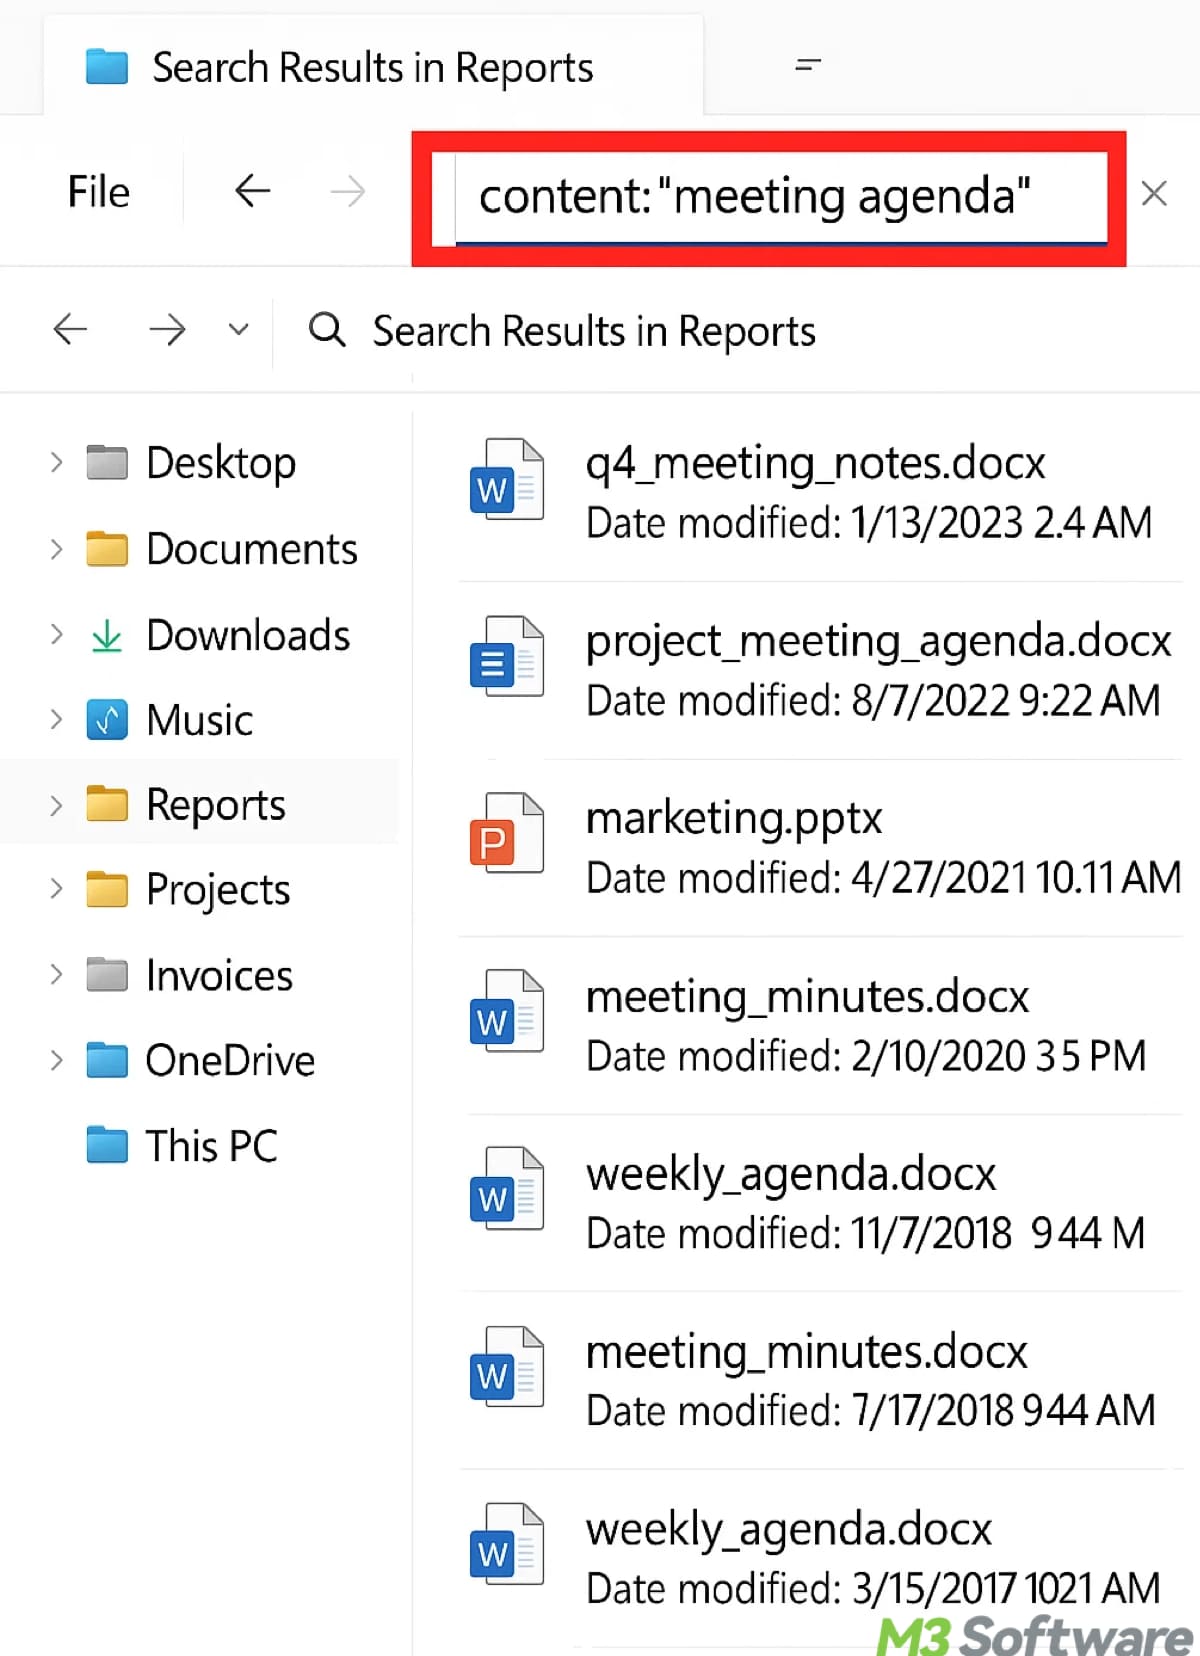
Then you can search file contents by opening File Explorer and navigating to the folder. In the search box, type: content:"your search text", such as: content:"meeting agenda":
You can narrow down results by adding more limitations like this: *.txt content:"agenda", which finds only .txt files containing “agenda”.
Spread these cherished tips and bring benefit to other adorable internet surfers.
Though basic filtering is available in File Explorer, we receive lots of feedback demanding more advanced sifting and easier operation. iBoysoft DiskGeeker helps filter and clean (most users' desired) to the greatest degree.
Why choose iBoysoft DiskGeeker for Windows?
iBoysoft DiskGeeker doesn't just display files, it helps you take control of your storage, clean smarter, and optimize your PC effortlessly. Here is a comparison table about Windows File Explorer vs. iBoysoft DiskGeeker:
| Function | Windows File Explorer | iBoysoft DiskGeeker |
| Junk File Cleanup | ❌ No built-in junk file cleaner | ✅ Dedicated System Cleanup that removes cache, temp files, logs, and update debris |
| Find Large Files Easily | ⚠️ Manual filtering with search syntax, no size visualization | ✅ One-click Search for Large Files with size threshold and file extension exclusion |
| Disk Space Analysis | ❌ No native space analysis | ✅ Intuitive Space Analyzer for OS partition, user folder, or any custom folder |
| Filtering by File Size | ✅ Possible via size: in search box | ✅ Graphical interface + Advanced Settings for setting minimum file size filter |
| Filtering by File Type / Extension | ✅ Using wildcards (e.g., *.jpg) | ✅ Can exclude extensions during large file scan |
| File Preview & Location | ⚠️ Requires manual navigation | ✅ Inline View button for preview and path access |
| Visual Mode for Analysis | ❌ No visual space usage representation | ✅ Dual-mode: Visual and Non-visual mode to inspect folder sizes and hierarchy |
| Multi-file Selection and Clean-Up | ⚠️ Basic right-click delete; no batch space management | ✅ Drag files to Trash Bin, track total space to be freed, and clean with 1 click |
How to use iBoysoft DiskGeeker to filter large files
The Space Analyzer in iBoysoft DiskGeeker is your all-in-one solution to free up storage and manage disk space smartly. It helps you filter large files on partitions and even clean them swiftly to make room for incoming files.
Step 1: Install and launch iBoysoft DiskGeeker for Windows.
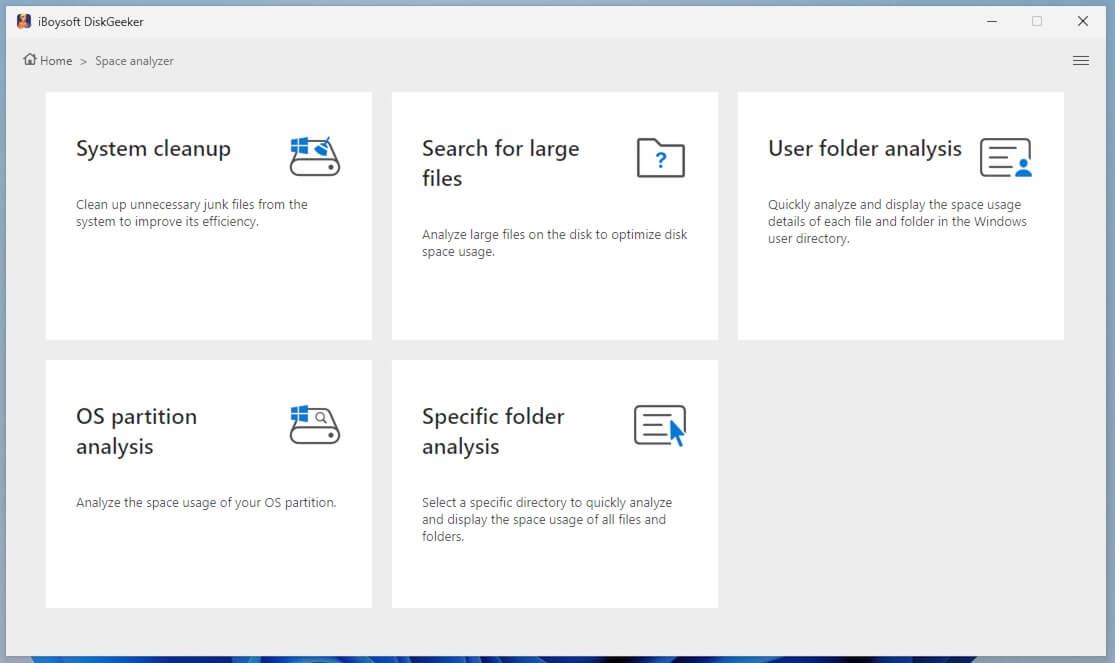
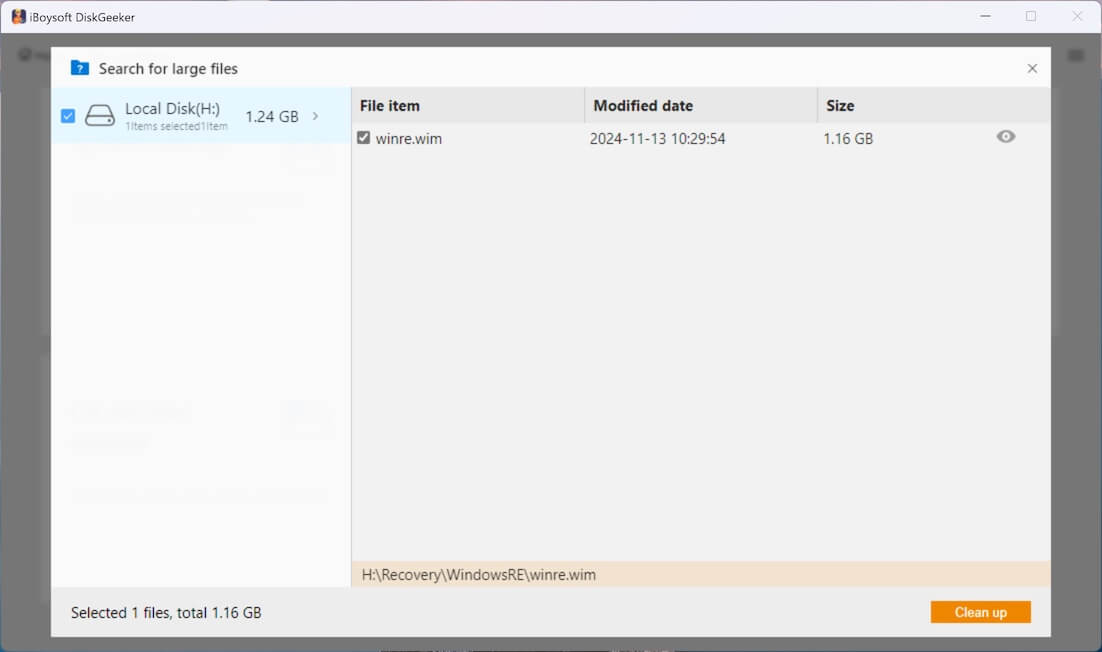
Step 2: Click "Search for large files" from the Space analyzer module.
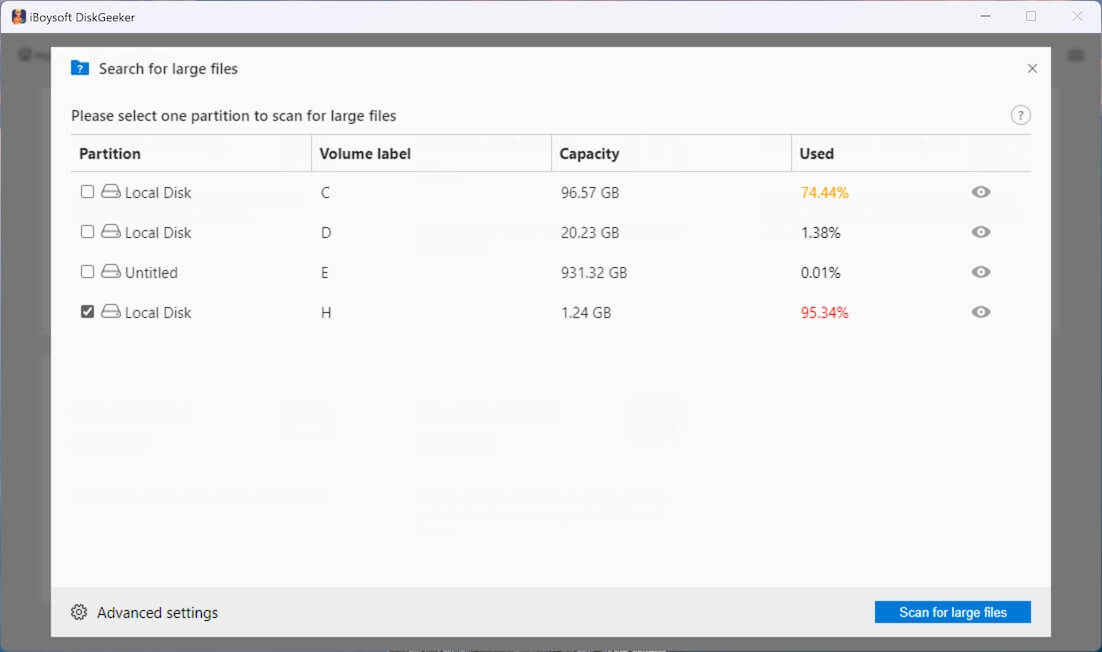
Step 3: Select a partition to scan for large files in your Windows.
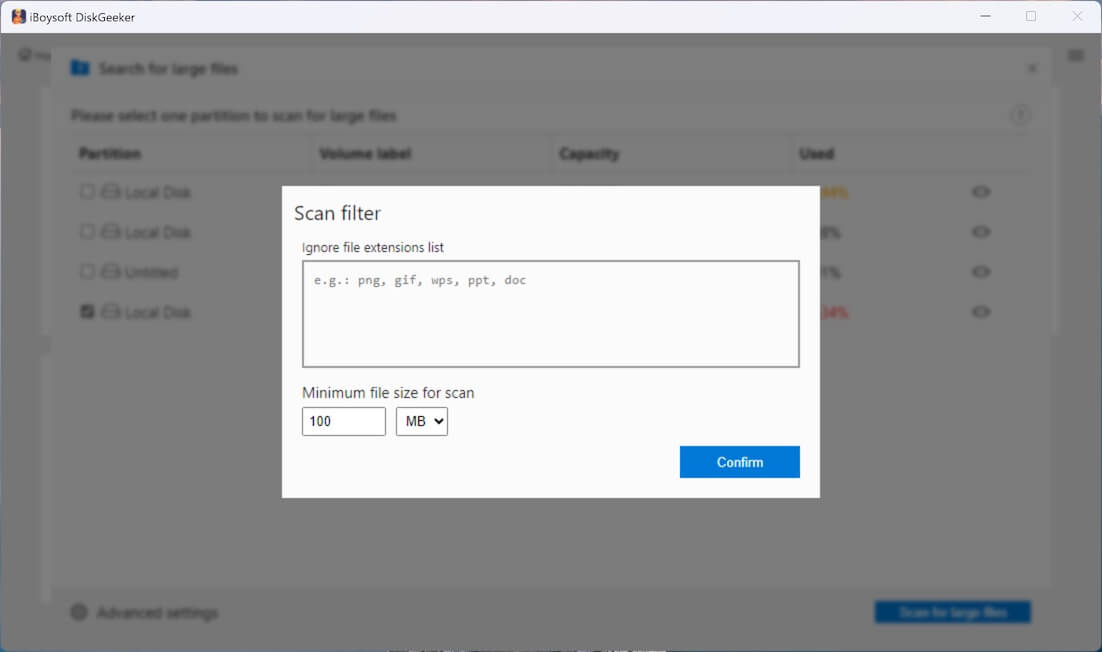
Step 4: Go to "Advanced settings" at the bottom left corner to set the minimum file size for scanning. Here, you can add the file extension to prevent the tool from searching for certain files.
Step 5: After filtering for large files, click the view button to check the searched large files, and click "Clean up" if needed.
How to use iBoysoft DiskGeeker to do file analysis
Step 1: In the "Space analyzer" module, select one of the space analysis features.
Step 3: It will automatically analyze the files in the selected location.
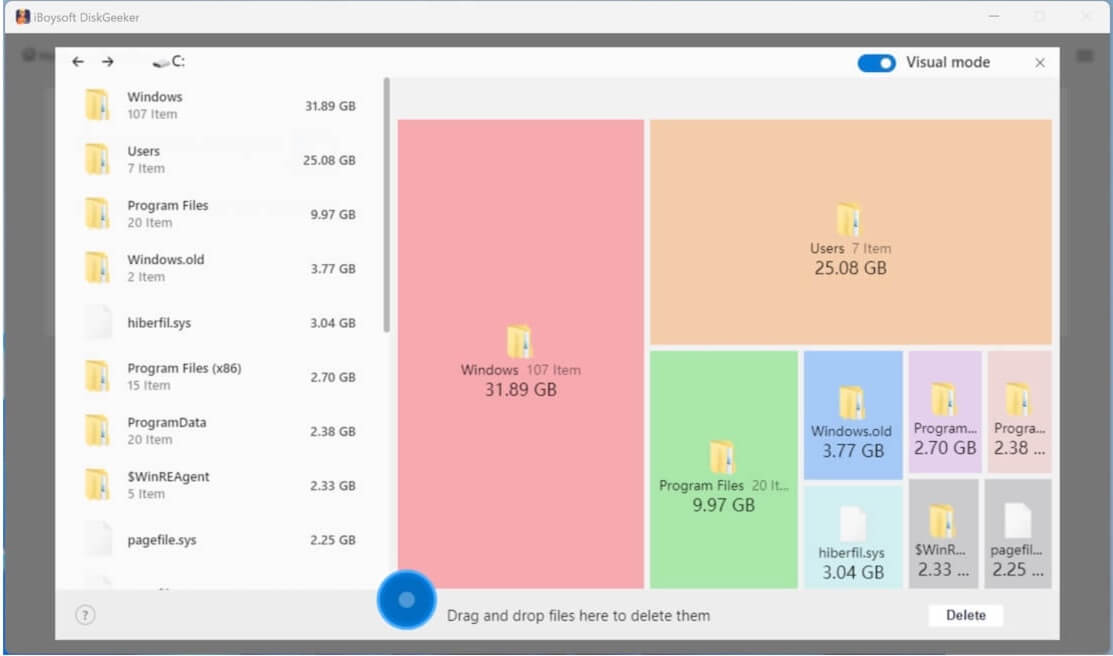
Step 4: Wait and check the scanned results, which can be displayed in two modes: Visual mode and Non-visual mode.
Tip: In Visual mode, the left and right views are the same level directories, and the right view is a visual presentation of the files in the left view. You can see their storage capacity proportionally.
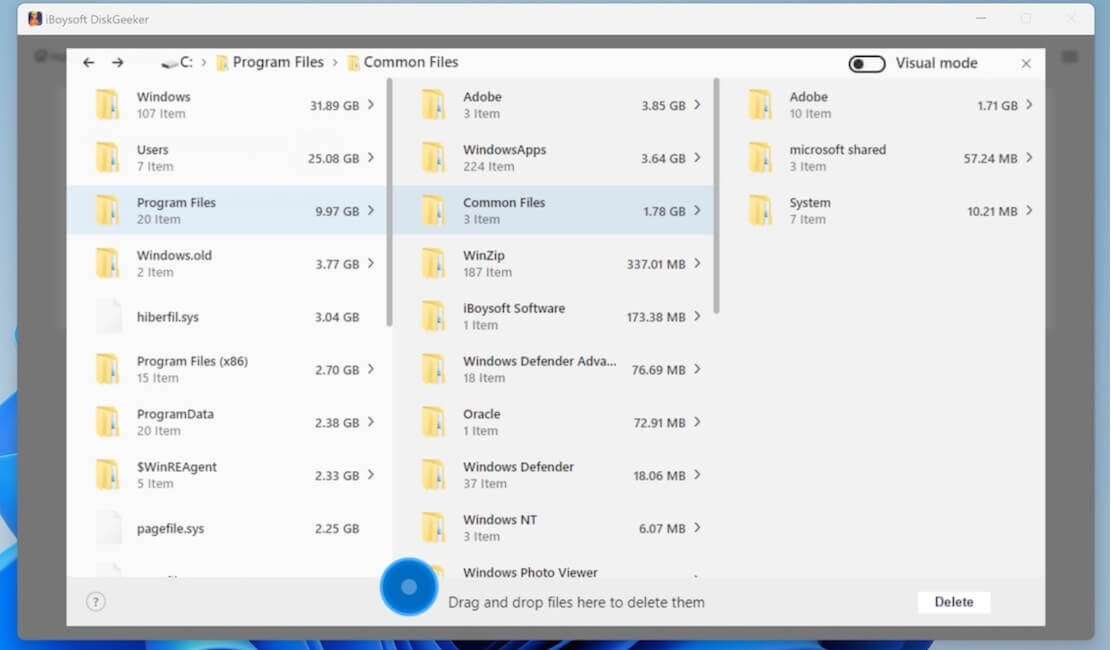
Tip: Turn off the Visual mode button in the upper right corner; you are in non-visual mode, which displays the file path. (When there are fewer than three levels of directory structure, it displays all path structures.)
Step 4: Select unwanted files and drag and drop them to the Trash Bin (a blue circle), which will show the total size of all and the separate size of each file.
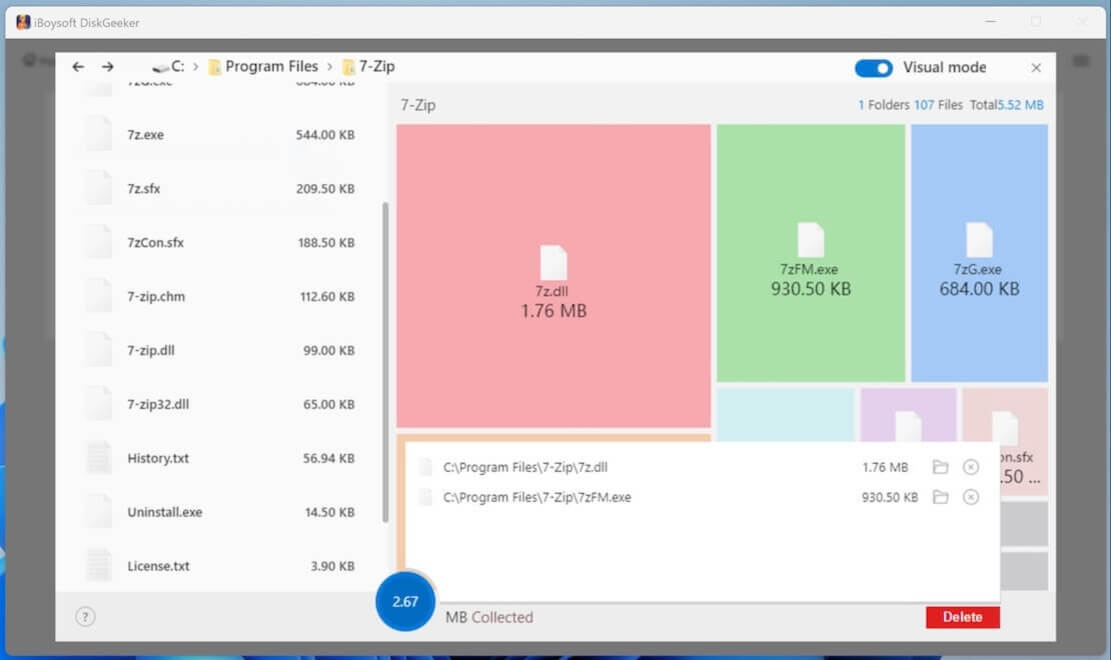
If you regret moving a certain file to the Trash Bin, click on the blue circle, then click the Remove (X) button.
Step 5: Click "Delete" to permanently remove the files you put in the blue Trash Bin.
Conclusion
Filtering and content search techniques in Windows Explorer make us spend less time hunting for files and more time on what truly matters.
While Windows File Explorer gives us the basics, iBoysoft DiskGeeker elevates file and space management to a whole new level. With intelligent tools, visual clarity, and effortless cleanup. DiskGeeker helps reclaim space, boost performance.
Share and explore other pragmatic features in iBoysoft DiskGeeker, such as system cleanup. In addition, its built-in bonus features like BitLocker management and disk clone make it an optimal choice for every Windows user.