
Written by
Yuri ZhangSummary: This post elucidates how to upgrade to Windows 10 step by step, to be precise and concrete, checking the compatibility and installation is of the utmost importance.
There is a saying that goes on among PC users if the reboot can solve some errors, then the upgrade can address most of the issues. Also to gain fresh performance, upgrading to Windows 10 is often paid attention to.
More often than not, the Windows version update always launches in a longer period than the Mac speedy update. Microsoft probably will provide a new Windows version from which, in another 3 to 5 years, users shall approach the perfect operation system in the future.
At this moment, Windows 10 is mature enough to enable many people to choose. This table displays why many people choose to upgrade to Windows 10 which suffice to meet user's needs. You may be interested in the things to do before upgrading to Windows 11.
| Factor | Windows 7 | Windows 8/8.1 | Windows 10 | Windows 11 |
| Security Updates | Limited support, end of life in 2020 | Limited support, end of life in 2023 | Ongoing support until 2025 (Home/Pro) | Ongoing support until 2026 (Home/Pro) |
| Compatibility | Good compatibility with older software and hardware | Improved compatibility with touch-enabled devices | Better compatibility with modern hardware and software | Improved compatibility with modern hardware and software |
| User Interface | Traditional desktop interface with Start Menu | Introduction of Start Screen; Modern UI design | Hybrid approach with Start Menu and Modern UI elements | Redesigned interface with centered Start Menu and modern aesthetics |
| Features | Basic features; lacks newer functionalities | Introduction of features like Charms Bar and app snapping | Introduction of Cortana, virtual desktops, and Continuum | Enhanced multitasking, virtual desktops, and Microsoft Teams integration |
| Performance | Stable performance on older hardware | Performance improvements; faster boot times | Optimizations for better performance and efficiency | Optimized for modern hardware; improved gaming performance |
| Integration | Limited integration with cloud services | Integration with Microsoft account and cloud services | Integration with OneDrive, Cortana, and Microsoft Store | Integration with Microsoft Teams, Xbox, and gaming features |
| Support Lifecycle | End of extended support in 2020 | End of extended support in 2023 | Ongoing support until 2025/2026 | Ongoing support until 2026 (Home/Pro) |
| Future Compatibility | Limited support for future technologies | Limited support for future technologies | Better support for future hardware and software advancements | Better support for future hardware and software advancements |
| Resources | Windows 7 ISO File 32/64-bit All in One | Windows 8 and Other Old Windows Versions Download | Windows 10 Download | Windows 11 Download |
Measure to take before the upgrade
Step 1: Backup cannot be emphasized enough. Ensure to back up all your important files, documents, photos, and important data with external storage, cloud services, or disk imaging software. If data loss occurs, you might as well use iBoysoft Data Recovery for Windows, a no-cost data recovery software that can retrieve deleted or lost files on Windows in just three simple steps.
Best Lost File Recovery Software - iBoysoft Data Recovery for Windows
Step 2: Consider uninstalling any unnecessary or unused software programs. This can help streamline the upgrade process and reduce the likelihood of compatibility issues or conflicts.
Step 3: Free up disk space by making sure that you have sufficient free disk space available on your system drive (usually C:) for the Windows 10 installation. Remove temporary files, clear out your browser cache, and uninstall large applications or games you no longer need.
Step 4: Disconnect any unnecessary external devices such as USB drives, printers, scanners, and external hard drives before starting the upgrade process. This can prevent potential conflicts and ensure a smoother upgrade experience.
Step 5: While the upgrade aims to preserve your files and settings, it's possible that some preferences may not carry over seamlessly. Consider making a note of your personalized settings in applications or system preferences so you can easily reconfigure them if needed after the installation.
Spread this expertise to inspire all walks of life.
Caveats during the upgrade
Once the upgrade has started, it's essential to avoid shutting or restarting your computer, unplugging power sources. Upgrade interruption could lead to system instability or data corruption. The upgrade can take some time, depending on your PC's speed and the amount of data being transferred. Be patient without attempting to speed up the process.
Pay close attention to the on-screen instructions and prompts during the upgrade. Read each step carefully and follow the directions. If you're using a laptop or tablet, make sure it's connected to a reliable power source throughout the upgrade. Losing power midway through the installation could result in data loss or system instability.
While the upgrade is in progress, avoid running other programs or tasks that could consume system resources or interfere with the installation. Close unnecessary applications and refrain from multi-tasking until the upgrade is complete. Periodically check the progress of the upgrade. Most installations will provide a progress indicator or status message to keep you informed.
Tips: During the upgrade, Windows 10 will check for a valid license. If you're upgrading from a genuine version of Windows 7 or Windows 8.1, your license should carry over. However, if you're doing a clean install or upgrading from a non-genuine version, you may need to purchase a new license.
How to upgrade to Windows 10
Step 1: Check that your computer meets the system requirements for Windows 10 by running Windows Update Assistant on your machine. Typically, Windows 10 requires at least a 1 GHz processor, 1 GB RAM for 32-bit systems or 2 GB for 64-bit systems, 16 GB of free hard drive space, and a DirectX 9 graphics device with WDDM 1.0 driver.
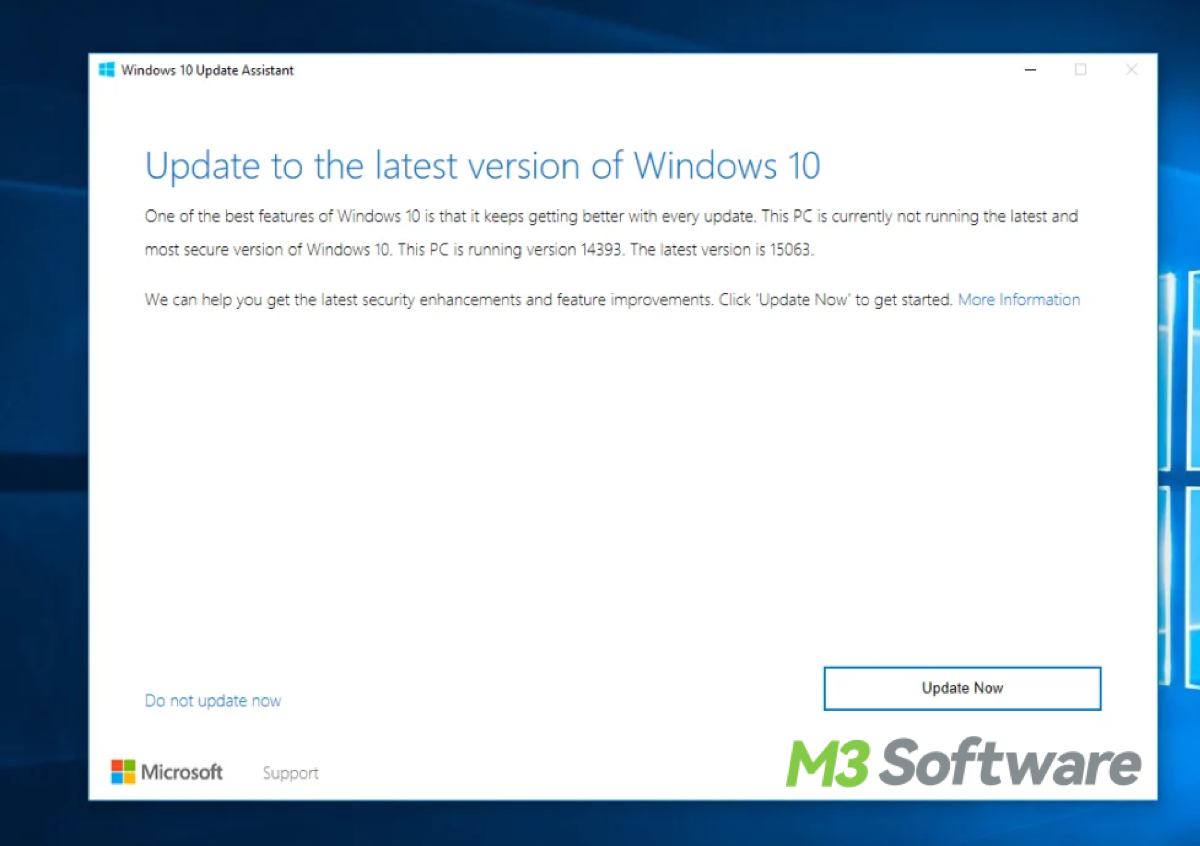
Step 2: Back up your important files and data and make sure your current software and hardware are compatible with Windows 10. Still, use the Windows 10 Upgrade Assistant tool provided by Microsoft to check compatibility.
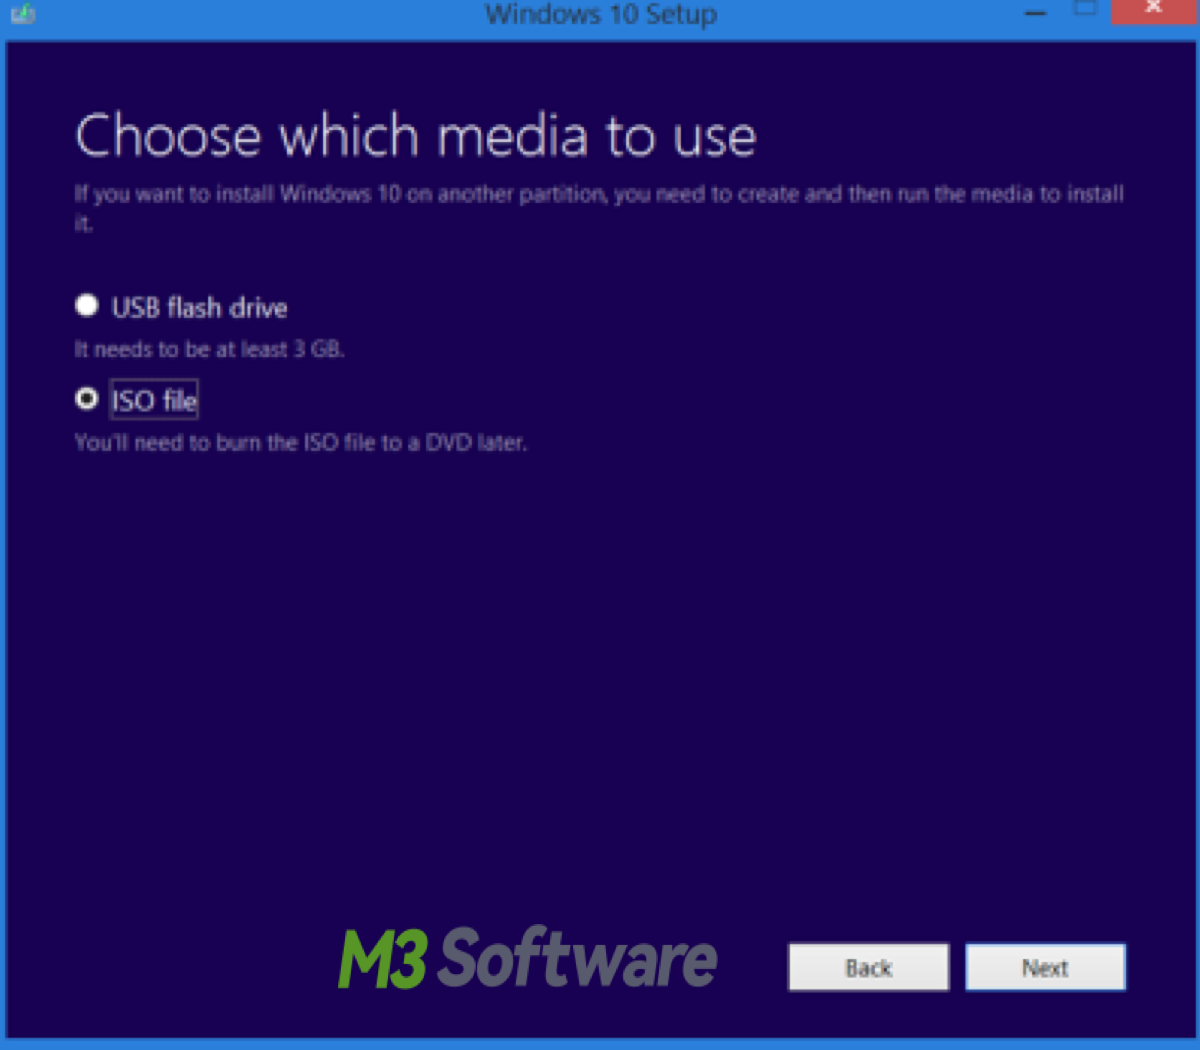
Step 3: Download the Windows 10 ISO directly from Microsoft's website. (Download Windows 10 Home ISO | Download Windows 10 Pro ISO)
⬇️ Windows 10 Pro, Home, Enterprise LTSC & Education ISO (Official)
They offer a tool called the "Media Creation Tool" which allows you to create a bootable USB drive or download an ISO file to burn to a DVD.
Tips: Follow this article if you want to download Windows 10 ISO without the Media Creation Tool.
Step 4: Insert the installation media you created or downloaded, then restart your computer. You may need to change the boot order in your BIOS settings to boot from the installation media.
Step 5: When prompted, select the option to upgrade your existing operating system. This will preserve your files, settings, and applications. However, it's always a good idea to double-check that you have backups of your important files, just in case.
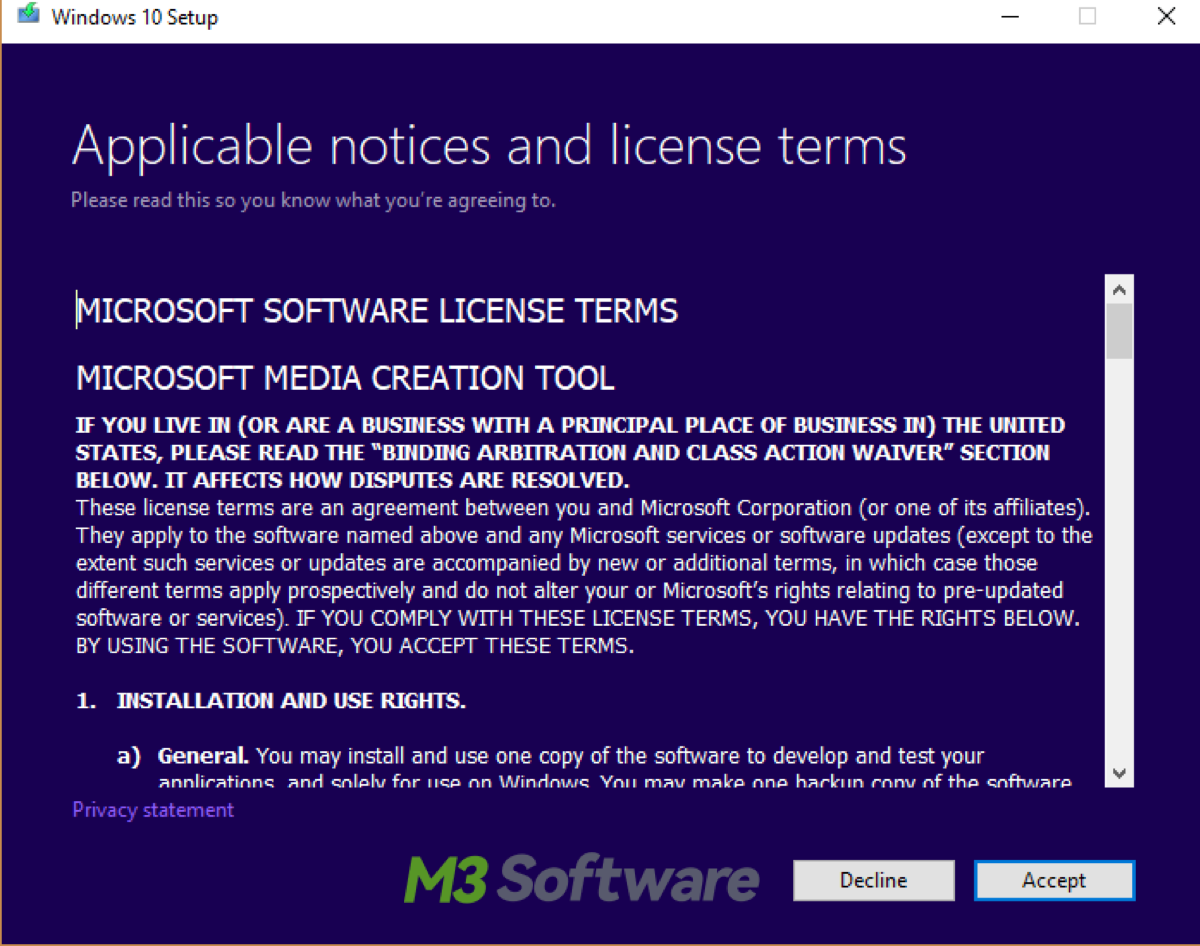
Step 6: Follow on-screen Instructions, the installation process will guide you through various steps such as accepting the license agreement, choosing installation options, and configuring settings. Follow these instructions carefully.
Step 7: Once the installation is complete, Windows 10 will boot up, and you'll need to go through the initial setup process, including setting up user accounts, privacy settings, and preferences.
Step 8: After upgrading to Windows 10, make sure to update your drivers and software to ensure compatibility and security. Most people often ignore this step.
Following these steps should help you successfully upgrade to Windows 10. If you encounter any issues during the process, you can refer to Microsoft's support resources or seek assistance from forums and communities.
Share this knowledge to be informative around others.
After the upgrade to Windows 10
Windows 10 introduced many new features and improvements compared to previous versions. Take some time to explore these features, such as the virtual desktops, Cortana virtual assistant, Task View, and the revamped Start menu. Familiarizing yourself with these features can enhance your productivity and overall user experience.
Is the upgrade to other versions basically the same as upgrading to Windows 10
To upgrade. You'll need to obtain the installation media for the new version of Windows, whether it's Windows 10 or another version like Windows 7, 8, or 11. This could involve downloading an ISO file or using the upgrade tools provided by Microsoft.
You may need:
Download Windows 7 ISO
Download Windows 7 Pro ISO
Windows 7 Ultimate ISO
Windows 7 Home Premium ISO
Download Windows 8.1 ISO
Download Windows 10 ISO
Download Windows 10 Home ISO
Download Windows 11 ISO
Download Ghost Spectre Windows 11 ISO
Windows 10 introduced new features like Cortana, virtual desktops, and enhanced capabilities, which may require additional setup or configuration during the upgrade. Upgrading to Windows 11 may involve considerations such as hardware compatibility and system requirements. Upgrading from older versions of Windows, such as Windows 7 or 8, may require more compatibility checks compared to upgrading from a more recent version like Windows 10.
In summary, while the basic process of upgrading to different versions of Windows shares similarities, each upgrade may have its own unique features and requirements that users should be aware of before proceeding.
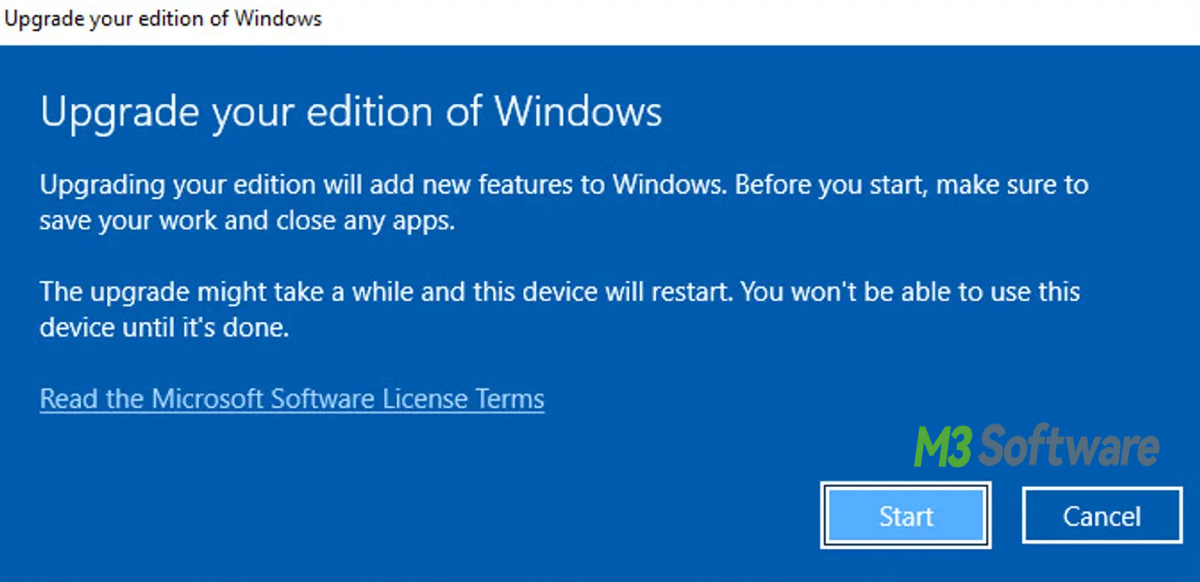
Tips: If you want to upgrade to Windows Pro. After upgrading to Windows, you can upgrade to Windows Pro with a valid product key. If you don't have a product key, you may need to purchase one from Microsoft or an authorized retailer.
Spread these insights with an open mind.
How to upgrade to Windows 11 without TPM
If you're intent on attempting the upgrade despite the lack of TPM, you could explore unofficial workarounds or third-party tools, but be aware that these methods are not supported by Microsoft and can be risky. These approaches may involve modifying system files, using specialized tools to circumvent checks, or attempting to emulate TPM functionality.
Must do the upgrades to Windows 10/11 need TPM?
Upgrading to Windows 10 typically does not require TPM (Trusted Platform Module) as a mandatory hardware requirement. Windows 10 has more lenient hardware requirements compared to Windows 11
As of Windows 11's release, Microsoft requires TPM 2.0 as a minimum hardware requirement for installation. However, if your system does not have TPM or if it does not meet other requirements but you still want to upgrade, there's no official method to bypass these requirements. Proceeding with such an upgrade can lead to system instability, security vulnerabilities, and other issues.
Here's a general overview of how to upgrade to Windows 11 without TPM:
Step 1: Verify that your system meets all other requirements for Windows 11, such as CPU architecture, minimum RAM, and disk space. You can use Microsoft's PC Health Check tool or third-party utilities to assess compatibility.
Step 2: Download the Windows 11 ISO installation media from the official Microsoft website or create a bootable USB drive using the Media Creation Tool. Make sure to choose the correct edition and architecture (32-bit or 64-bit) for your system.
If you want a lite version of Windows 11, get Windows 11 LTSC Download.
Step 3: One method (for advanced users) to bypass the TPM requirement is by modifying certain registry settings during the installation. This involves editing the Windows Registry to trick the installer into bypassing the TPM check. However, this method is complex and risky, which is not recommended.
Step 4: Some users have reported success in installing Windows 11 on unsupported hardware by using unofficial workarounds or third-party tools. These methods often involve patching or modifying system files to bypass TPM and other system checks. Be warned that these workarounds are not endorsed by Microsoft and can pose security risks.
Step 5: If you're unable to bypass the TPM requirement, consider sticking with your current version of Windows or exploring alternative operating systems that are compatible with your hardware.
Final thought
Windows 10 introduced several security features such as Windows Hello for biometric authentication, Windows Defender Antivirus, and Secure Boot to protect against malware and unauthorized access which enhanced your system's security, updates are often beneficial.
Besides, the Home edition is suitable for most home users, while the Pro edition includes additional features such as BitLocker encryption and Remote Desktop. Windows 10 comes in various editions, each tailored to different user needs. Make sure to choose the edition that best suits your requirements.
Share this know-how to plunge into practical work when needed.