
Written by
Wilsey YoungSummary: This post shows how to recover lost partition Windows 10 or Windows 11 through Disk Management, Command Prompt, or a professional partition recovery tool, iBoysoft Data Recovery for Windows. -From m3datarecovery.com
You can judge whether a partition is lost on Windows by the following circumstances: The system cannot detect the partition, the partition appears as RAW or unallocated in Disk Management, and the drive letter is missing in File Explorer.
If your partition is lost and you wonder how to recover lost partition Windows 10 or Windows 11, you are in the right place. The partition recovery methods introduced in this post involve using Disk Management, Command Prompt, or a third-party tool on Windows 10.
You can share this post by clicking the following buttons
How to recover lost partition Windows 10 or Windows 11
You may lose your partition due to the damaged partition table, sudden power outage, virus attack, improper ejection, bad sectors, etc. Once the partition is lost on the Windows OS, it becomes unavailable for read-and-write access. Worse, you will lose all the data if the lost partition is not recovered. Here is how to recover lost partition in Windows 10 or Windows 11.
Recover lost partition Windows 10 or Windows 11 via iBoysoft Data Recovery for Windows
iBoysoft Data Recovery for Windows is a professional and intuitive recovery tool that can help retrieve deleted or lost data from various storage devices, even when they become corrupted or inaccessible.
In addition, this easy-to-use data recovery tool is highly effective in restoring lost or deleted partitions on Windows, including the BitLocker encrypted partition. Only a few steps are needed when it comes to partition recovery.
Here's how to recover lost partition Windows 10 or Windows 11 via iBoysoft Data Recovery for Windows:
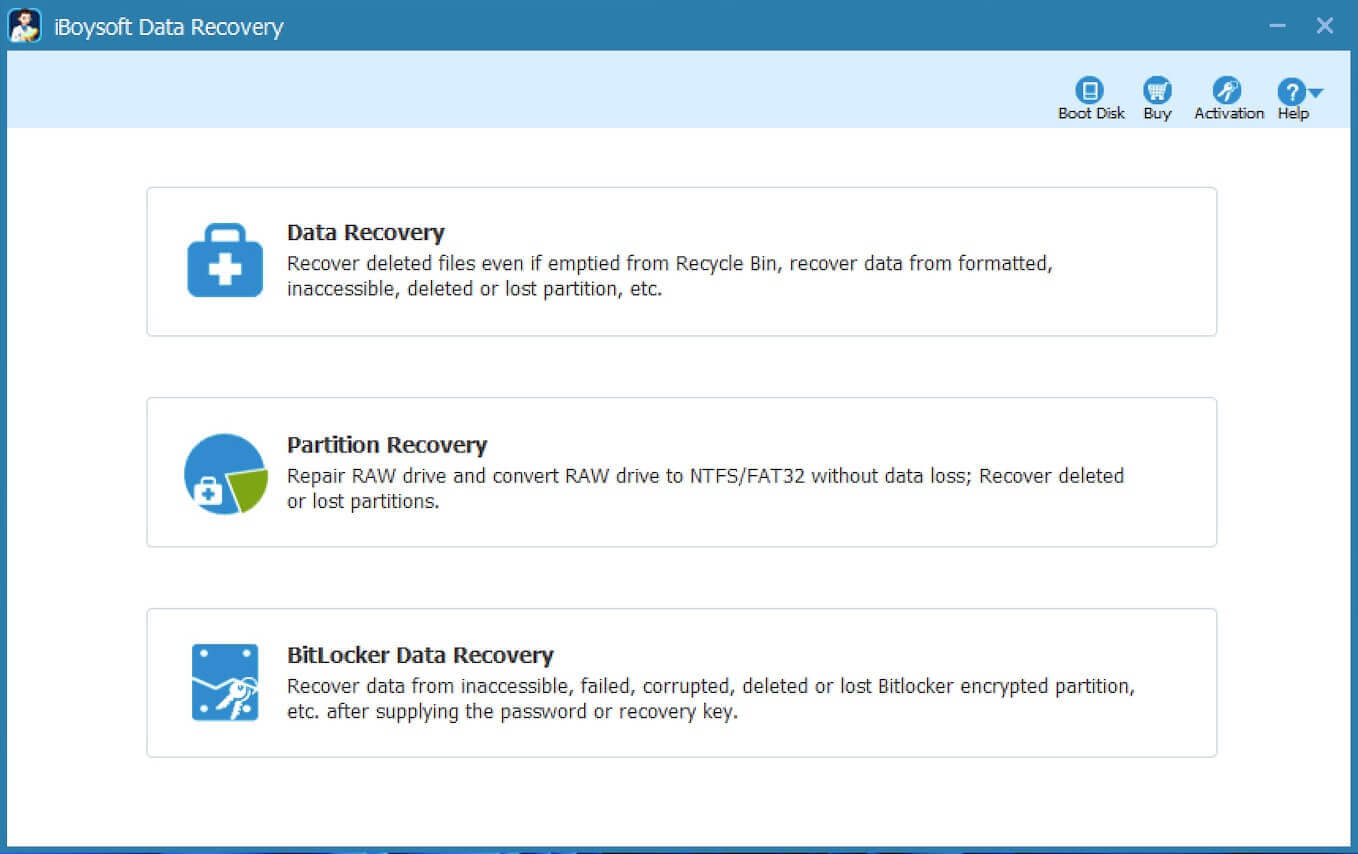
- Download, install, and launch iBoysoft Data Recovery for Windows.
- Choose the Partition Recovery module in the main interface.
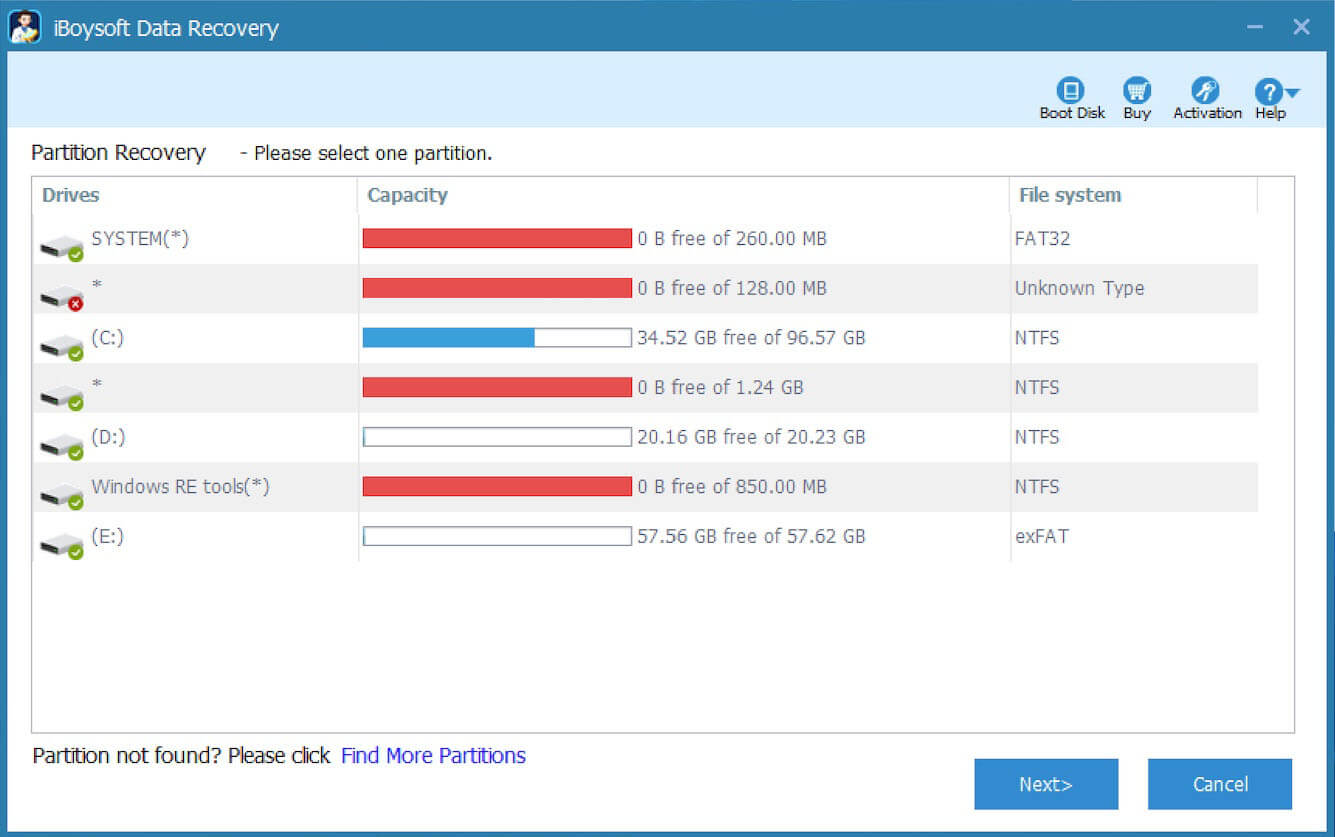
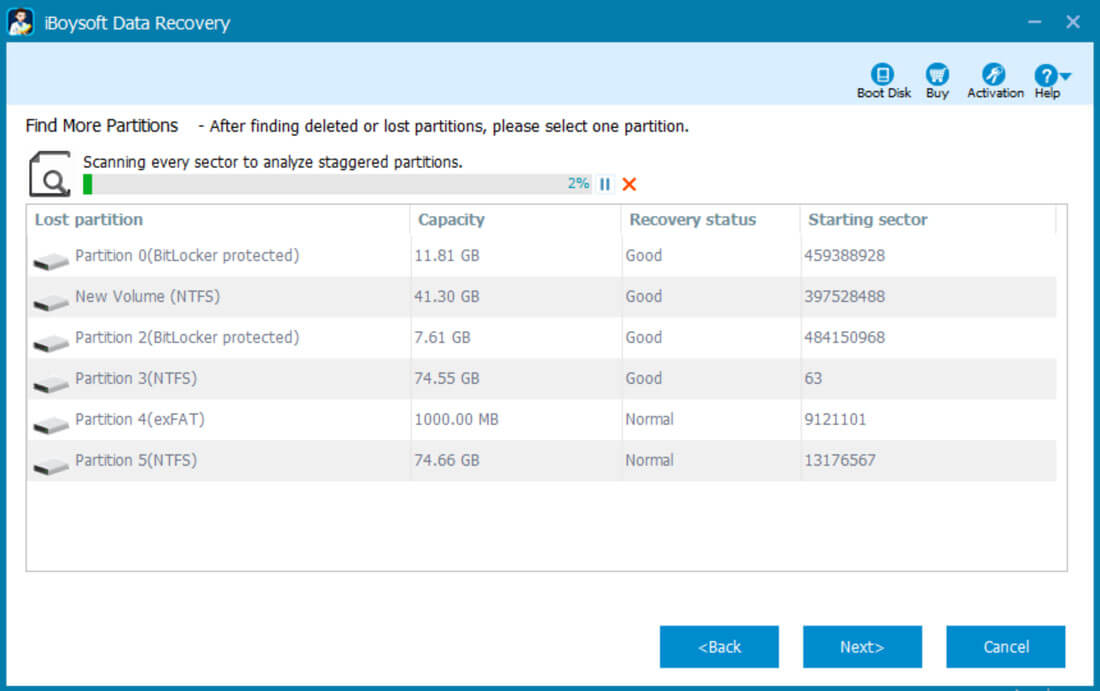
- Click Find More partitions at the bottom.
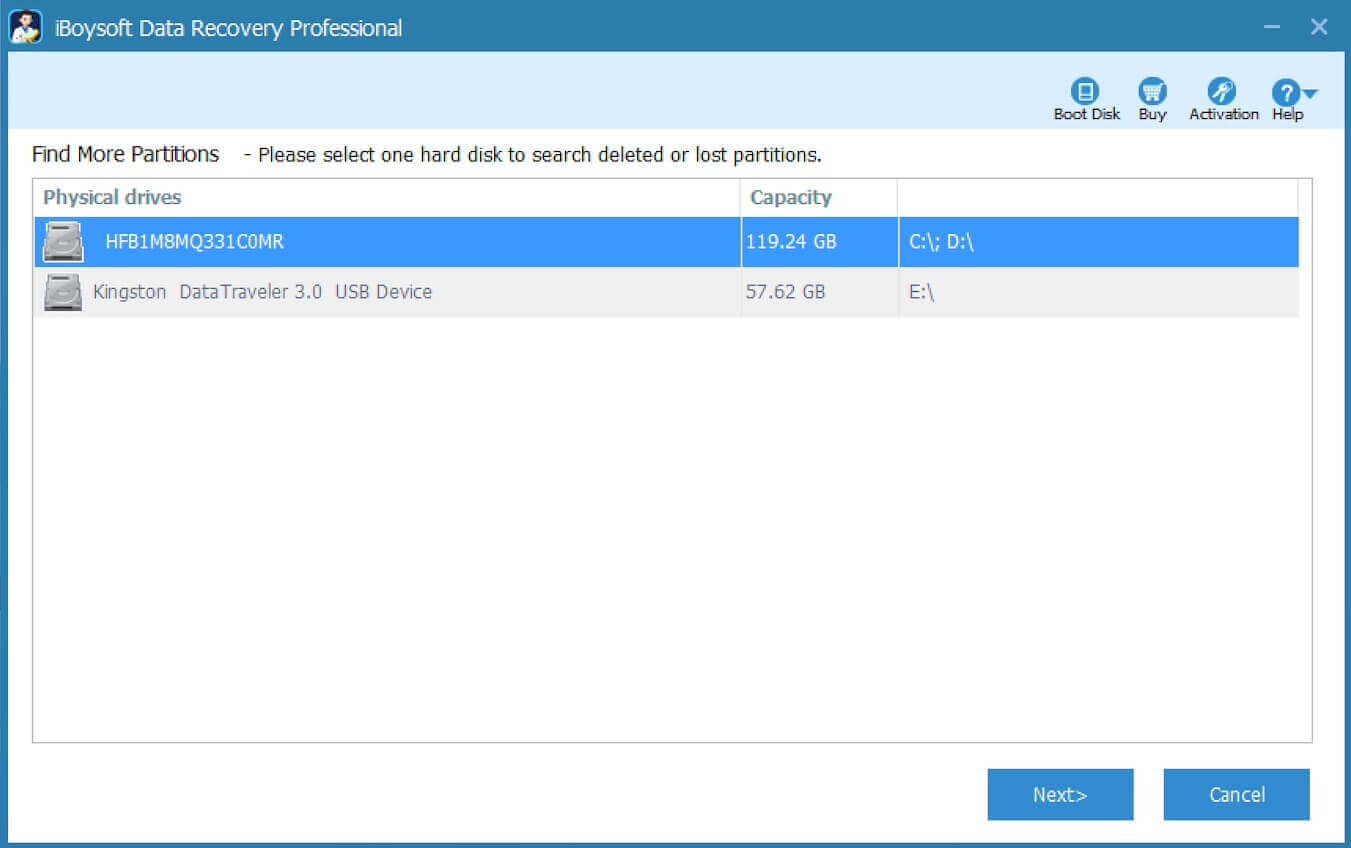
- Choose the hard drive where the lost partition was located and click the Next button. This tool starts scanning for the missing partitions on the selected drive.
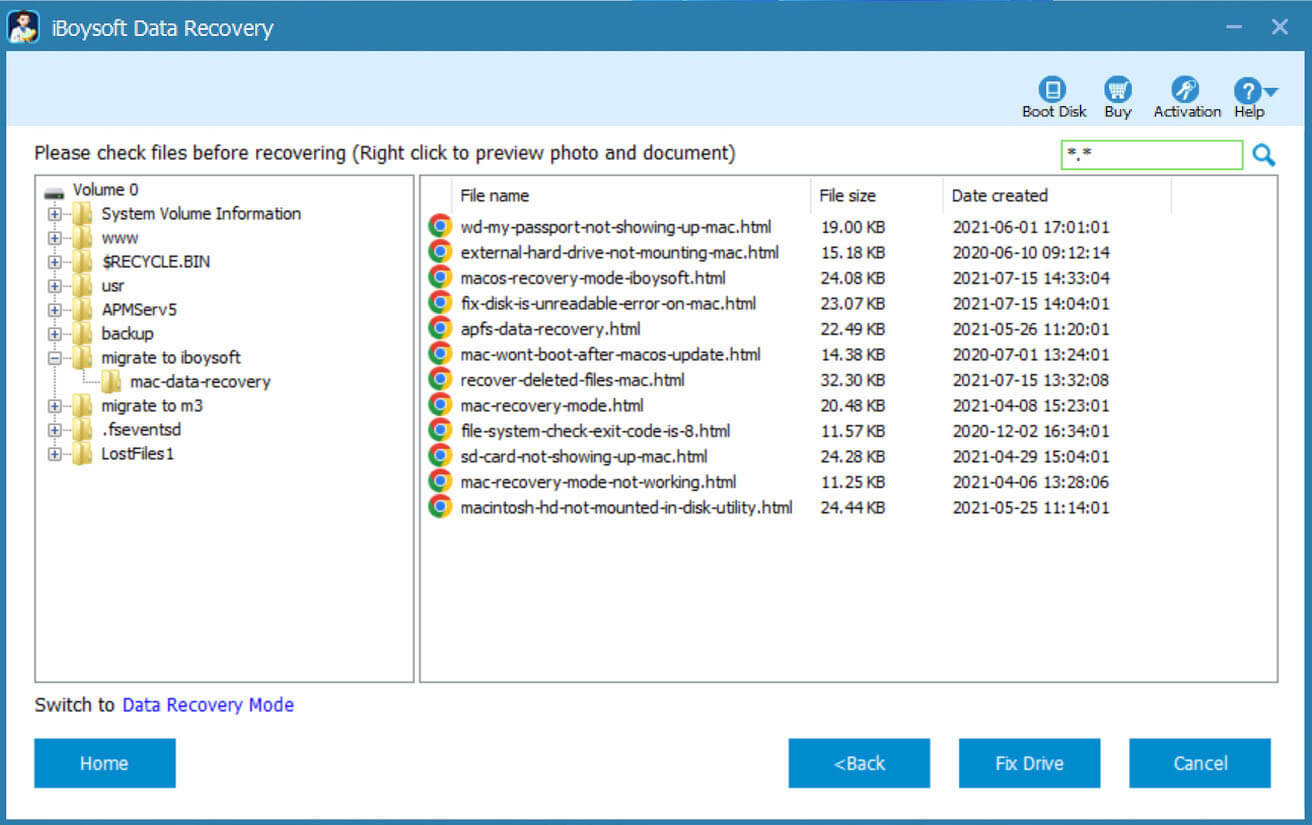
- Select the detected partition and click Next again to check the files.
- Right-click on the files in the lost partition and preview the content.
- Click the Fix Drive button to recover the lost or deleted partition.
Recover lost partition Windows 10 or Windows 11 via open-source TestDisk
TestDisk is a free and open-source tool primarily designed to recover lost or deleted partitions on Windows. However, green hands could find this tool hard to operate as it works through a command-line interface.
Here's how to recover lost partition Windows 10 or Windows 11 via open-source TestDisk:
Tips: To navigate in TestDisk, use the Arrow and PageUp/PageDown keys. Confirm your choice with the Enter key. To return to a previous display or quit TestDisk, use the q (Quit) key.
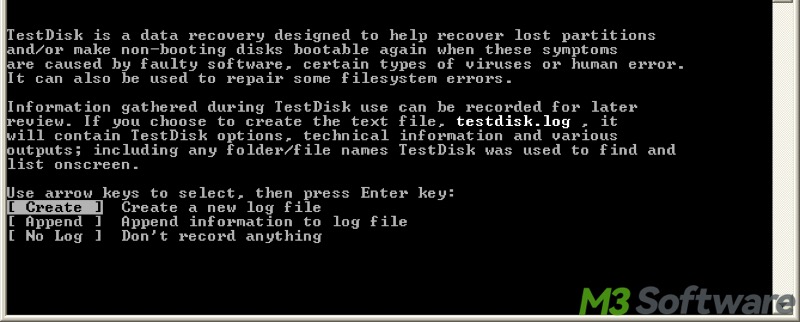
- Download TestDisk and start TestDisk from an account in the Administrator group
- Choose "Create" to let TestDisk create a new log file containing technical information.
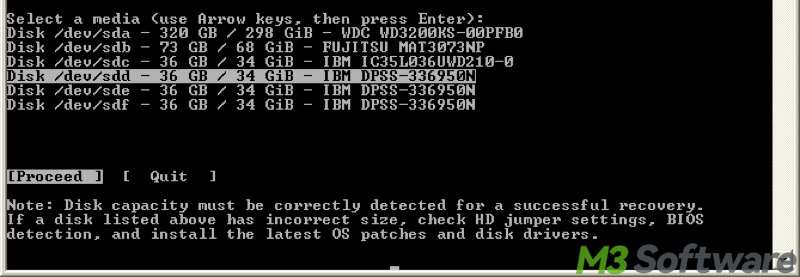
- Use the arrow keys to select your hard drive with the lost partition, then press Enter to continue.
- Select the partition table type and press Enter to proceed.
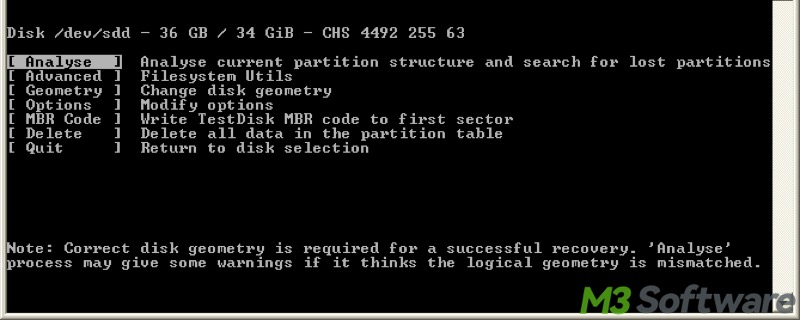
- Choose "Analyse" and press Enter to check the current partition structure and search for lost partitions.
- Confirm at Quick Search to proceed when the list of partitions is displayed.
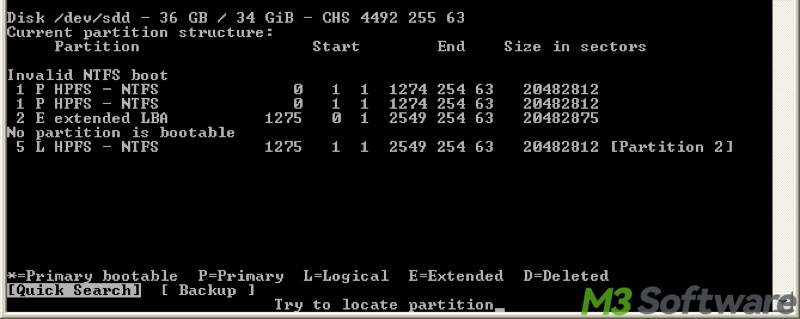
- Select the lost partition and press P to list the files. If all directories and data are correctly listed, press q to return to the list of detected partitions.
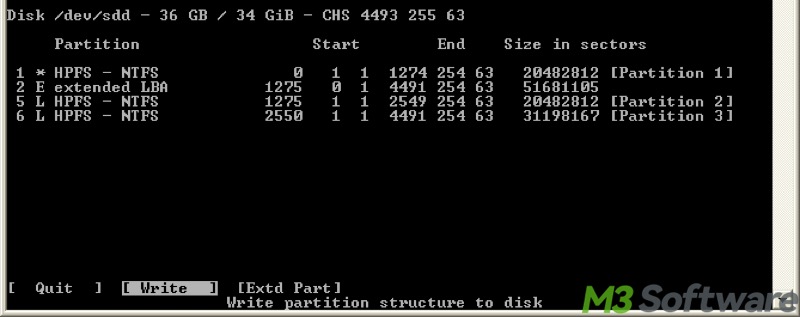
- Using the left/right arrow keys to switch the status of the selected partition from D(deleted) to L(logical), then press Enter.
- Go to the menu Write to save the partition structure, and confirm with Y
- Quit the tool and reboot your PC.
Please share this post if you find it helpful
Recover lost partition Windows 10 or Windows 11 via Command Prompt
If the partition is not given a drive letter in Disk Management, the File Explorer will not recognize or detect the partition. Therefore, you can recover lost partition by assigning a new drive letter through the Command Prompt.
Here's how to recover lost partition Windows 10 or Windows 11 via Command Prompt:
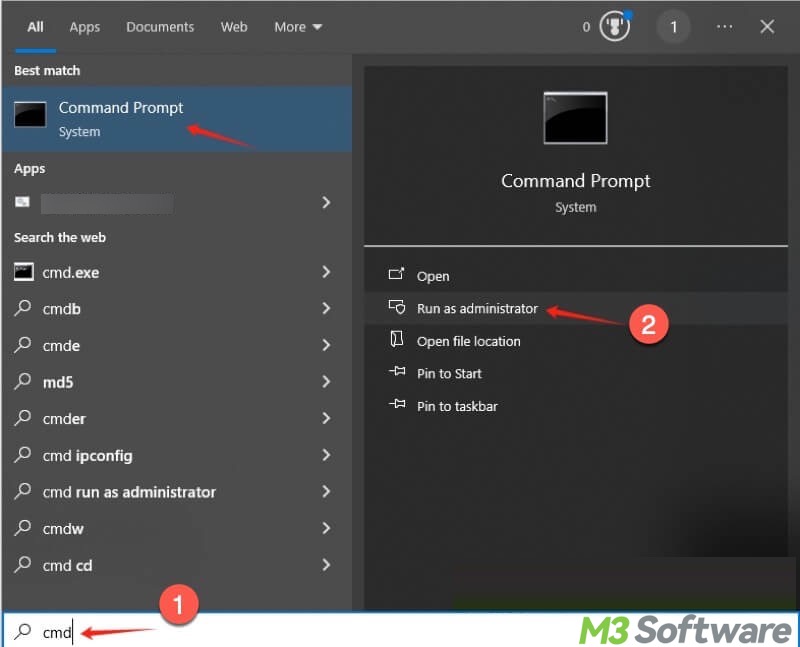
- Press the Windows+S keys to launch the Windows search box.
- Type cmd in the Windows search box and run cmd as an administrator.
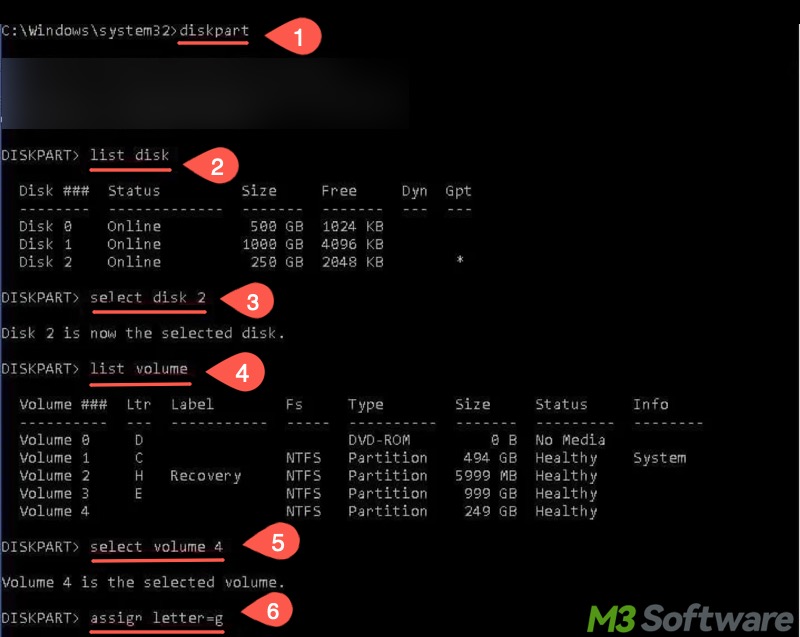
- Input the following commands and hit the Enter key after each.
list disk
select disk # (Replace # with the number of the hard drive containing the lost partition)
list volume
select volume # (Replace # with the number of the lost partition)
assign letter=# (Replace # with new drive letter)
Recover lost partition Windows 10 or Windows 11 via Disk Management
Besides Command Prompt, you can assign a new drive letter to the lost partition through Disk Management. Here's how to recover lost partition Windows 10 or Windows 11 via Disk Management:
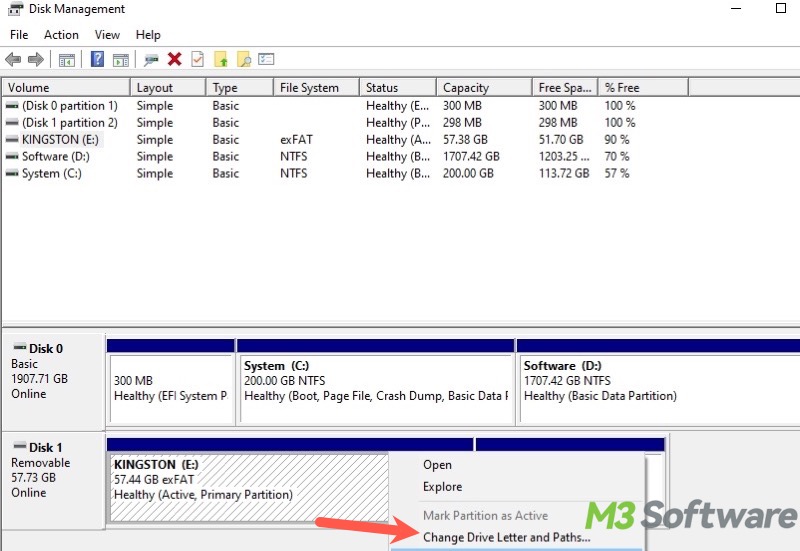
- Press the Windows+X keys and choose Disk Management.
- Right-click on the lost partition and select Change Drive Letter or Path.
- Click the Change button.
- Choose "Assign the following drive letter" and select an available letter from the drop-down menu on the right.
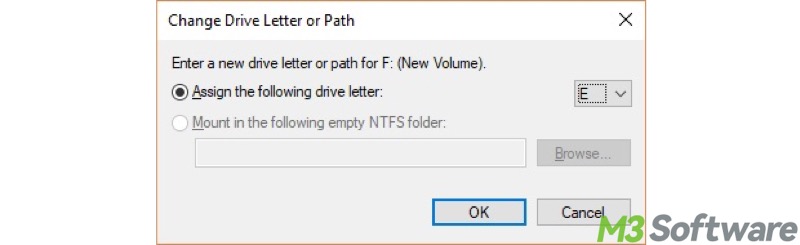
- Click OK.
Conclusion
You can recover lost partition Windows 10 or Windows 11 through Command Prompt or Disk Management only when the drive letter is not assigned. iBoysoft Data Recovery for Windows can work like a charm when your partition is lost or shows as RAW. More importantly, this data recovery tool is more user-friendly than the open-source TestDisk.
You can share this post with your friends