
Written by
Wilsey YoungSummary: This article is a step-by-step tutorial on how to run iBoysoft Data Recovery for Mac in macOS recovery mode, especially when a Mac cannot boot. -From m3datarecovery.com
It is hard to recover lost data from a Mac that cannot boot. Thanks to macOS Recovery Mode, you can run Mac data recovery in macOS Recovery Mode to save your precious data.
iBoysoft Data Recovery for Mac is a professional and easy-to-use tool that excels in recovering lost or deleted files from SSDs, HDDs, USB drives, SD cards, etc. Additionally, this professionally designed tool is capable of retrieving data from an unbootable, crashed, unresponsive, or inaccessible Mac. It is compatible with macOS 26 Tahoe Beta, macOS 15 Sequoia, and other versions.
This article elaborates on the steps to run Mac data recovery in macOS recovery mode with or without an Internet connection.
You can share the post by tapping on the buttons below
Run Mac data recovery in macOS recovery mode
The method to enter macOS recovery mode differs because of different Mac models. You can adopt the corresponding steps below based on your Mac models.
Run Mac data recovery in macOS recovery mode with Internet
If your Mac is connected stably to the Internet, use the method below to run Mac data recovery in macOS recovery mode.
Step 1: Start your Mac into Internet Recovery mode.
If your Mac was introduced before 2018:
- Turn on your Mac by pressing the power button.
- Hold down the "Option+Command+R" keys immediately until you see the spinning globe on the screen.
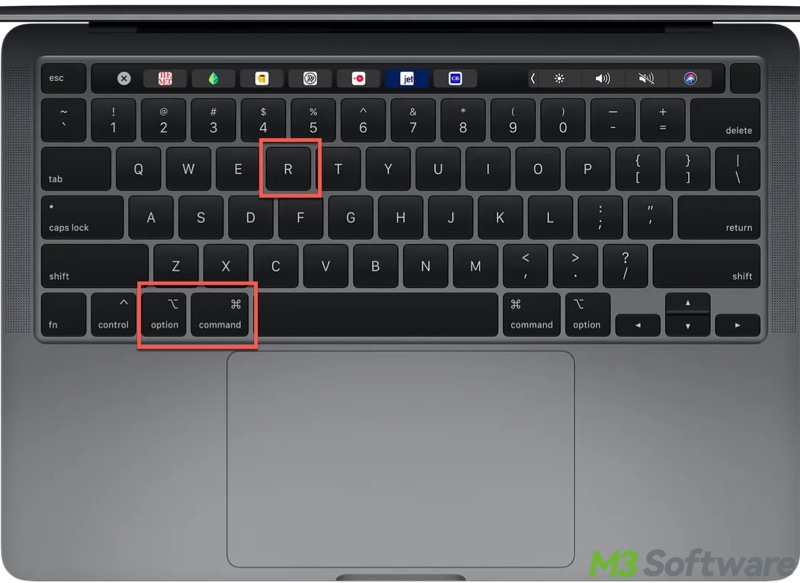
You will see the spinning globe instead of the Apple logo because here you're starting macOS Recovery mode via the Internet.
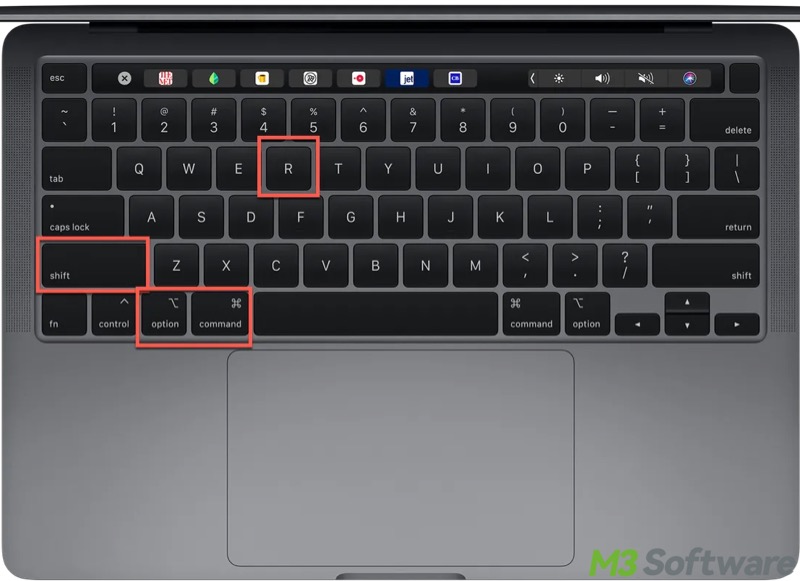
If it is a T2-secured Mac (introduced in 2018 and later):
- Turn on your Mac.
- Press and hold the "Option+Command+R+Shift" key together until the spinning globe appears, which boots your Mac into macOS recovery mode.
For Apple Silicon M1, M2, M3 & M4 Macs:
- Press and hold the power switch (Touch ID) until you see Loading startup options.
- Click “Options” to enter macOS Recovery Mode.
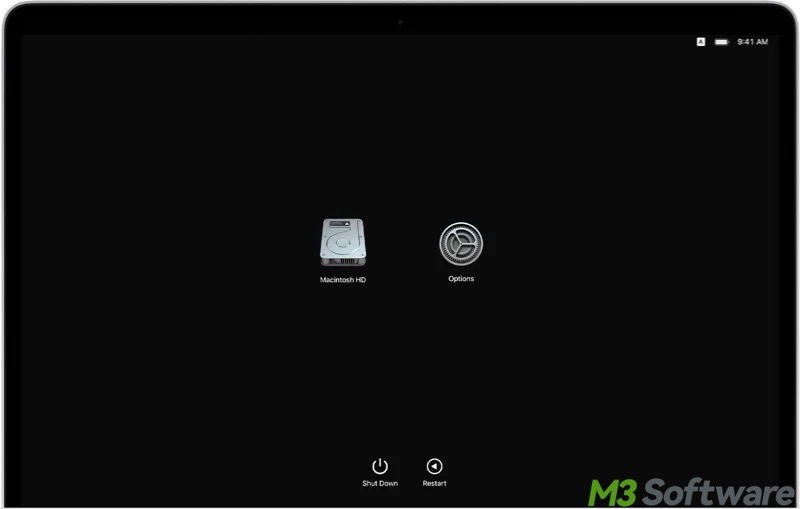
The appearance of the "macOS Utilities" menu indicates that your Mac is in macOS Recovery Mode.
Tips: In the macOS Utilities > Reinstall macOS, you can see which operating system is installed in the Recovery Mode.
Step 2: Connect your Mac to the Internet.
Step 3: Open "Terminal" from the “Utilities” drop-down menu. 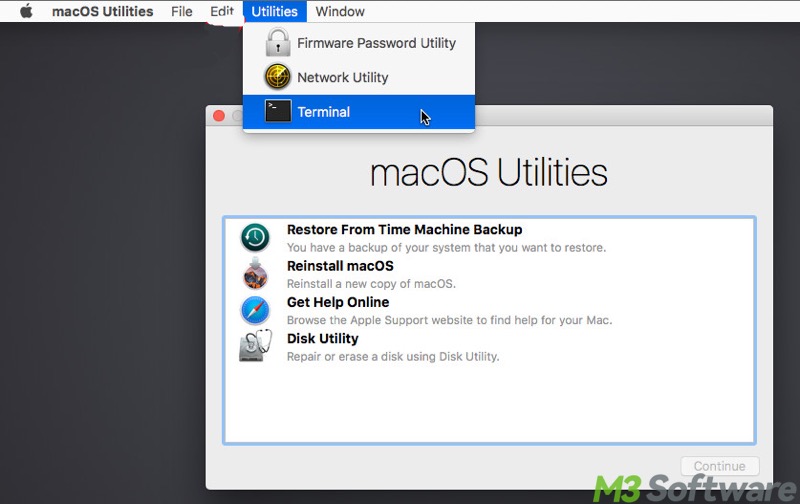
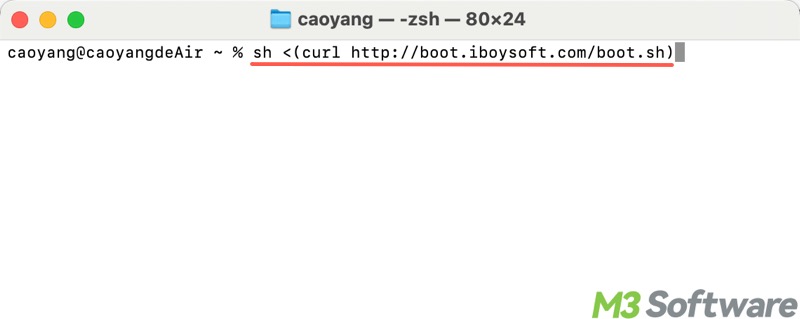
Step 4: Run the following command to launch iBoysoft Data Recovery for Mac:
sh <(curl boot.iboysoft.com/boot.sh)
If you want to recover data from a Fusion Drive, run the command below:
sh <(curl http://boot.iboysoft.com/fdboot.sh)
Step 5: Wait a moment to launch iBoysoft Data Recovery for Mac in macOS Recovery mode.
Step 6: After this tool is launched, select the Macintosh HD (or macOS) volume and click "Search for Lost Data." If you see there is a Macintosh HD-Data (or macOS - Data) volume, please select this one. 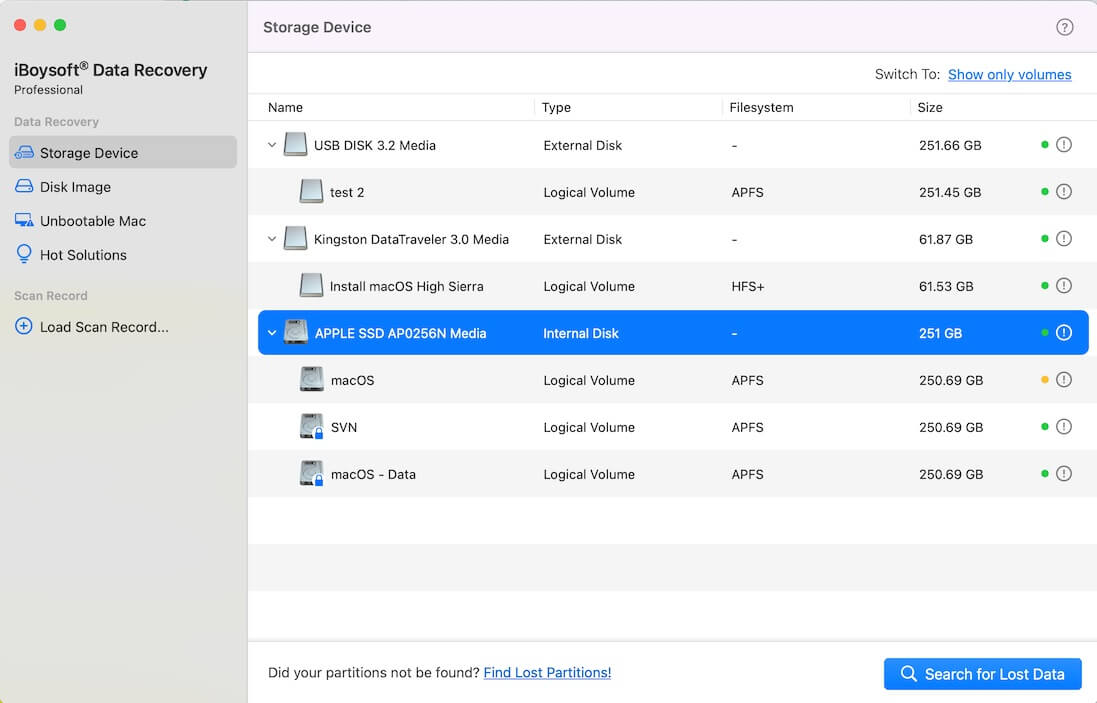
Note: If you lost data from the Fusion drive, which is split to SSD and HDD, please select "Fusion drive" from the left side of iBoysoft Data Recovery for Mac.
Step 7: After your data is found, preview the files and see if they are recoverable. 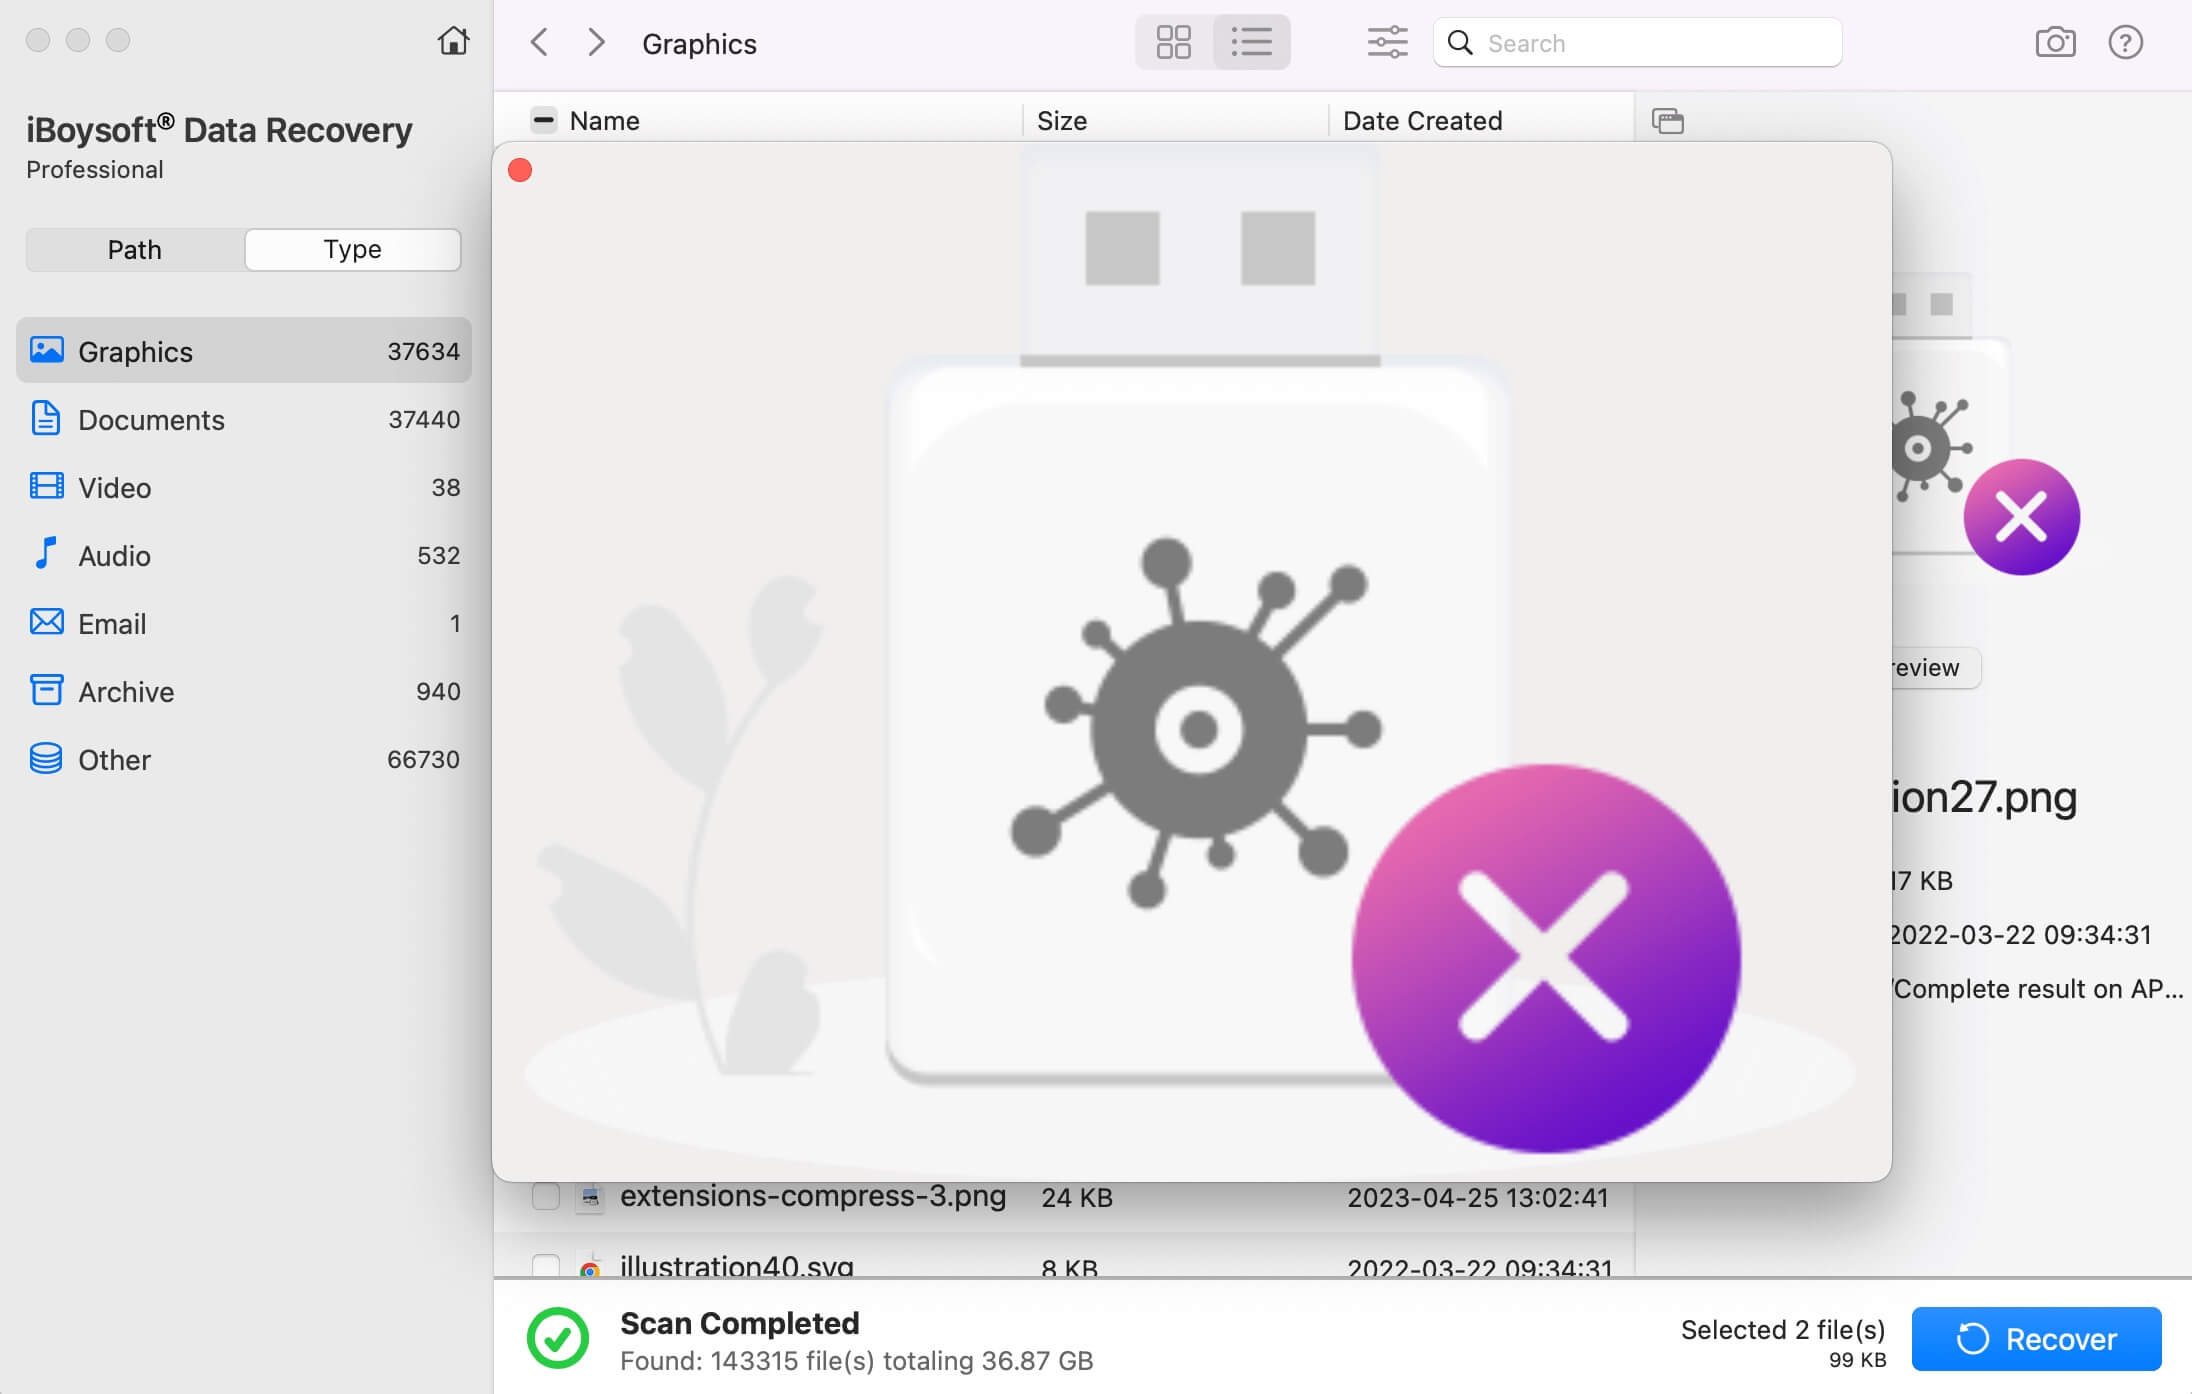
Step 8: Connect an external storage device to your Mac.
Step 9: Tap on the "Recover" button and select the external storage device to store the recovered files.
Here are some tips that may be helpful:
- There are two spaces in the above command, one space after sh, another space after curl.
- If you see a message "No such file or directory" after running the above command, it means you entered the wrong command; enter the correct one and try again.
- If you see a message "Could not resolve host: boot.iboysoft.com" after running the command above, it means your Mac has not connected to the Internet. Please connect your Mac to the Internet and try again.
You can share this article and show your friends how to run Mac data recovery in macOS recovery mode
Run Mac data recovery in macOS recovery mode without Internet
The unstable or malfunctioning Internet may cause your Mac to fail to launch iBoysoft Data Recovery for Mac by running the command. In this case, follow the steps below to run iBoysoft Data Recovery for Mac in macOS recovery mode.
First of all, you need to prepare:
- A healthy empty USB drive.
- A PC or Mac with a stable Internet connection and USB ports.
Step 1: Plug the empty USB drive into a healthy Windows PC or Mac. Please remember the name of the USB drive.
Step 2: Copy and paste the following links to the web browser one by one to download the files and save them to the root directory of your USB drive.
http://boot.iboysoft.com/boot.sh
http://boot.iboysoft.com/iboysoftdatarecovery.dmg
Step 3: Plug the USB drive into your unbootable Mac.
Step 4: Boot your unbootable Mac into macOS Recovery mode.
Step 5: Open Terminal.
Step 6: Type the following command to list all mounted disks.
mount
Step 7: From the listed drives, find the path of the USB drive. For example, /Volumes/Work Space as shown in the picture below.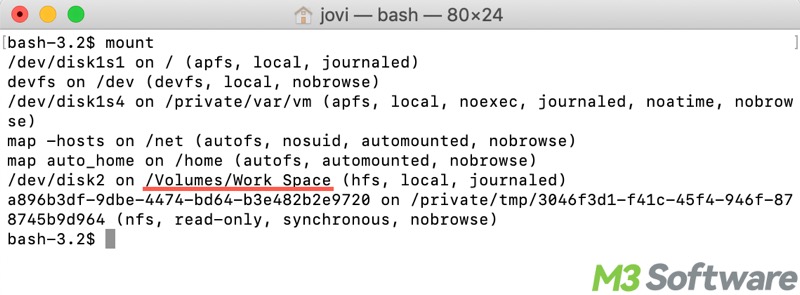
Step 8: Type cd 'the USB drive location' command and press "Enter." For example:
cd '/Volumes/Work Space'
Step 9: Run the following command to launch iBoysoft Data Recovery for Mac:
chmod 777 ./boot.sh && ./boot.sh
Step 10: After iBoysoft Data Recovery for Mac is launched, follow the wizard to recover lost data.
You can tap on the following buttons to share the post
FAQs about run Mac Data Recovery in macOS recovery mode
A
Yes! You can run a specialized Mac data recovery tool, like iBoysoft Data Recovery for Mac, by booting your Mac into the macOS recovery mode, and then you will be able to recover your precious data from Mac.
A
If you use an Intel-based Mac introduced before 2018, you can enter macOS recovery mode by turning on your Mac, pressing the Option+Command+R keys, and holding them until a spinning globe appears. If it is a T2-secured Mac introduced in 2018 or later, turn on your Mac, press and hold the Option+Command+R+Shift keys until the spinning globe appears.
A
When your Mac is in macOS recovery mode and connected to the stable Internet, follow the steps below to run iBoysoft Data Recovery for Mac: 1. Open Terminal. 2. Input and execute sh <(curl boot.iboysoft.com/boot.sh) to launch the data recovery tool. 3. When iBoysoft Data Recovery for Mac is launched, follow the wizard to recover the files.