
Written by
Wilsey YoungSummary: This post primarily shows how to use TestDisk to recover deleted/lost APFS partitions. Regarding APFS data recovery, iBoysoft Data Recovery for Mac is highly recommended. -From m3datarecovery.com
Apple File System (APFS) is a file system for macOS, iOS, tvOS, and watchOS, developed and deployed by Apple Inc. It aims to fix core problems of HFS+ (also called Mac OS Extended), APFS's predecessor, on these operating systems. Apple File System is optimized for flash and solid-state drive storage, with a primary focus on encryption.
TestDisk is a powerful free data recovery tool primarily designed to help recover lost partitions due to certain types of viruses or human error (such as accidentally deleting a Partition Table).
This post is a step-by-step tutorial on how to use TestDisk to recover deleted or lost APFS partitions in macOS. Additionally, the method to recover individual files is included.
You can click the buttons below to share the post quickly
How to use TestDisk to recover deleted/lost APFS partitions
According to the TestDisk official document from: https://www.cgsecurity.org/wiki/TestDisk, TestDisk supports lots of file systems, including APFS, FAT32, exFAT, NTFS, ext2, ext3, ext4, HFS, HFS+, and HFSX.
You can follow the steps below to recover lost APFS partitions via TestDisk:
- Install TestDisk from the official TestDisk download page.
- Launch the "Terminal" in macOS and run the command: sudo testdisk
- Use the arrow keys to select the target APFS disk listed by TestDisk.
- TestDisk will attempt to detect the correct partition table. Confirm the correct one by pressing the "Enter" key on your keyboard.
- Choose the "Analyse" option to scan for lost or deleted partitions.
- TestDisk will scan the partition table for any issues. If it finds the partition you want, it will show it in the list.
- Select the partition you want and choose "Write" to restore the partition.
- Choose "Quit" to exit TestDisk.
If TestDisk can't find the partition, you may need to try other options.
You can share this post with your friends online
How to recover lost data from APFS drives or partitions
While TestDisk is used for partition recovery, PhotoRec is used to recover individual files, even if the partition itself is lost or damaged. However, PhotoRec does not directly support APFS. In this case, an APFS data recovery software is required.
Here's how to recover data from APFS drives or partitions via PhotoRec:
- Run the following command in the “Terminal”: sudo photorec
- Choose the APFS disk from the list and press “Enter.”
- If PhotoRec doesn't automatically detect the partition table, it will ask you to choose the partition type.
- If you're recovering files from a specific partition, select it. Otherwise, you can select the whole disk.
- Since you are recovering data from an APFS drive, choose the ext2/ext3/ext4 file system type, as PhotoRec does not directly support APFS. APFS is based on a similar structure to ext2/3/4 when viewed by PhotoRec.
- Choose specific file types (e.g., images, documents, videos) or select All to recover all possible files.
- Select the directory where you want the recovered files to be saved. Don't save the recovered files to the same drive you're recovering from.
- After choosing the directory, press “Enter” to begin the recovery process. PhotoRec will scan the disk and attempt to recover files.
- Once the recovery is complete, navigate to the destination folder you selected before and check the recovered files.
Tips: TestDisk and PhotoRec are free and powerful recovery tools, but they are used in a text-based command-line interface that many computer users find complex and technical to use. If you need a professional and easy-to-use data recovery tool, or TestDisk and PhotoRec cannot recover files, iBoysoft Data Recovery for Mac is strongly recommended.
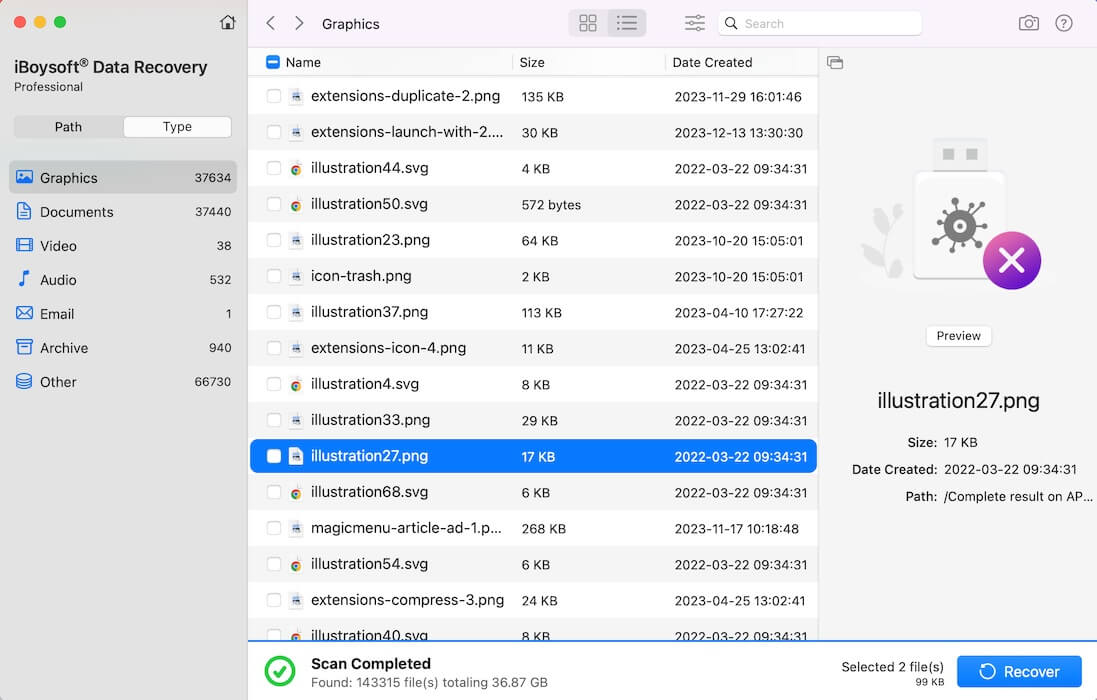
iBoysoft Data Recovery for Mac is a professional and user-friendly APFS data recovery software that can undelete files from APFS drives, recover lost data from corrupted, unreadable, unmounted, crashed, or failed APFS drives, recover lost data from deleted/lost APFS partitions, etc.
More importantly, iBoysoft Data Recovery for Mac can retrieve lost/deleted data from any Mac-based internal and external storage device, such as HDD, SSD, USB drive, SD card, and more. It supports over 1000 file formats, and it's widely compatible with macOS 26, 15, 14, 13, 12, 11, 10.15, 10.14, 10.13, 10.12, Mac OS X 10.11
Tutorial to recover lost data from a formatted, corrupted, crashed, unreadable, or unmounted APFS drive via iBoysoft Data Recovery for Mac:
- Download, install, and launch iBoysoft Data Recovery for Mac on your Mac computer.
- Select the formatted, corrupted, crashed, unreadable, or unmounted APFS drive and click "Search for Lost Data." If you select an encrypted drive, you will be required to enter a password.

- If the APFS partition is not found, please click “Find Lost Partitions!” or refer to: External Hard Drives Not Showing Up on Mac.
- iBoysoft Data Recovery for Mac is scanning the lost data from the APFS drive you select.
- Preview the found files, choose what you want, and click the "Recover" button to save them to another healthy location.
You can share the post by tapping on the following buttons
FAQs about TestDisk APFS
A
TestDisk is powerful free data recovery software! It was primarily designed to help recover lost partitions and/or make non-booting disks bootable again when these symptoms are caused by faulty software: certain types of viruses or human error (such as accidentally deleting a Partition Table). PhotoRec is file data recovery software designed to recover lost files, including video, documents, and archives from hard disks, CD-ROMs, and lost pictures from digital camera memory. PhotoRec ignores the file system and goes after the underlying data, so it will still work even if your media's file system has been severely damaged or reformatted.
A
TestDisk can find lost partitions for various file systems, including APFS. PhotoRec does not directly support APFS. APFS is based on a similar structure to ext2/3/4 when viewed by PhotoRec.
A
First of all, you need to download from the official site: https://www.cgsecurity.org/wiki/TestDisk_Download. TestDisk uses a text-based interface (in Terminal), not a graphical one, so you need to open Terminal and run sudo testdisk, and then choose Create to start a new log (recommended). Use arrow keys to highlight the affected drive and press Enter. Choose Analyze to scan for lost partitions. Select a listed partition and press C to copy files to another drive.