
Written by
Wilsey YoungSummary: This post primarily explores the methods that enable users to read and write to an NTFS drive on macOS 26 Tahoe. iBoysoft NTFS for Mac can endow you with full read and write access to NTFS drives in macOS 26 Tahoe. -From m3datarecovery.com
Not being able to write files on an NTFS drive in macOS could be an annoying barrier, particularly for those who work on both Windows and macOS 26 Tahoe, the latest and major macOS release in 2025.
Whether you are a new or experienced user of macOS, it is worth noting that the mounted NTFS drives are read-only in macOS 26 Tahoe. Alternatively, perhaps you were once able to gain NTFS read-write support in macOS with the help of an NTFS for Mac tool, but now the tool could be incompatible with macOS 26 Tahoe.
This post covers 3 methods that can help you enable write support to NTFS drives on macOS 26 Tahoe.
The following buttons can help share the post immediately
What makes an NTFS drive read-only in macOS 26 Tahoe
NTFS (New Technology File System) is a file system created by Microsoft and primarily used by Windows computers. Therefore, although you are allowed to mount an NTFS drive in macOS 26 Tahoe, macOS provides only read support for NTFS drives.
This means you can only view files on the mounted NTFS drives in macOS 26 Tahoe, and the operations like adding, deleting, editing, and renaming the files on NTFS drives are forbidden. The read-only state also prevents you from copying or transferring files from a Mac to the NTFS drives.
How to mount an NTFS drive in read-write mode in macOS 26 Tahoe
This post introduces 3 methods to use NTFS on macOS 26 Tahoe. You can choose one according to your needs.
Gain macOS 26 Tahoe NTFS read/write access using iBoysoft NTFS for Mac
iBoysoft NTFS for Mac is a professional and user-friendly tool that can help you read write NTFS drive on macOS Tahoe 26. Whenever your macOS starts or restarts, you can directly read, write, add, and delete files on the NTFS drives mounted by iBoysoft NTFS for Mac.
What's more? Once iBoysoft NTFS for Mac mounts the NTFS drives, the NTFS drive can work in the same way as a local physical volume. This means you can freely manage the NTFS drive on the desktop, in the Finder and Disk Utility, and feel free to airdrop, tag, and sync files!
Most importantly, iBoysoft NTFS for Mac works perfectly with macOS & Mac OS X, and it is fully compatible with both Intel-based and Apple Silicon Macs, including the M4, M3, M2, and M1 chips.
Follow the steps below to use iBoysoft NTFS for Mac to gain read-write NTFS for macOS 26 Tahoe:
Note: To avoid software conflicts, please uninstall other NTFS for Mac tools first!
- Download and install iBoysoft NTFS for Mac.
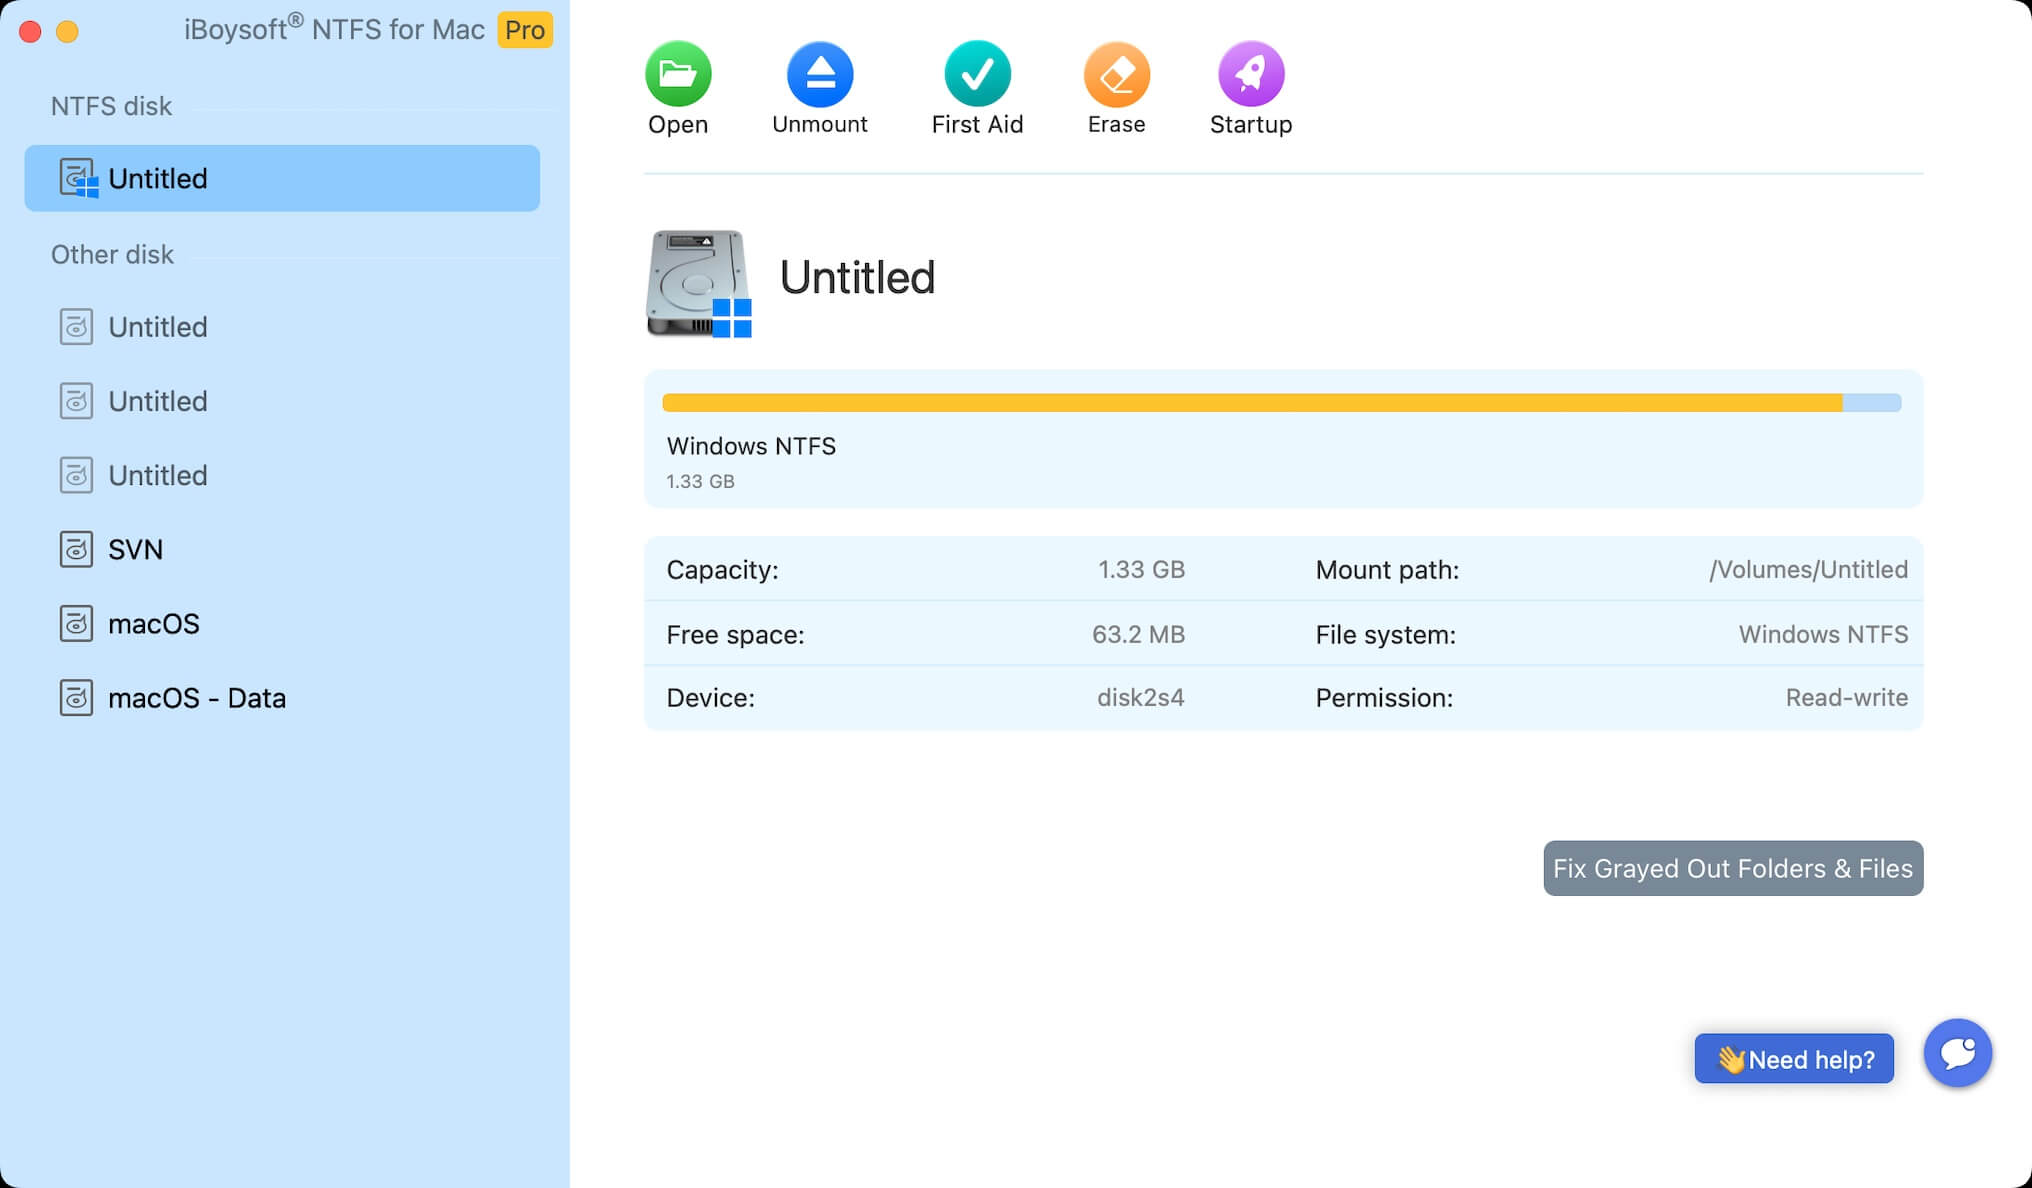
- Now you can add, delete, edit, rename, and write files on the NTFS drives in macOS 26 Tahoe.
Note: A system restart may be needed for the first-time installation.
You can share iBoysoft NTFS for Mac with your friends
Reformat NTFS drives in macOS 26 Tahoe
Formatting the NTFS drives in macOS 26 Tahoe is a popular way to gain read-write access on them. However, reformatting requires choosing another file system that is compatible with macOS, such as APFS, Mac OS Extended (Journaled), or exFAT.
Moreover, formatting involves erasing all the data on the target drive, so you may need to back up the data before formatting an NTFS drive in macOS 26 Tahoe.
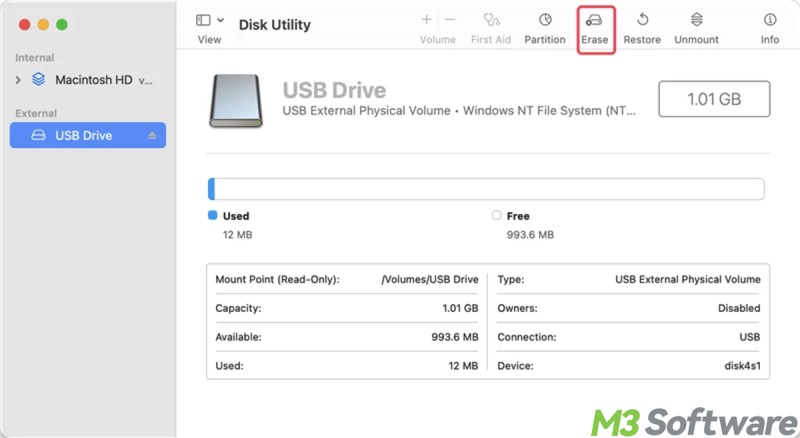
Here's how to format an NTFS drive in macOS 26 Tahoe:
- Open Disk Utility in macOS 26 Tahoe.
- Choose the target NTFS drive from the left side panel.
- Tap on the "Erase" button.
- Input the name.
- Select the file system from the drop-down menu right next to "Format:"
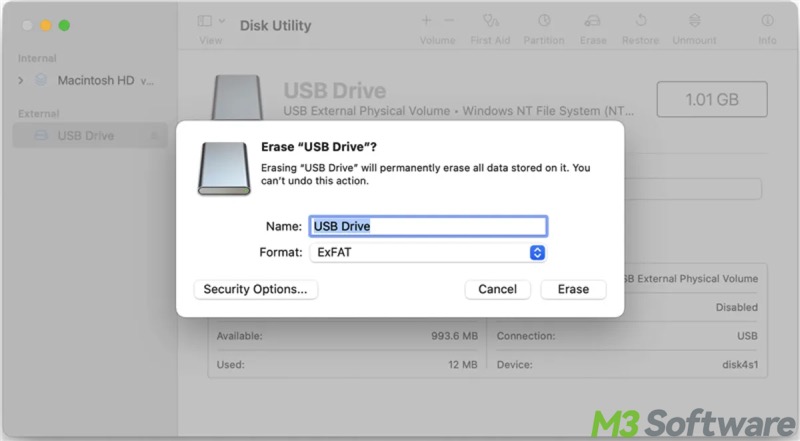
- Set the scheme to GUID Partition Map.
- Click the "Erase" button, then the formatting begins.
Install Windows alongside macOS 26 Tahoe through Boot Camp
Boot Camp is a built-in utility in macOS that can help you partition your Intel-based Mac's internal drive and install Windows alongside macOS. This allows you to choose, on startup, whether to boot into macOS or Windows.
Therefore, if you're using an Intel-based Mac and don't feel like using a third-party tool or reformatting the NTFS drives, the only way to read write NTFS drive on macOS Tahoe 26 is to create a Windows Boot Camp partition.
Nevertheless, creating a Boot Camp Windows partition lends itself better to those who often work across macOS 26 Tahoe and Windows. Another downside is that each time you boot into Windows, it requires a system restart of your Mac. Additionally, while using Windows, data on the macOS 26 Tahoe partition won't be accessible.
If you are interested in creating a Boot Camp Windows partition, refer to: How to Install Windows 10 on Mac with Boot Camp Assistant?
Conclusion
Suppose you are having trouble using NTFS on macOS 26 Tahoe, and you don't feel like reformatting or creating a Boot Camp Windows partition, download and install iBoysoft NTFS for Mac! To avoid software conflicts, uninstall other NTFS for Mac tools not compatible with macOS 26 Tahoe first.
You can share the post by clicking the buttons below: