
Written by
Wilsey YoungSummary: This post briefly introduces Windows File History and how it works in Windows 10. This article also includes a step-by-step tutorial on enabling Windows File History and restoring backed-up files in Windows 10. -From m3datarecovery.com
Regularly backing up files and data on Windows is of great importance to Windows computer users nowadays, especially to those who always deal with sensitive information and important data in life, work, study, etc.
Features and tools for data backup are almost ubiquitous in modern digital times, and many Windows users would rather use the built-in tools than download the third-party software. Regarding built-in backup tools on Windows, Windows File History often comes into the spotlight.
What is Windows File History in Windows 10?
Windows File History is a built-in backup feature that allows you to automatically back up copies of your personal files, such as documents, photos, and videos stored in desktop or other folders you specify.
With the help of Windows File History, you can easily restore lost or deleted files from previous versions, thus saving you the trouble of losing files due to system failure, misoperation, corruption, etc. Unlike general manually-created full backups, Windows File History features a continuous saving mechanism, making it ideal for protecting your day-to-day data.
How does File History work in Windows 10?
Once the Windows File History is enabled and properly set up, it regularly saves copies of the files stored in your desktop and other folders you specify during setup to a designated storage device, typically an external hard drive or network drive.
In addition, Windows File History saves copies of your files in the background. It also allows users to decide how often they want the File History to back up the files (e.g. every hour by default), so File History keeps several versions of the files, enabling users to restore files from a specific date and time to their original location.
You can share this post by clicking the buttons below.
How to enable File History in Windows 10?
The following steps show how to enable Windows File History via Settings on Windows 10:
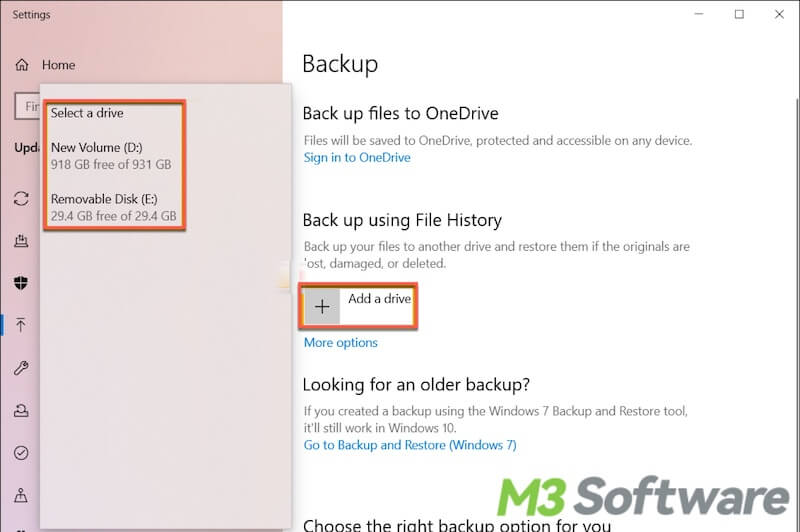
- Connect a storage drive (or configure a network drive if needed) to your Windows PC. Note: An external hard drive is recommended.
- Press the Windows+i keys on your keyboard to open Settings on Windows.
- Navigate to Update & Security > Backup
- Click the "Add a drive" button under "Back up using File History" and choose the connected storage device from the list.
- Click “More options” to customize the data backup.
- Decide how often you want the system to back up your files and how long it keeps them.
- Under the "Back up these folders" section, you can specify specific folders to be backed up by the File History, meanwhile, you can remove the selected folders by clicking on it.
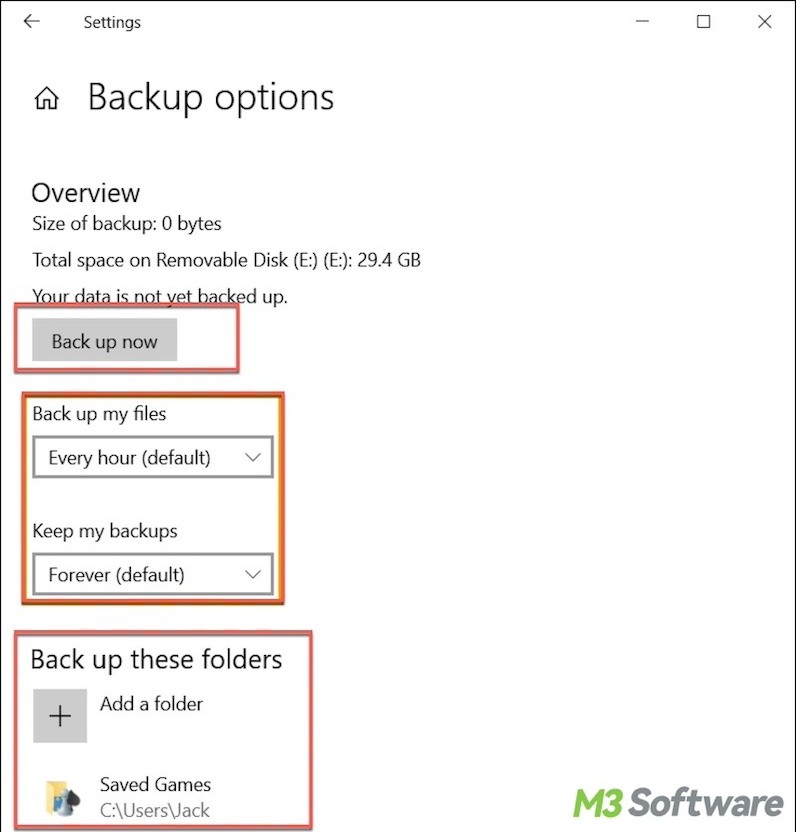
- Tap on "Back up now" and the backup will begin.
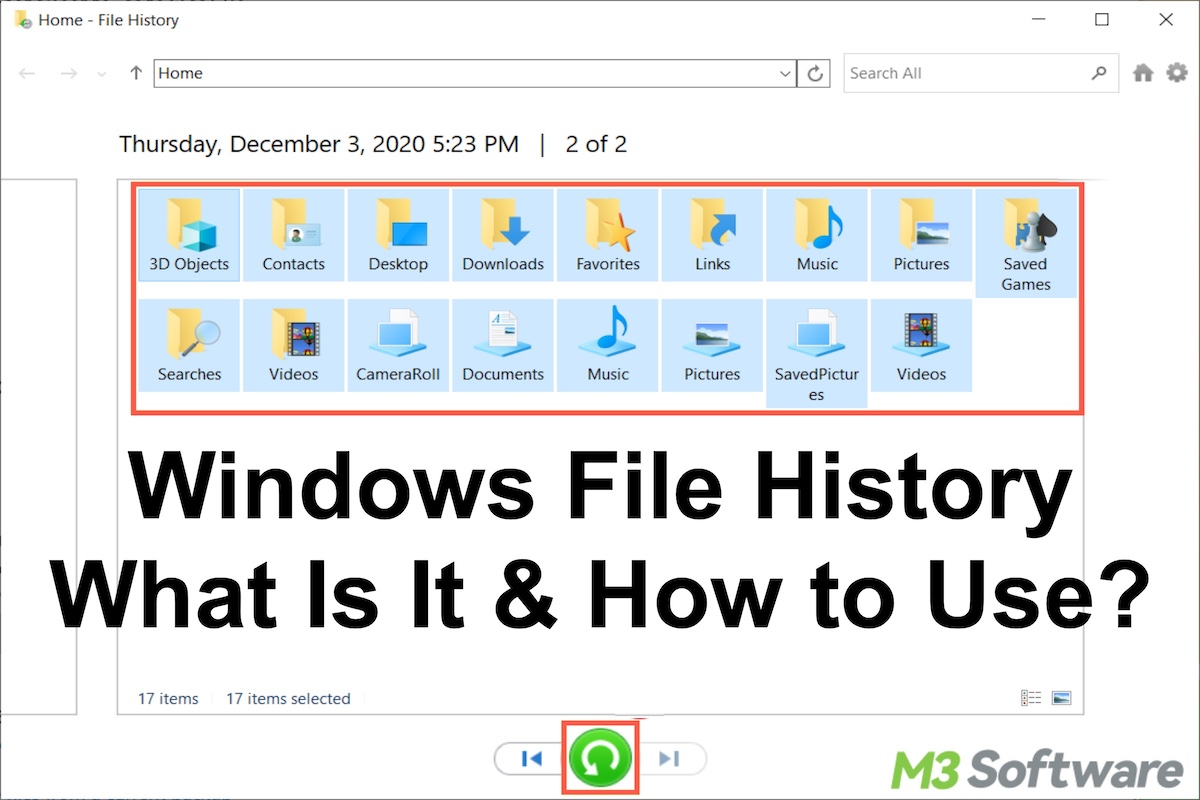
Once enabled, the Windows File History will back up files automatically based on your settings Whenever you want to restore the files, you can follow the steps below:
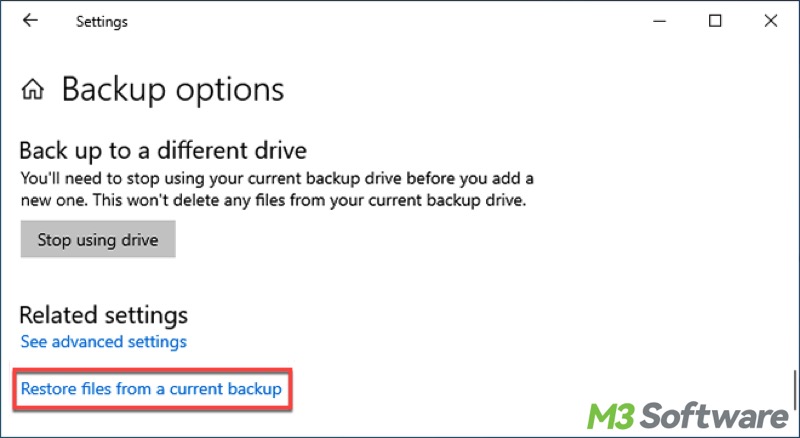
- Open Settings > Update & Security > Backup
- Click "More options" under "Back up using File History."
- Scroll down to find and tap on “Restore files from a current backup.”
- Double-click the folders to check the folders in it.
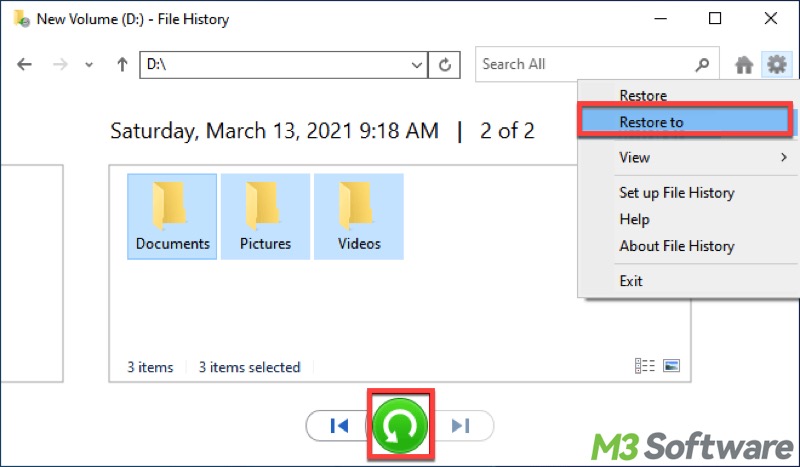
- Select the desired files and click the green recovery button to restore.
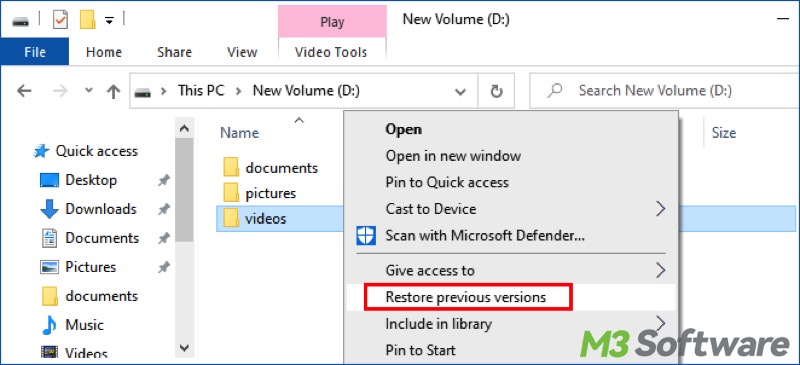
- Alternatively, to restore a file or folder, you can open File Explorer and go to the location of the original file, right-click on a folder or file, and choose "Restore previous versions."
Tips: If you prefer saving the restored files to another location (avoid overwriting), click the gear button top right corner and tap on "Restore to..."
Click the following buttons to share this post