
Written by
Wilsey YoungSummary: This post primarily discusses how to recover files disappeared from Desktop on Windows 10/11 using the built-in tools or utilities. iBoysoft Data Recovery for Windows is recommended for retrieving lost or deleted files on Windows. -From m3datarecovery.com
Windows users tend to place some specific files onto the Desktop, making them more easily accessible. However, Windows users may run into the issue that some or all files on the Desktop disappear out of the blue.
According to the feedback, it seems that some files vanish from the Desktop for no reason, and some disappear after a Windows update. This post focuses on the "files disappeared from Desktop" on Windows 10/11 and offers proven ways to recover lost or missing data.
Methods to recover files disappeared from Desktop
With built-in tools and utilities on Windows 10/11, you can easily retrieve those files disappeared from Desktop without downloading any resources from the Internet. If these efforts are to no avail, a specialized tool is needed for an advanced retrieval.
Method 1 - Check the Recycle Bin
Windows users may think the files disappeared from Desktop are unlikely to be in the Recycle Bin. As a matter of fact, accidental deletion often happens in the computing world. In some rare cases, viruses or malware not only tamper with your files but may also drag them into the Recycle Bin.
Consequently, having a look at the Recycle Bin on Windows may save you the trouble of trying all other solutions.
You can click the following buttons to share the post
Method 2 - Search for files through File Explorer
After files disappeared from Desktop, searching for them through the File Explorer on Windows 10/11 should also be at the top of the list, as the system might move your files to other folders on the hard drive or partition, particularly the system drive.
Whether or not your files disappeared from Desktop after update, follow the steps below to check if they can be located:
- Double-click the "This PC" or "My Computer" icon on the "Desktop" to open "File Explorer."
- Tap on the search bar in "File Explorer" and input the exact filename.
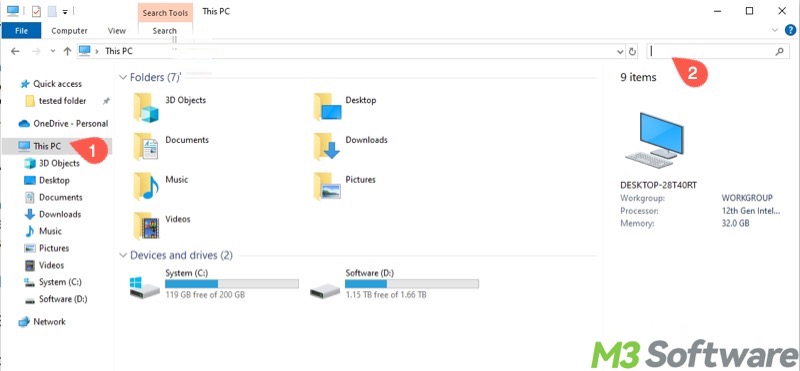
- Wait patiently until the scanning is complete.
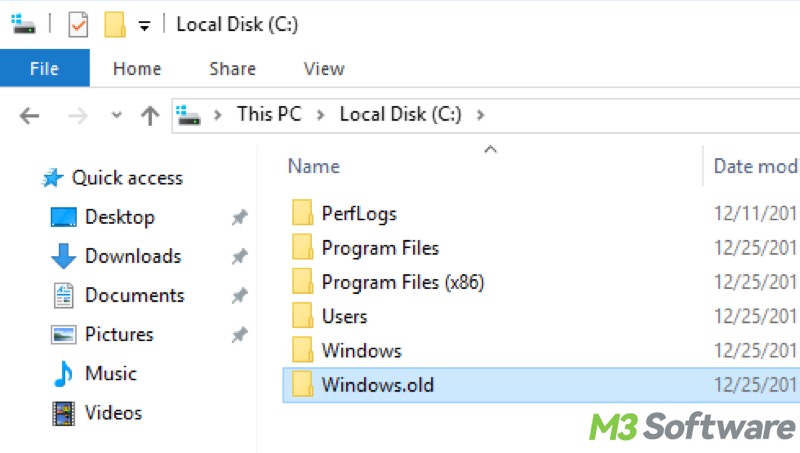
Can't remember what the filename is? The system might back up the files on the Desktop to Windows.old folder:
- Double-click the "This PC" or "My Computer" icon on the "Desktop" to open "File Explorer."
- Double-click the system drive, aka Local Disk (C:) or System (C:).
- Open the "Windows.old" folder and check if the lost files are there.
Alternatively, check if you are logged into an incorrect user profile and check if Windows logs you into a temporary profile. If yes:
- Open "File Explorer."
- Double-click the system drive > Users > original profile name > Desktop.
- Check carefully if files exist.
Method 3 - Show hidden files
Windows hides some important system-related files to protect them from being modified or deleted. Therefore, after files disappeared from Desktop, you can adjust the settings to let the system show hidden files:
- Double-click the "This PC" or "My Computer" icon on the "Desktop" to open "File Explorer."
- Tap on the "View" tab and click the "Options" button.
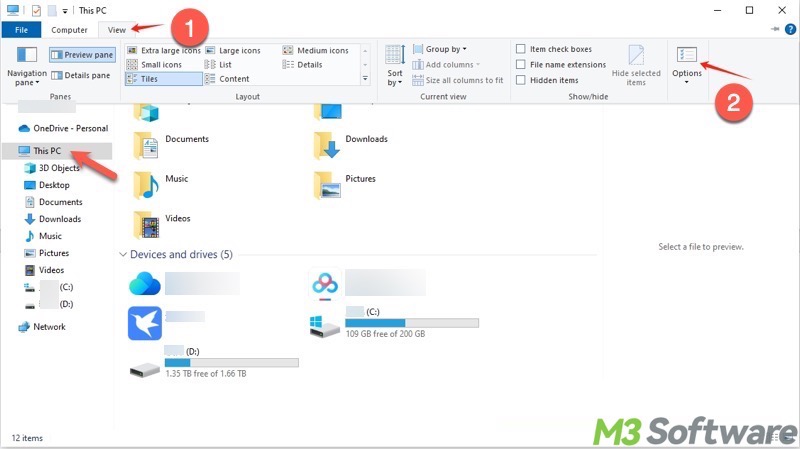
- Select "Show hidden files, folders, and drives."
- Click "Apply" and "OK."
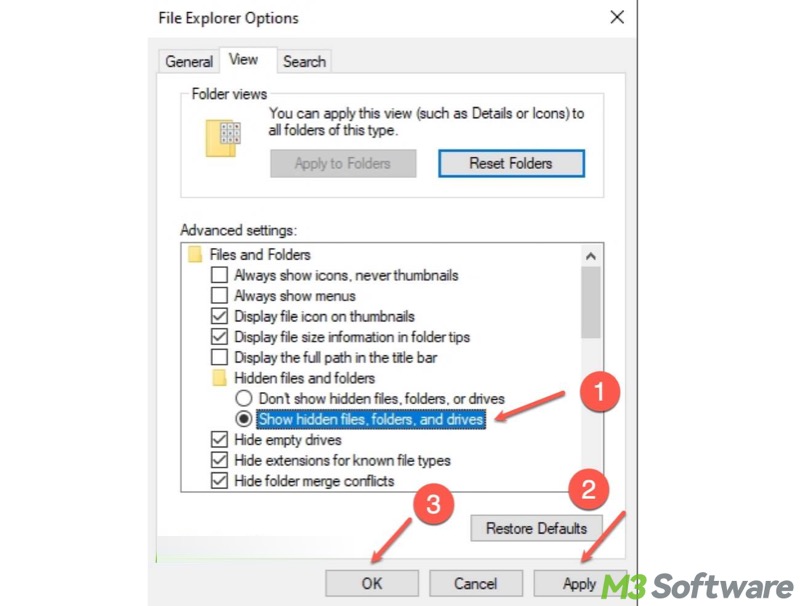
- Search for the files again in File Explorer with the steps mentioned in method 2.
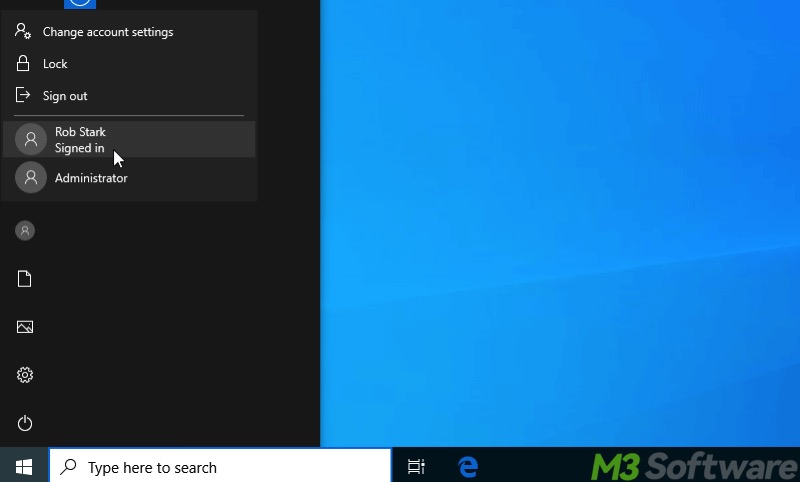
Method 4 - Log in to the correct user account
If you are logged into a different Windows user account or a temporary profile, switch back to the user account on which the file was created.
- Click the "Start" menu button.
- Tap on the "Profile" icon on the left side panel.
- Select the target user account, and you will be taken to the login interface.
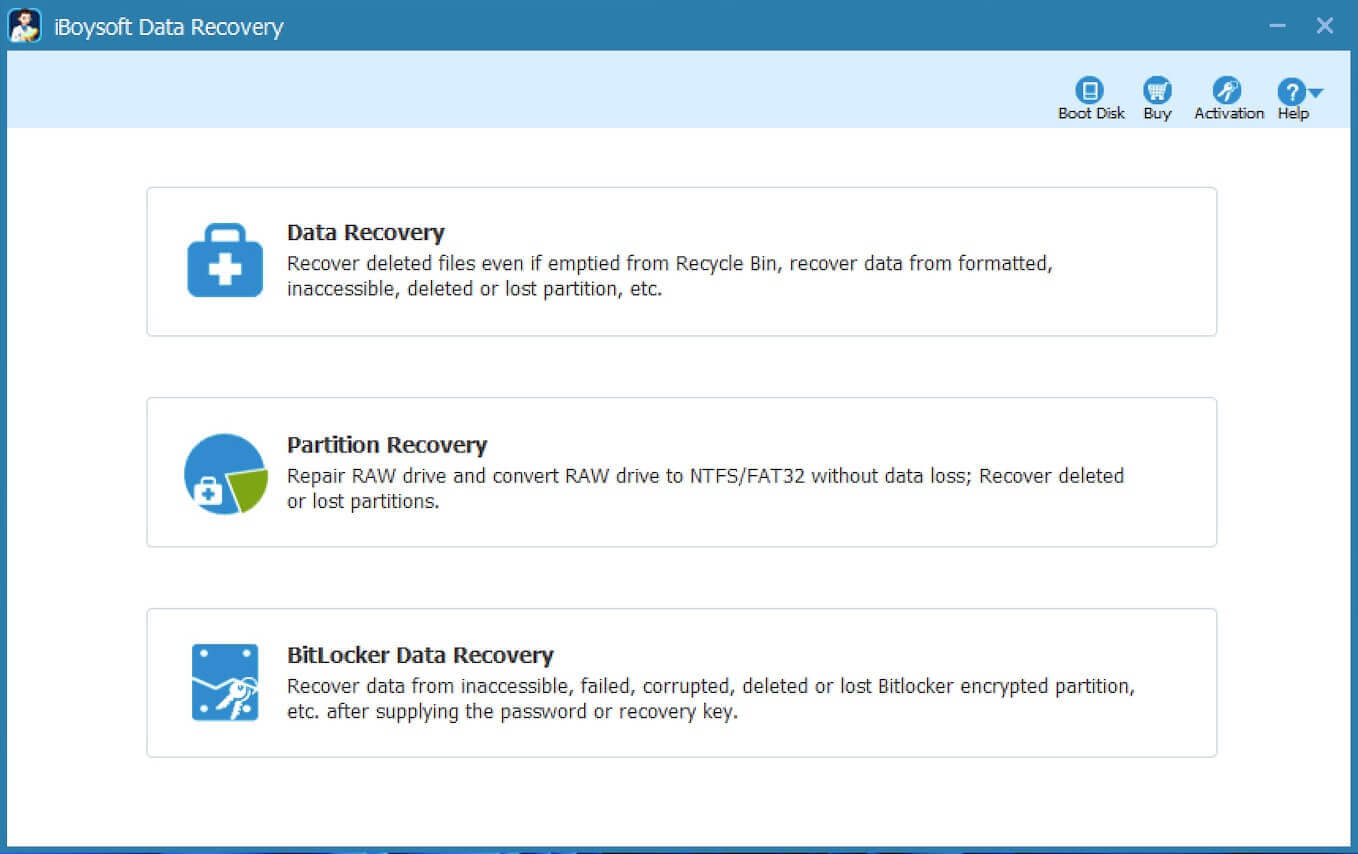
Method 5 - Use a specialized tool
iBoysoft Data Recovery for Windows is a professional and intuitive data recovery tool that can help you effortlessly restore lost or deleted files from an SSD, HDD, USB drive, SD card, or other storage devices.
iBoysoft Data Recovery for Windows is designed with an advanced scanning and data recovery algorithm. When you have no idea what happened and where the files went, this data recovery tool is a perfect choice. In addition, no matter what the file types and formats are, this tool can easily retrieve lost/deleted files, even if the drive is corrupted, inaccessible, or formatted.
After your files disappeared from Desktop Windows 10/11, use iBoysoft Data Recovery for Windows:
- Download, install, and launch iBoysoft Data Recovery for Windows.
- Choose the "Data Recovery" module from the main interface.
- Select the hard drive and click "Next" to let the scanning begin.
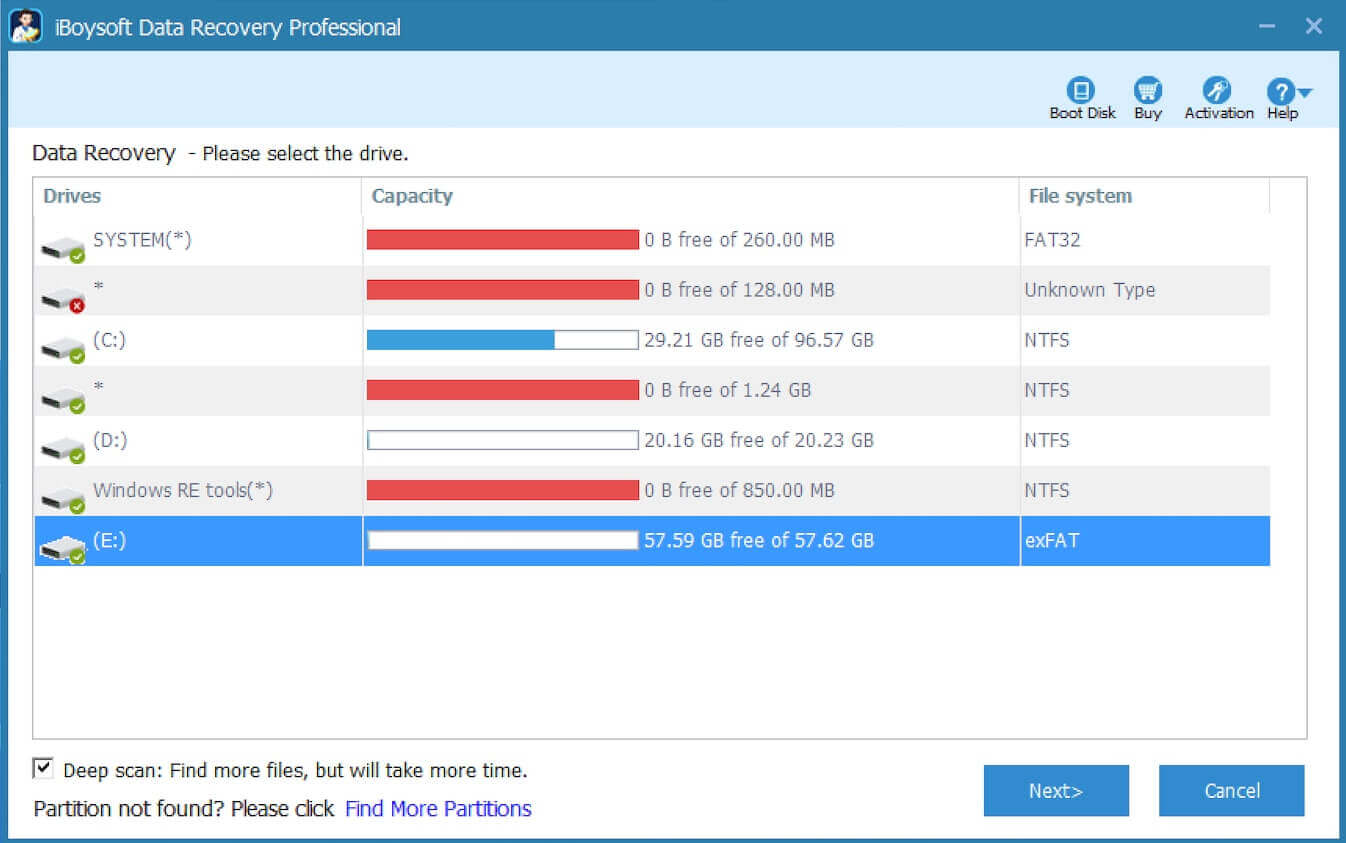
- When scanning is complete, use the preview feature to check if the files are recoverable.
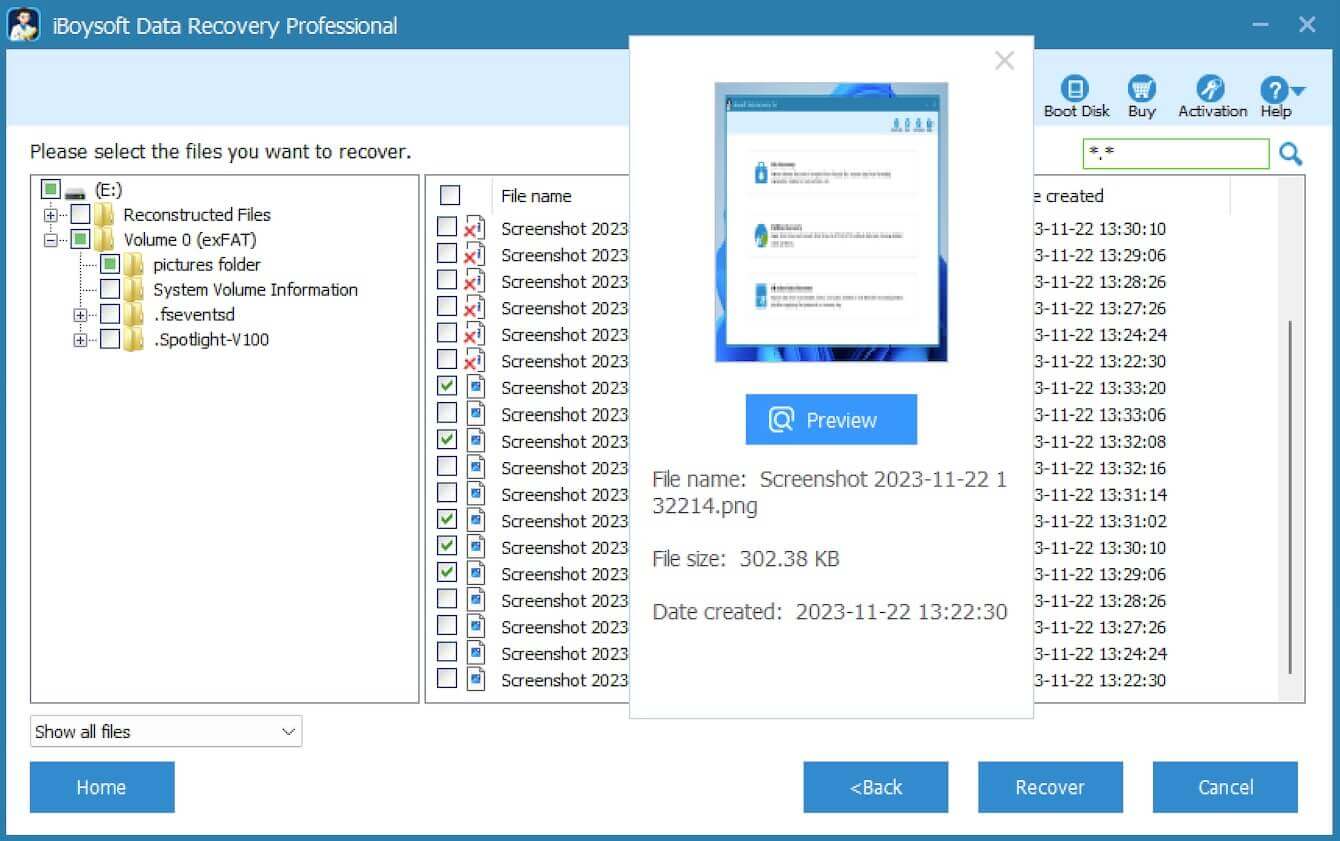
- Tick the wanted files and click the "Recover" button. Please note that the recovered files should be saved to a different drive or partition to prevent overwriting.
You can share this post with your friends online
Method 6 - Use File History
Windows File History is a built-in backup feature that automatically creates backup copies of personal files, such as documents, pictures, videos, and other files, in the desktop or other folders you specify. With File History, you can quickly restore files disappeared from Desktop after update:
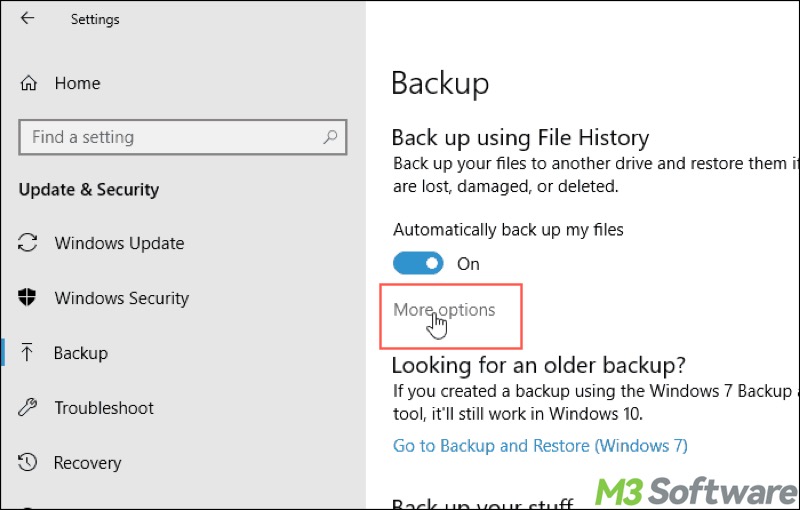
- Open “Settings” > “Update & Security” > “Backup”
- Click "More options" under “Back up using File History.”
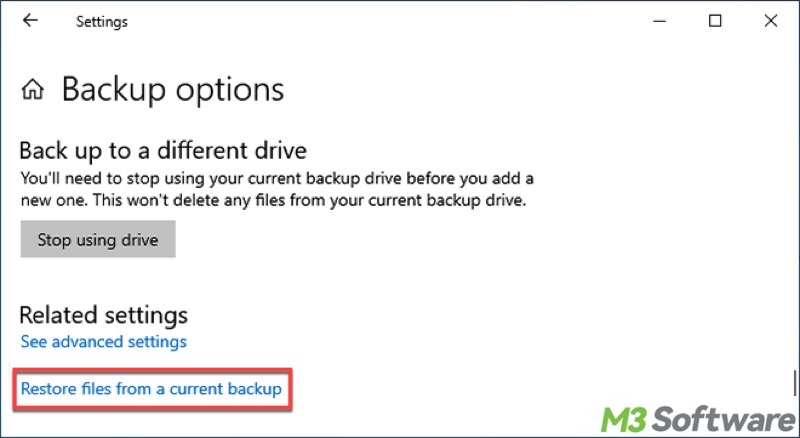
- Click “Restore files from a current backup.”
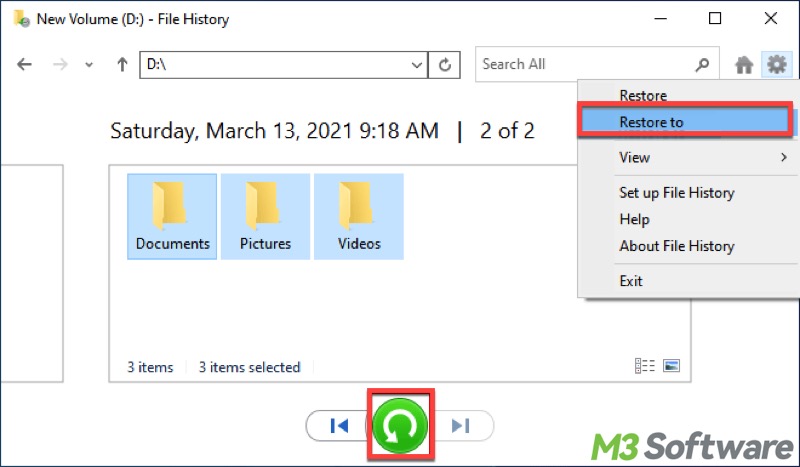
- Double-click the folders to check the folders in them.
- Select the files you want and click the green recovery button to restore.
- If you want to save the restored files to another location, click the gear button in the top right corner and tap on "Restore to..."
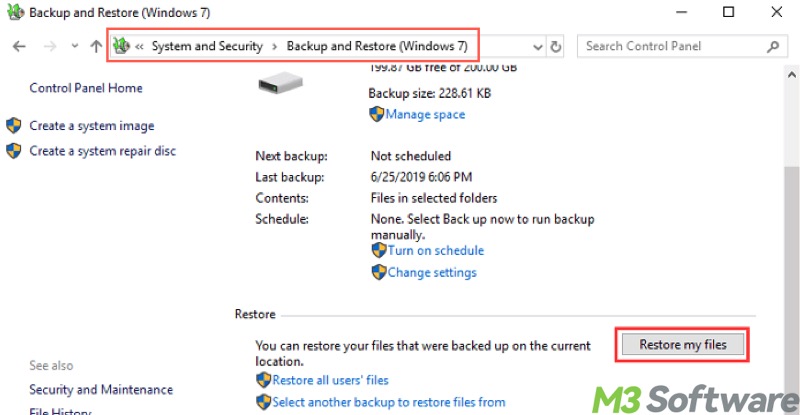
Method 7 - Use Backup and Restore (Windows 7)
If you created a backup with the help of the Windows 7 Backup and Restore tool, it still works in Windows 10:
- Open "Settings" and choose "Update & Security."
- Select "Backup" from the left side panel.
- Click "Go to Backup and Restore (Windows 7)."
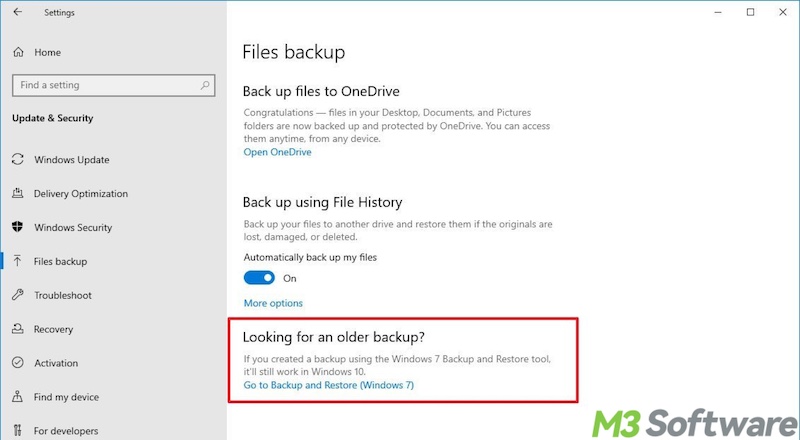
- Tap on "Restore my files" and follow the simple wizard to get the files back.
Bonus Tips: Prevent "files disappeared from Desktop" on Windows 10/11
Many factors on Windows can cause data security issues, such as "files disappeared from Desktop" on Windows 10/11. Here are some practical tips for avoiding accidental data loss.
Back up important data
In the modern digital world, backing up important files has always been the best option to prevent data loss. Therefore, you can regularly back up files on Windows using File History or other tools.
Hard disk health check
Checking and maintaining the hard disk health is crucial to data security, as system file or file system issues may result in data loss.
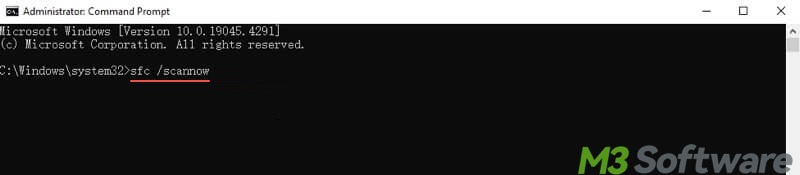
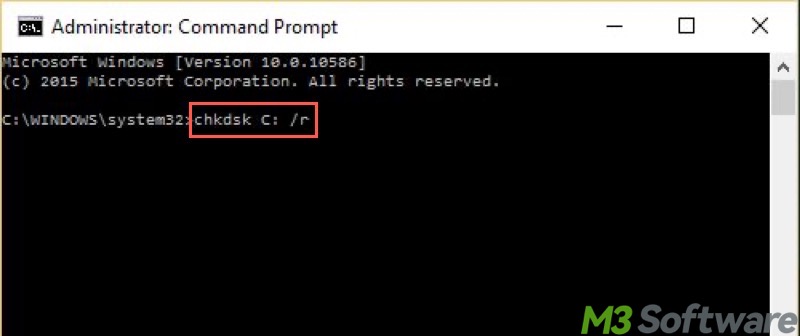
To check for and repair system files and file system issues:
- Input "cmd" into the Windows search box and choose "Run as administrator."
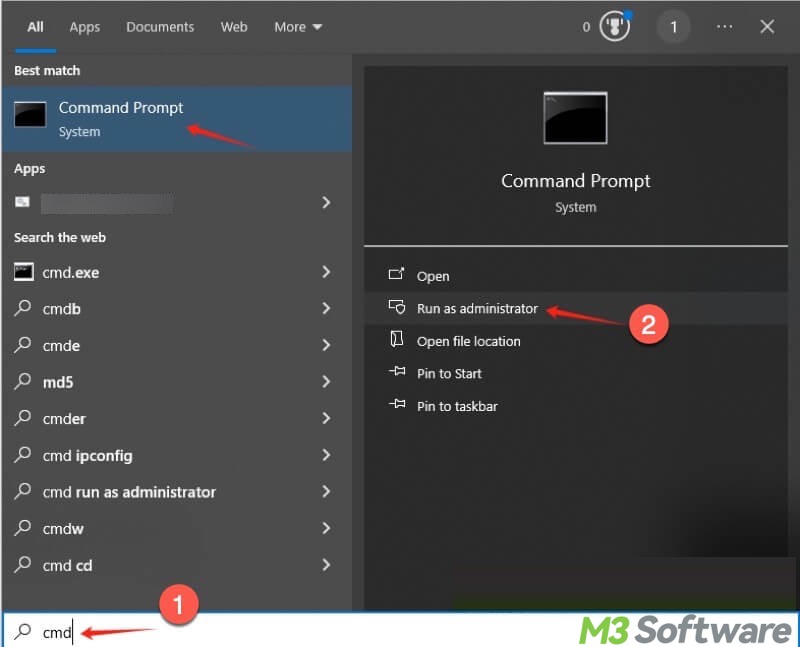
- Type "sfc/ scannow" and hit the "Enter" key on your keyboard. SFC will attempt to fix any detected issues.
- Input "chkdsk X: /r", replace X with the actual drive letter, and hit "Enter." It will attempt to repair file system errors and disk issues.
Scan for viruses or malware
Viruses or malware are typically the major culprit for a data loss case like "files disappeared from Desktop." Running a virus scan regularly is necessary:
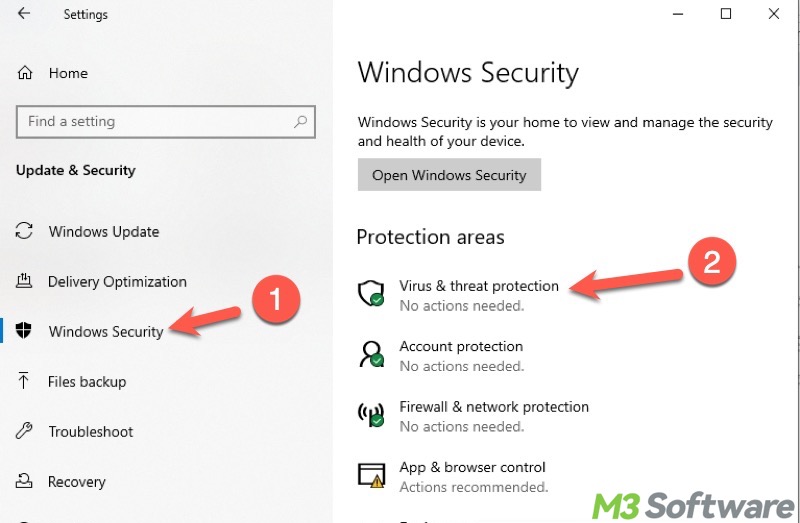
- Open “Settings” on Windows and choose “Update & Security.”
- Choose “Windows Security” and tap on “Virus & threat protection.”
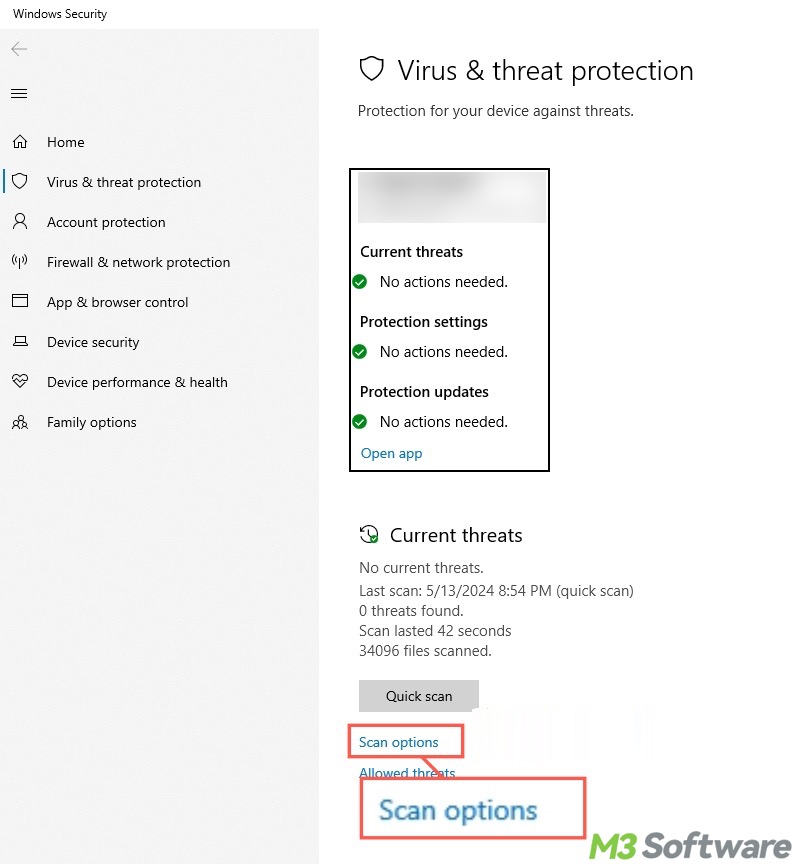
- Scroll down and click “Scan options.”
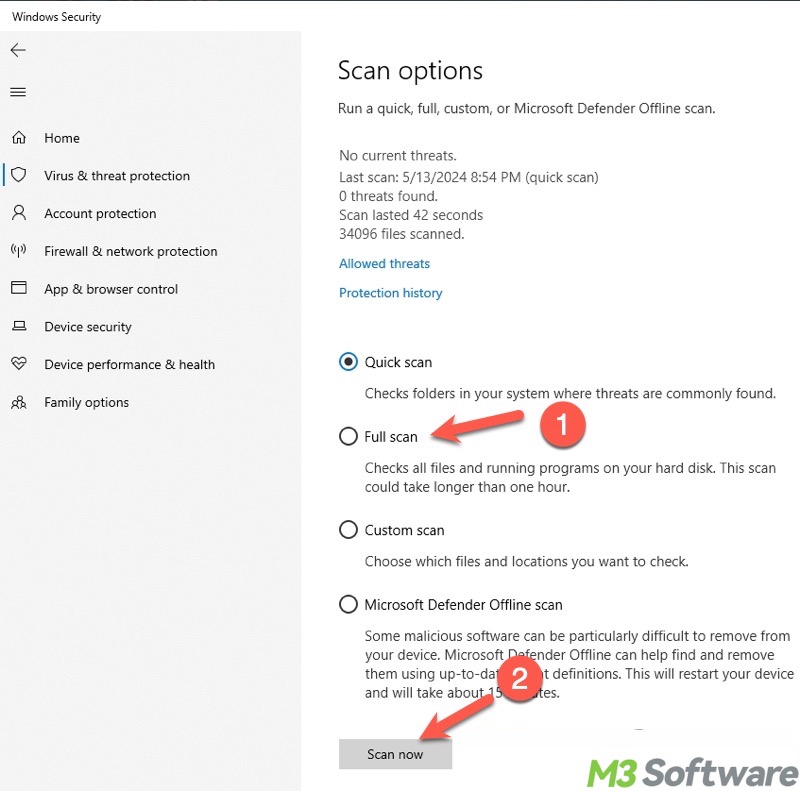
- Choose the scanning mode you want and click “Scan now.”
You can share the post by tapping on the buttons below
FAQs about files disappeared from Desktop
A
Various factors on Windows 10/11 can cause your files to disappear from the Desktop: 1. Windows update or system error. 2. Accidental deletion. 3. You're logged into the incorrect user profile. 4. Files are hidden by the system. 5. Viruses or malware delete or move the files.
A
To check if the files are really gone, you can: 1. Search for files using the search bar in File Explorer. 2. Check the Recycle Bin. 3. Open File Explorer and adjust the settings to let it show hidden items. 4. Ensure you're logged into the correct user profile.
A
To prevent any data loss in the future: 1. Back up files using internal or external tools. 2. Use the sfc /scannow and chkdsk X: /r commands to check and repair disk issues. 3. Use the built-in or specialized tool to scan for viruses or malware. 4. Disable automatic cleanup features or tools.