
Written by
Yuri ZhangSummary: This guide elaborates on creating restore points, restoring Windows PC, and why we might want to complement System Restore with a more robust disk cloning solution - iBoysoft DiskGeeker for Windows.
If your Windows PC starts acting up after a recent driver update, software install, or system tweak, you might wish you could turn back the clock.
That's exactly what System Restore is for — a built-in Windows feature that lets you roll back your system settings and files to an earlier working state without affecting your precious documents or photos. Let's explore creating a restore point, including using command-line options, and restoring our PC with certainty.
Note: A restore point is a snapshot of our system's state, including registry settings, system files, drivers, and installed programs, created at a specific time. It acts like an undo button for major system changes.
How to manually create a restore point on Windows 11/10
Caveat: System Restore must be enabled before any problems occur. You can't rely on it once your PC fails to boot or an issue has already occurred. To set it up effectively, enable it when your system is performing well. Here's how:
Method 1: Create a restore point through Windows System Restore
Keep in mind that Windows System Restore backs up system files, registry settings, installed programs, and Windows configuration, not our private files like documents, photos, or videos.
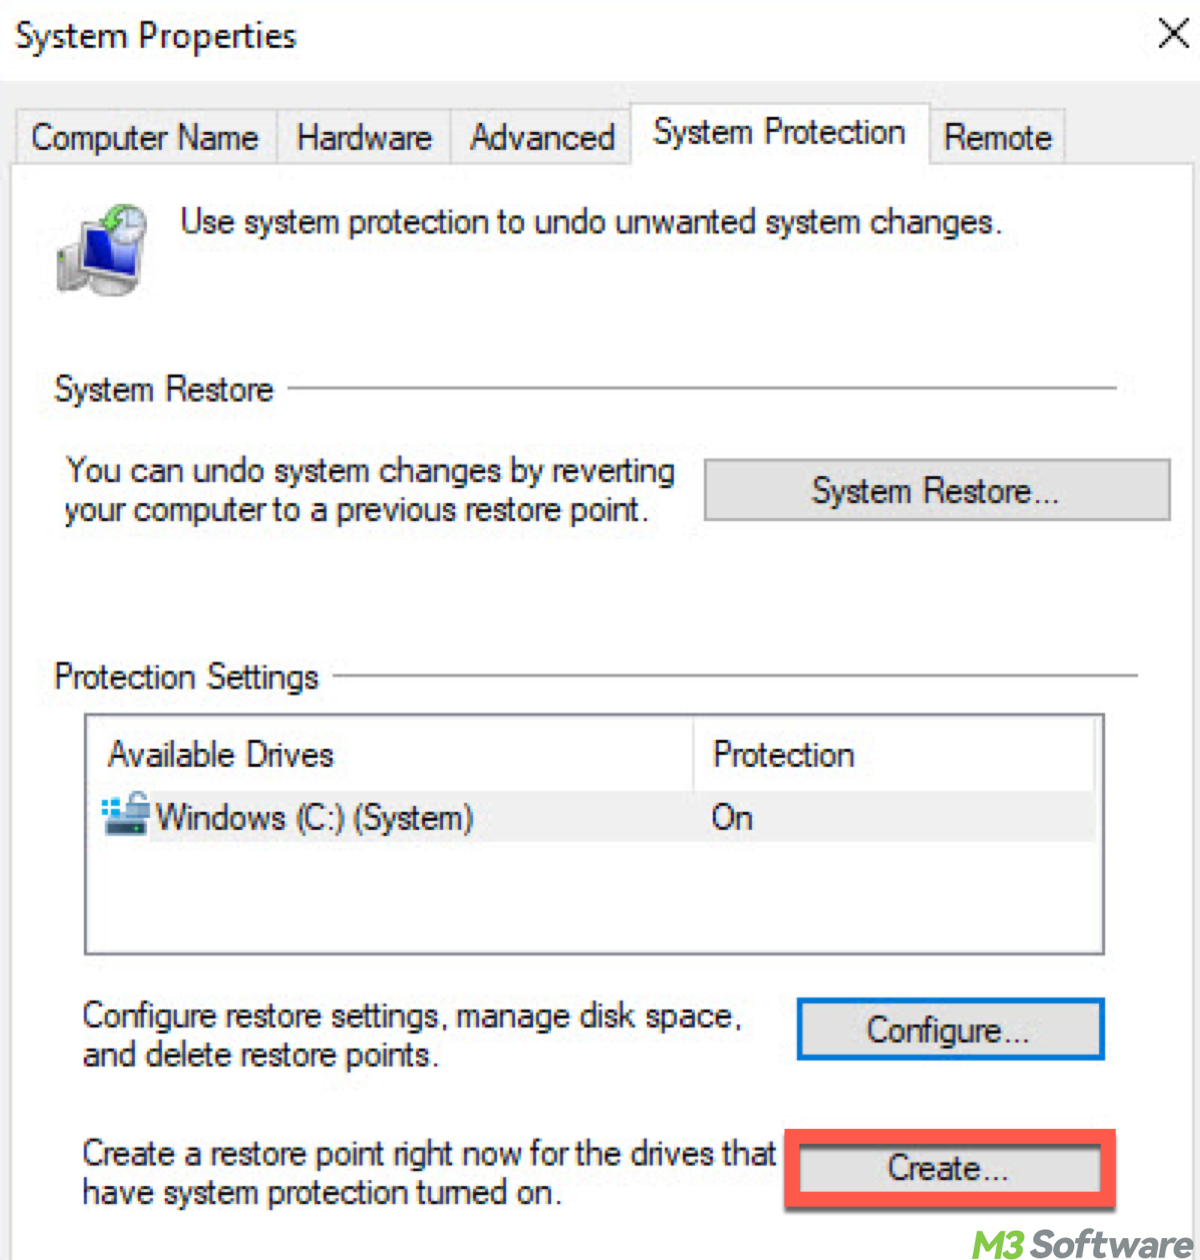
- Press Windows + S, search "System Restore" or "Create a restore point", and hit Enter.
- In the System Protection tab, select your system drive (usually C:), and click Create.
- Give it a name like "Before GPU Driver Update" and click Create.
Method 2: Create a restore point in Windows using Command Prompt
You can create a restore point simply using the following command:
wmic.exe /Namespace:\\root\default Path SystemRestore Call CreateRestorePoint "MyRestore", 100, 7
Each part means the following:
- "MyRestore": The name of the restore point. You can customize this to describe the purpose (e.g., "Before Update").
- 100: The event type, 100 stands for "Application Install", which is commonly used to indicate that an install or major system change is being made.
- 7: The restore point type, which means "Modify Settings", is typically used when system settings are about to change.
These values help Windows categorize the restore point for proper management and cleanup. Similarly, if you choose to use PowerShell, then use this command: Checkpoint-Computer -Description "ManualRestore" -RestorePointType "MODIFY_SETTINGS"
- Description "ManualRestore": Names the restore point; you can customize it to describe the purpose (e.g., "Before Driver Update").
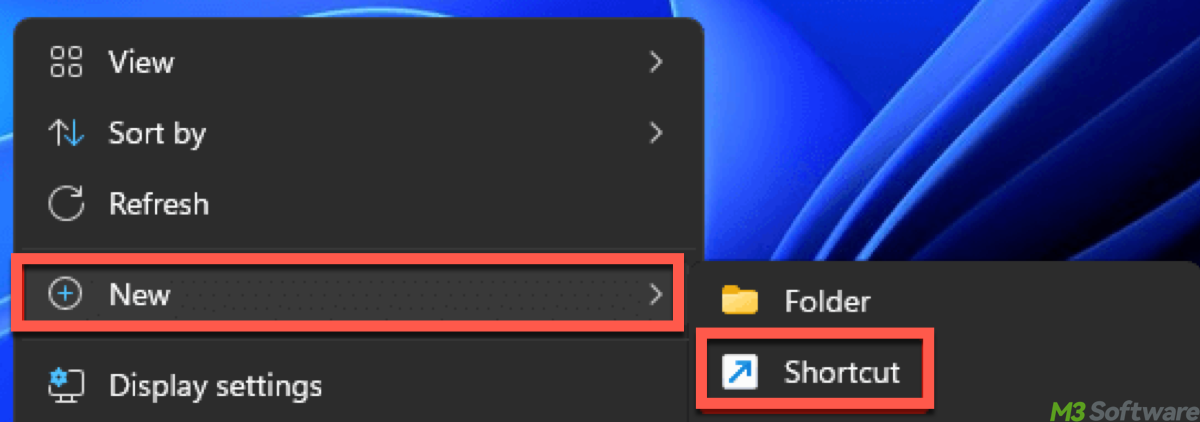
Method 3: Create a shortcut for a one-click restore point
This method creates a one-click shortcut to run the restore point creation command, making it a semi-automatic operation. It's based on the Command Prompt method, but wrapped in a desktop shortcut for convenience.
- Right-click on your desktop > New > Shortcut.
- Paste this in the location box:wmic.exe /Namespace:\\root\default Path SystemRestore Call CreateRestorePoint "QuickRestore", 100, 7
- Name it Create Restore Point, then right-click > Properties > Advanced > check Run as administrator.
You need to run it as an administrator, but you don't have to type the command each time; just double-click the shortcut. Now you can create restore points instantly when needed.
How to restore our Windows PC to an earlier date
After creating a restore point, what can we do to restore our device to the backup status? Here's how:
- Search "Create a restore point" in Start Menu > click System Restore.
- Pick a restore point > click Next > Finish.
- Your PC will restart and roll back to that state.
If Windows won't boot, use Advanced Startup Options (Shift + Restart > Troubleshoot > System Restore).
Note: Can we create a restore point on an external hard drive? The answer is no, System Restore only works on internal system drives. External drives are not eligible for protection due to performance. If you truly need it, use a System Image Backup (Control Panel > Backup and Restore) or iBoysoft DiskGeeker for Windows to back up to external storage.
Share these practical guides and continue to see more almighty ways for restoration.
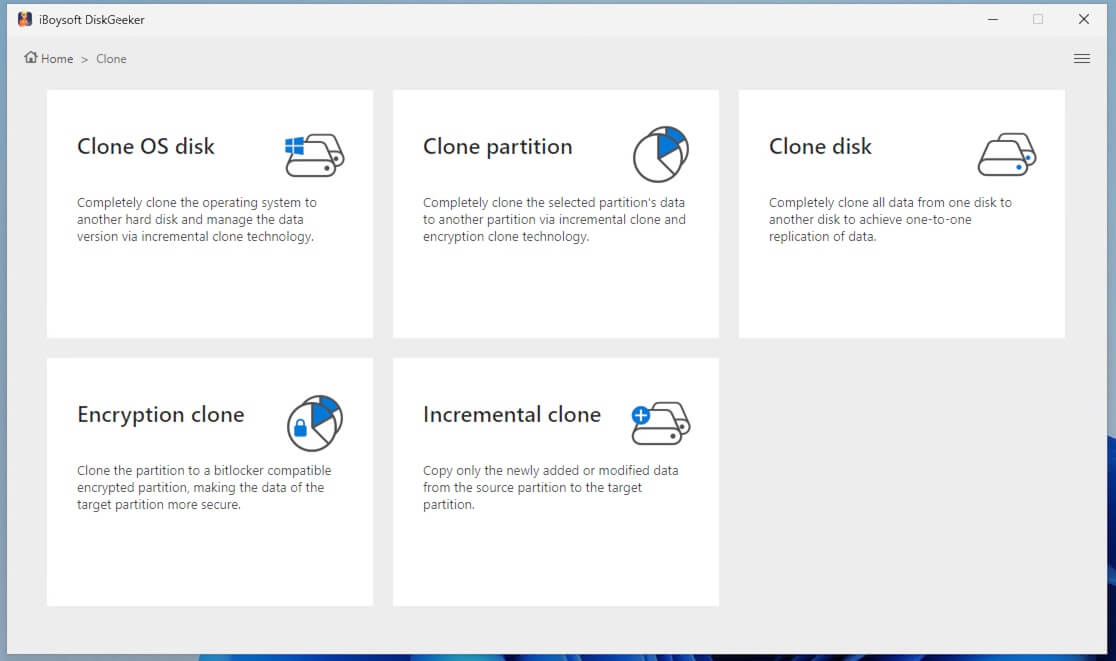
Bonus: Use cloning of iBoysoft DiskGeeker for Windows
System Restore is great for rolling back recent system changes, but it doesn't protect against hardware failures, complete system corruption, or malware.
For full system safety, consider using iBoysoft DiskGeeker's Clone function — a professional tool to clone your entire system drive bit-by-bit to an external disk or drive. It quickly restores your PC to a fully working state, including OS, applications, and files. You can back up partitions or whole disks with ease.
Tutorial to clone an OS disk via iBoysoft DiskGeeker
This is to help you make a bootable system copy on a hard drive for system migration, storage device upgrade, or system file backup.
Step 1: Download and launch the iBoysoft DiskGeeker for Windows.
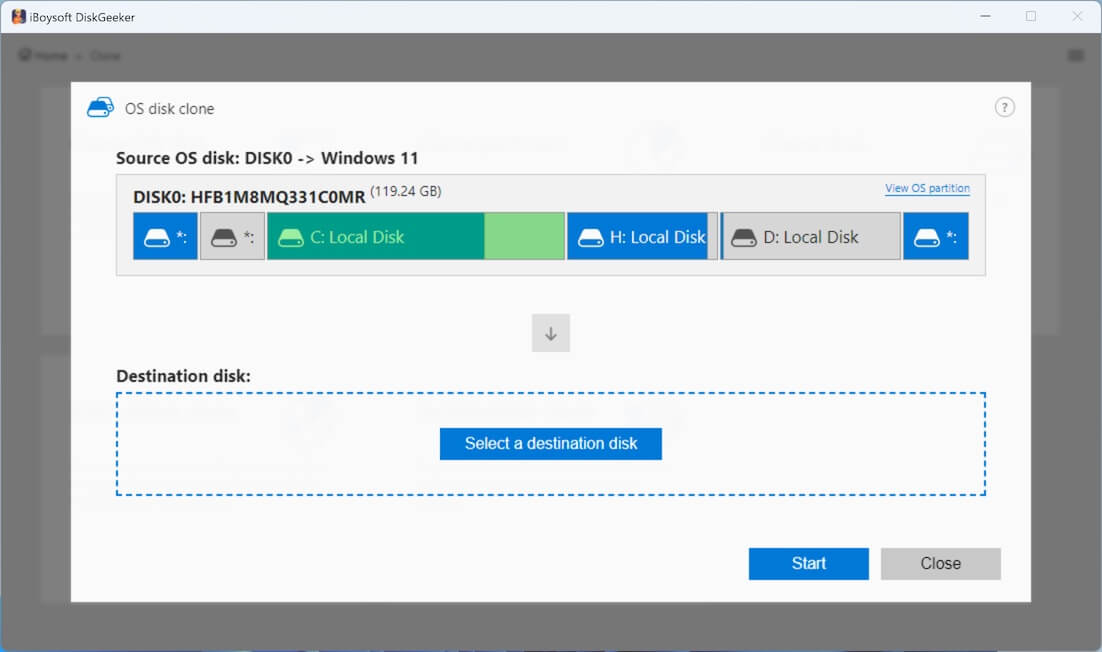
Step 2: Click "Clone OS disk" from the Clone module.
Step 3: Check the source disk from the Source OS disk section.
(In the Source OS disk section, the software will automatically list the system partition it found and also show the system version and the partition condition.)
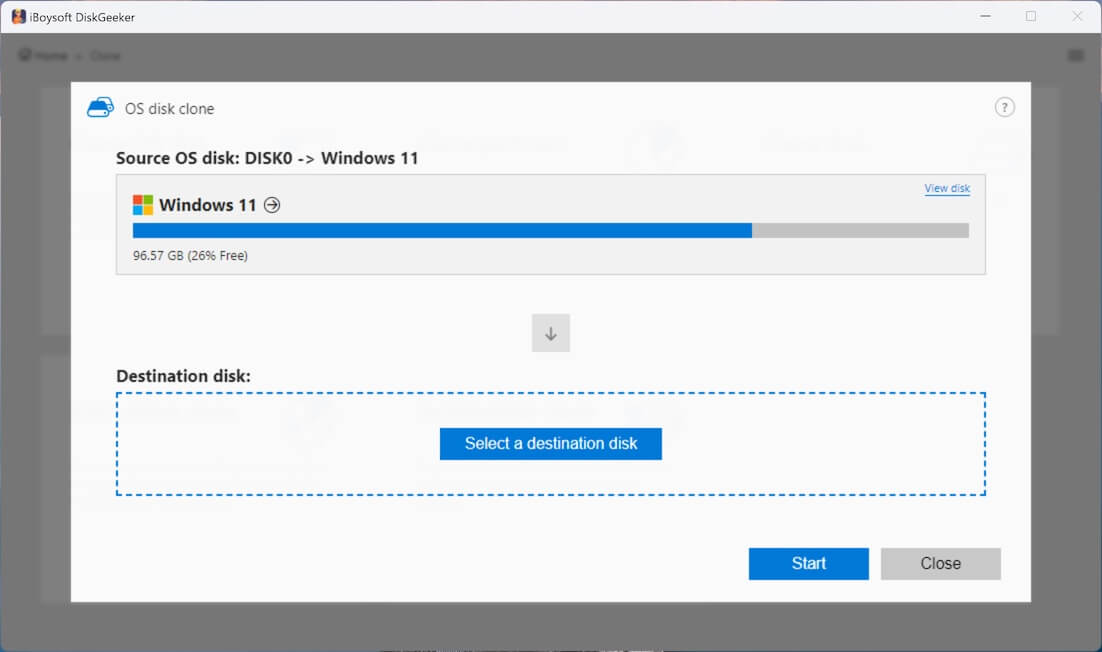
You can click "View disk" above to check the distribution of the disk where the system partition resides. To verify if the system partition is selected correctly, the selected system partition will be marked green.
Step 4: To choose an external drive as the destination disk, hover over the "Select a destination disk" button, and you'll see a list of available target disks.
Tips: The storage capacity of the destination disk must be larger than the source disk. For example, the source disk is 200GB, so the destination disk must be larger than 200 GB.
Step 5: Confirm if you have chosen the right destination disk and have backed up data on it, and then click "Start" > "Confirm."
Step 6: Wait for the cloning process to complete.
Tutorial to incremental-clone a partition (automatic backup for NTFS partitions)
The exclusive incremental clone feature syncs the inconsistent parts of the data between the source partition and the target partition, which saves a lot of time consumed by full disk cloning.
Step 1: Select "Incremental clone" from the Clone module.
Step 2: Choose the source partition.
Step 3: Hover over the Target partition area to select your destination partition.
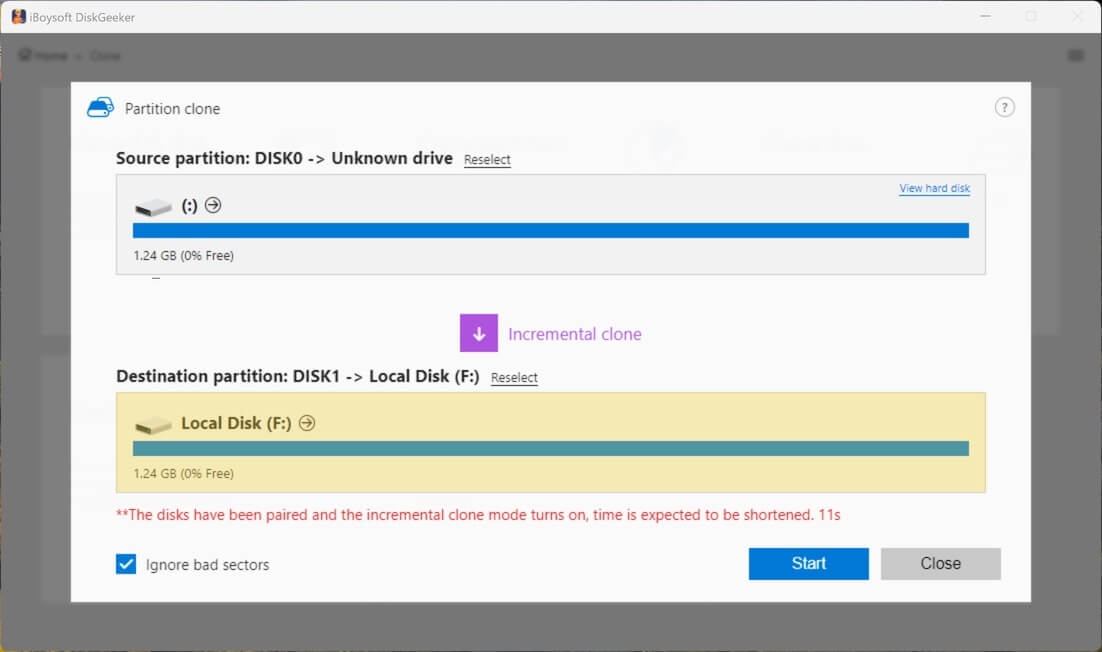
(Tick "Ignore bad sectors" if you want to bypass the possible bad sectors on the source partition.)
Step 4: Click "Start" and make a confirmation, and wait for the incremental clone to complete.
Tutorial to clone a full disk utilizing iBoysoft DiskGeeker
Disk clone makes an exact copy of all partition information and data on each partition on the target disk to a destination disk with the same sectors.
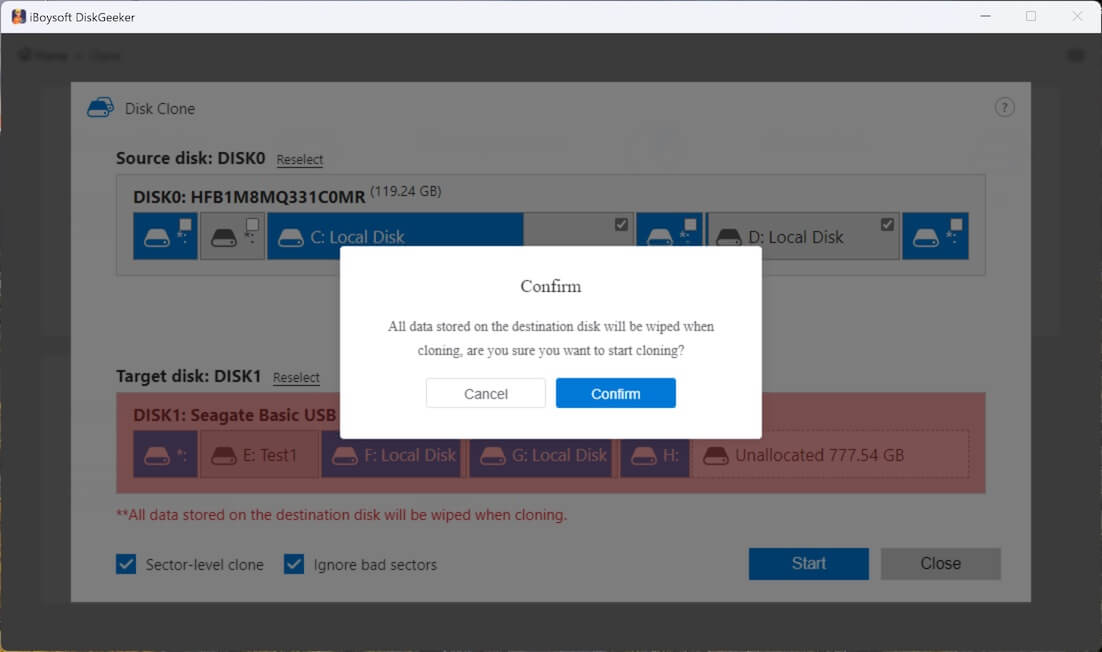
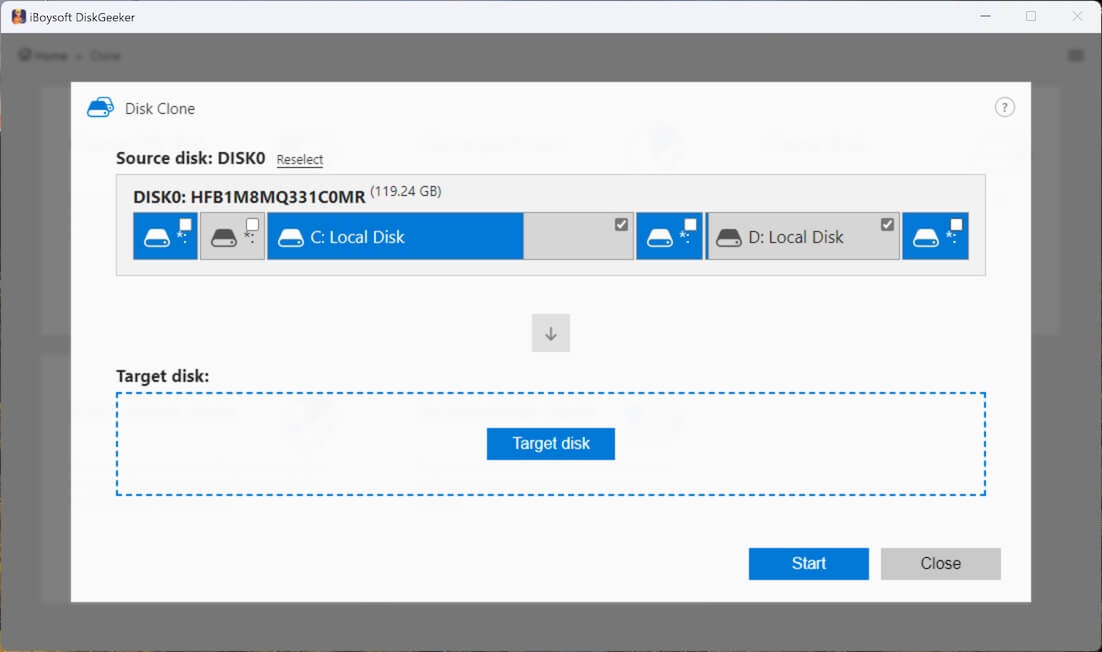
Step 1: Click "Clone disk" from the Clone module.
Step 2: Click "Source disk" to choose the source disk from the list.

(The selected source disk will be listed in the Source disk section. If you want to change the source disk, click the Reselect button for a change. Also, there is a selection button on each partition of the disk. You can uncheck those you don't want to clone.)
Note: You'll see the confirmation message if you choose a hard drive containing the Windows OS. If you need to clone an OS disk as a bootable system disk, click Yes to switch to the OS disk clone mode. If not, click No to continue.
Step 3: Hover your cursor on "Target disk" to select the destination disk. (The storage capacity of the target disk must be larger than the source disk.)
Step 4: Confirm the target disk and your settings.
(If you want to make a 1:1 copy of the source disk rather than only copy the files, check "Sector-level clone." If you don't want the bad sectors on the source disk to interrupt the cloning process, choose "Ignore bad sectors.")
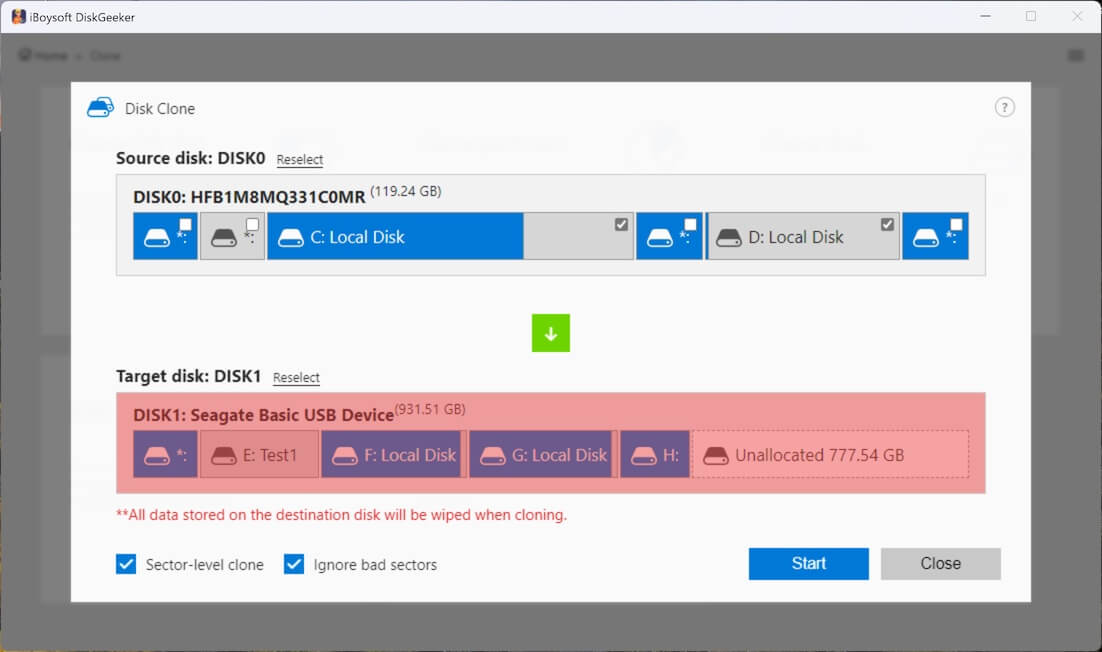
Step 5: Click "Start" > "Confirm" to start a disk clone.
Step 6: Wait for the disk clone to finish.
Final thought
Whether you're proactively creating restore points, rolling back from a system issue, or crafting a quick shortcut for future changes, System Restore is a valuable Windows safeguard.
Just remember: Enable System Protection on your system drive, create restore points before major changes, and consider full image backups with iBoysoft DiskGeeker for deeper protection.
Want help recovering from a failed system restore? Share these, and I'm always here to help with steps.
A
No, System Restore Points can only be created on internal system drives where System Protection is enabled. For backing up to an external drive, consider using a system image backup or disk cloning tool, iBoysoft DiskGeeker for Windows.
A
Yes, System Restore is safe to use. It only affects system files, settings, and installed programs, but it does not delete your personal documents, photos, or other files.
A
Typically no. Safe Mode disables System Protection by default, so you usually cannot create restore points there. It’s best to create restore points in normal mode before booting into Safe Mode for troubleshooting.