
Written by
Yuri ZhangWhether it is out of the harassment by pop-up upgrade notifications or the radical transformation in usage habits that comes with OS upgrades, more people often choose to ignore or close the related reminder.
When the notifications get more frequent, we should master how to prevent automatic upgrades to Windows 11 or lower versions. Extensive information also can be traced in m3datarecovery. Now let's swim into the clear guide down below.
Tips: When you are ready to upgrade your PC, you can download Windows 11 25H2, 24H2, 23H2, 22H2, or 21H2 ISO file directly and run the installer any time you want.
Using Windows Update Settings to pause the upgrade
Windows 11 introduces a new user interface, including changes to the Start Menu, taskbar, and overall design. Users comfortable with the Windows 10 interface might find these changes disruptive and they can prevent the upgrade in Settings.
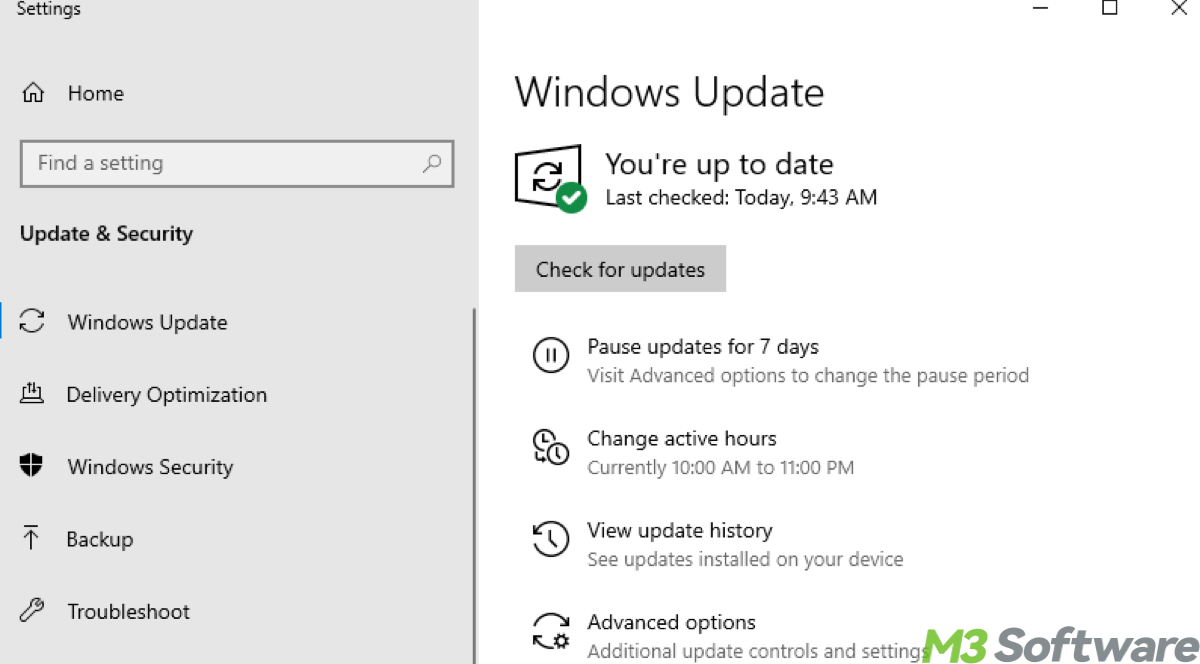
- Go to Settings by pressing Win + I.
- Navigate to Update & Security > Windows Update.
- Click on Advanced options.
- Under "Pause updates," select a date to temporarily pause updates (up to 35 days).
- For more permanent control, set your active hours and adjust restart options to prevent unexpected updates during those times.
Prevent automatic upgrade via metered connection Setting
Metered connection Setting allows users to schedule updates during off-peak hours or when it's convenient for them, reducing the likelihood of updates disrupting productivity or causing inconvenience.
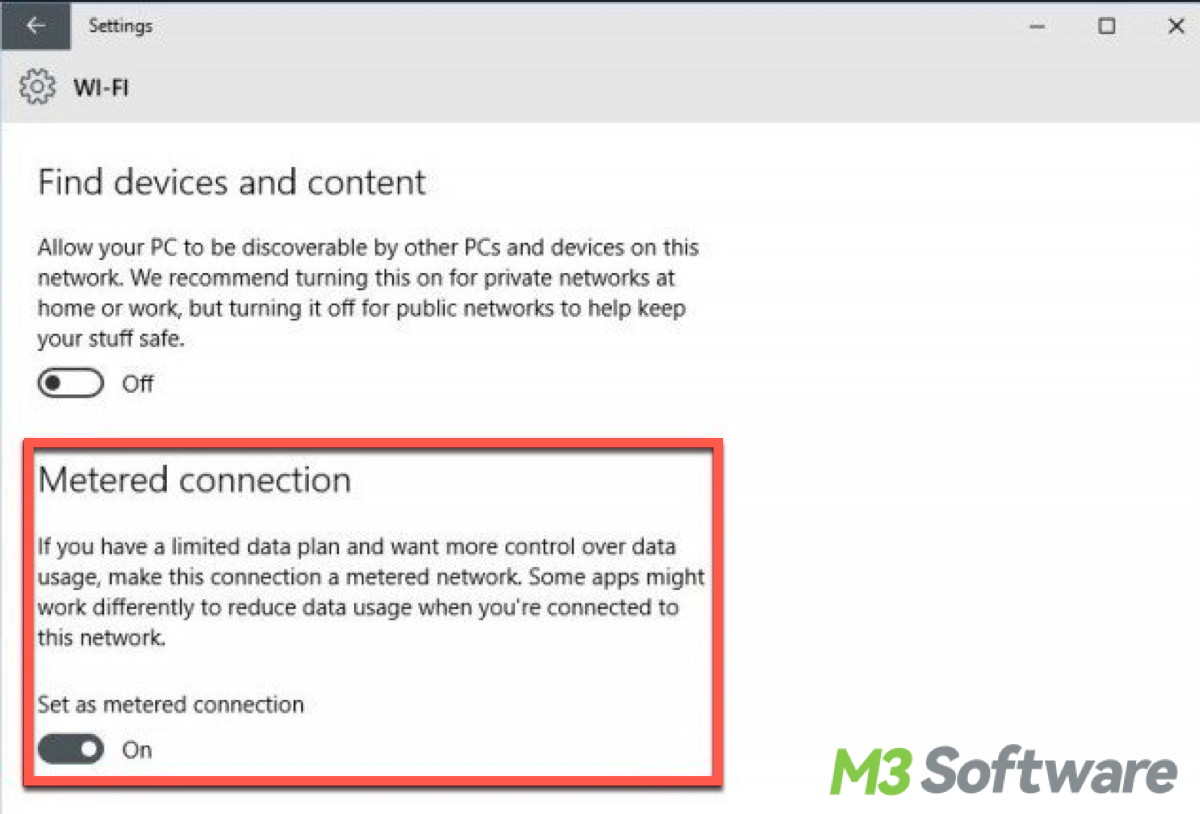
- Go to Settings by pressing Win + I.
- Navigate to Network & Internet > Wi-Fi.
- Click on your connected network.
- Toggle on the option Set as metered connection.
Note: This method tricks Windows into thinking your internet connection is limited, thereby preventing large updates from downloading automatically.
Disable Windows Update Service (not recommended for long-term use)
It's important to find a balance between ensuring system security of the new system and stability and minimizing disruption of the old system. Instead of disabling updates entirely, you can schedule them for times when they're least likely to impact your work.
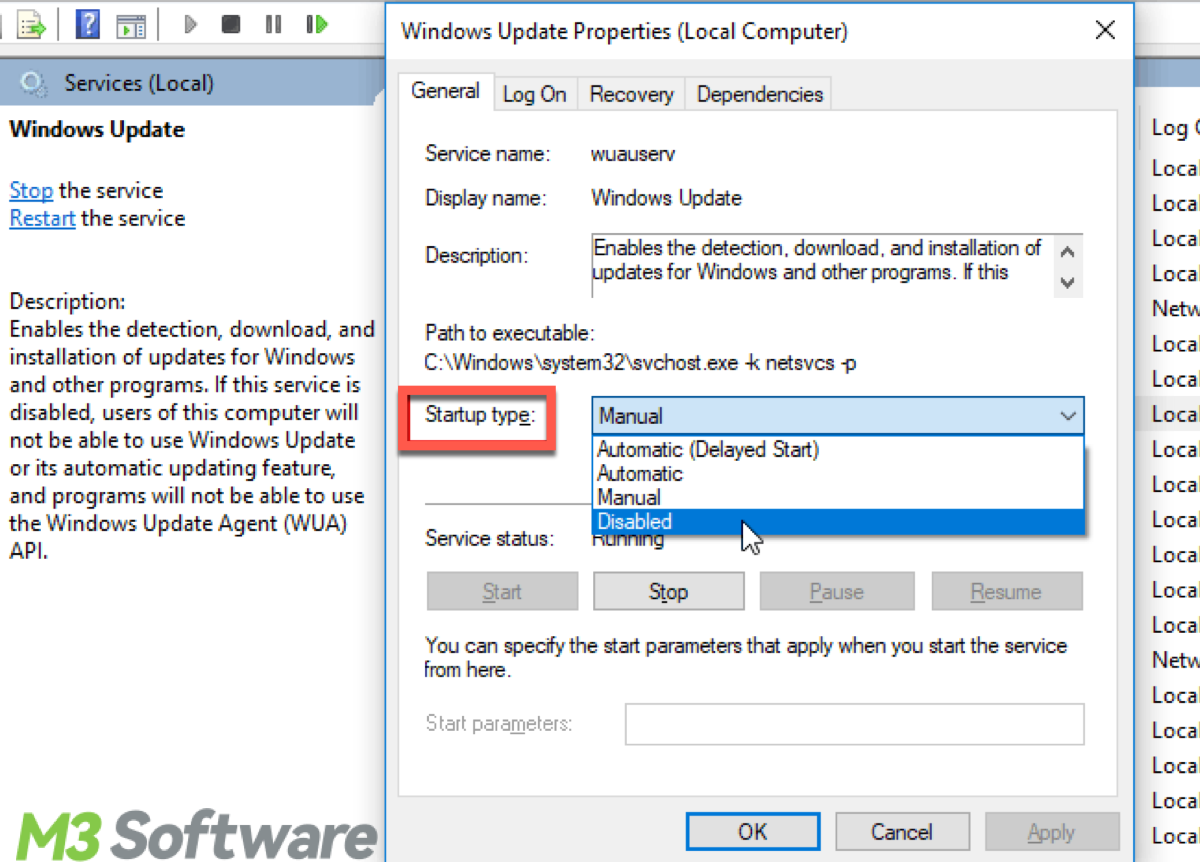
- Press Win + R to open the Run dialog box.
- Type services.msc and press Enter.
- Scroll down to find "Windows Update" and double-click it.
- Set the "Startup type" to Disabled.
- Click "Stop" if the service is running, then click "Apply" and "OK."
Share this knowledge to add acquisition
Using Third-Party Tools to block the upgrade
New operating systems often encounter bugs and issues that get resolved over time. Waiting allows for these initial problems to be addressed in subsequent updates. There are third-party tools designed to manage Windows updates and prevent automatic upgrades. One popular tool is the "Windows Update Blocker."
Tips: Download and run the tool from a trusted source. Be cautious with third-party tools and ensure they are from reputable sources to avoid malware.
Utilizing Registry Editor (advanced)
Upgrading to Windows 11 might necessitate hardware upgrades or purchasing new devices, leading to additional costs. With Registry Editor, upgrade prevention can be achieved, too.
- Press Win + R to open the Run dialog box.
- Type regedit and press Enter to open the Registry Editor.
- Navigate to the following path: HKEY_LOCAL_MACHINE\SOFTWARE\Policies\Microsoft\Windows\WindowsUpdate
- If the WindowsUpdate key does not exist, right-click on the Windows key, select New -> Key, and name it WindowsUpdate.
- Right-click on the WindowsUpdate key, select New > DWORD (32-bit) Value, and name it TargetReleaseVersion.
- Double-click TargetReleaseVersion, set the value to 1, and click "OK" .
- Right-click again on the WindowsUpdate key, select New > String Value, and name it TargetReleaseVersionInfo.
- Double-click TargetReleaseVersionInfo, set the value to 21H2 (or the version you want to stay on), and click "OK".
Utilizing Group Policy Editor to halt Windows 11 upgrade (advanced)
Windows 11 has stricter hardware requirements, including the need for TPM 2.0, Secure Boot, and newer processors. Many older PCs might lead to incompatibility or the inability to upgrade without hardware changes. Group Policy Editor is for Windows Pro, Enterprise, and Education editions.
- Press Win + R to open the Run dialog box.
- Type gpedit.msc and press Enter to open the Group Policy Editor.
- Navigate to the following path: Computer Configuration -> Administrative Templates -> Windows Components -> Windows Update -> Windows Update for Business.
- Double-click on "Select the target Feature Update version".
- Set it to "Enabled".
- In the "Options" box, enter the value 21H2 (or the version of Windows 10 you want to stay on).
- Click "Apply" and then "OK."
Final tips
Windows 10 has been around since 2015 and has received numerous updates and patches, making it a stable and mature operating system. While Windows 11 brings new features and improvements, it might not be the best choice for everyone. By staying on Windows 10, users can benefit from a familiar, stable, and compatible environment. Each user's situation is unique, and the decision should be based on individual needs, hardware, and use cases.
If you plan to reinstall Windows 10 or try a different edition, check out the following resources:
Share and practice this know-how for your good.