Written by
Wilsey Young"Windows 11 24H2 will enable BitLocker encryption for everyone!" This message has caused much confusion and worry to most Windows users, especially to those who have never done anything with this feature. Starting with Windows 11 24H2, BitLocker encryption will be automatically enabled for new and clean installations, in a bid to enhance the security of normal users.
What is BitLocker encryption on Windows? Is it good or bad to let Windows enable BitLocker automatically on your PC starting with Windows 11 24H2? Does BitLocker have any impact on your PC? How can we avoid this automatic BitLocker encryption?
In this post, we will briefly explain what BitLocker encryption is and discuss the corresponding questions about automatic BitLocker encryption in Windows 11 24H2.
You can click the buttons below to share this post!
Reddit discussions on Windows 11 24H2 BitLocker auto encryption
There are heated discussions about automatic BitLocker encryption in Windows 11 24H2 in the following Reddit post, where people share their experiences with this issue and the possible solutions. The potential reasons why Windows 11 24H2 enables BitLocker by default are also being discussed. You can check the post below for more details.
Windows 11 24H2 will enable BitLocker encryption for everyone — happens on both clean installs and reinstalls
by u/ardi62 in Windows11
What is BitLocker encryption on Windows?
BitLocker is a full-disk encryption feature included with Windows operating systems(except for Windows Home Editions). By encrypting the entire volumes on your hard drive, BitLocker can help protect your precious data stored on the disk against unauthorized access or data theft.
Is it good or bad to let Windows enable BitLocker automatically on PC?
That BitLocker encryption is enabled automatically for everyone starting with Windows 11 24H2 is controversial, and many Windows users wonder if it is good or bad to let this type of encryption feature activate by default.
To a certain extent, BitLocker is undoubtedly a useful built-in feature for most Windows users who are much worried about data leaks and data loss due to unauthorized access, especially when the computer is lost, stolen, or improperly decommissioned.
However, data loss is what has to happen if you didn't realize that the BitLocker encryption had been enabled automatically during the clean installs of Windows 11 24H2 and system upgrades to version 24H2. This means that you won't be able to access the BitLocker encrypted drive content if you forget about backing up the BitLocker recovery key as Windows requires during reinstallation.
On top of that, it has been proved that turning on the BitLocker encryption feature may have much impact on your PC's system and SSD(solid-state drive) performance. According to the latest comparison test conducted by bloggers and geeks, the maximum reduction of SSD performance when BitLocker is enabled can reach 45%.
As a side note, the impact the enabled BitLocker has on your PC performance may vary based on disk quality, disk performance, processed tasks, workload, etc.
Does BitLocker impact your PC performance? You can refer to this article for more details: Does BitLocker Slow Down PC? With Read and Write Speed Test!
How to disable Windows 11 24H2's automatic BitLocker encryption?
Fortunately, disabling automatic BitLocker encryption during a clean install of Windows 11 24H2 is as easy as ABC, and here's how:
Use Registry Editor to prevent automatic BitLocker encryption during Windows 11 24H2
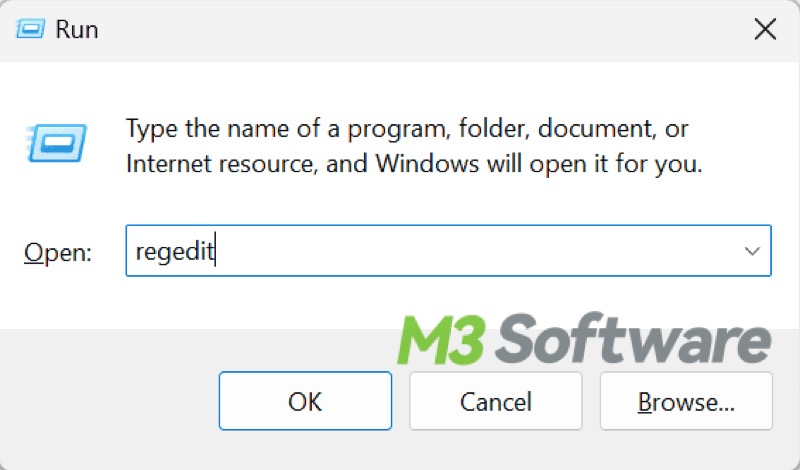
- Press the Windows+R keys to open the "Run dialog box."
- Type "regedit" in the box and hit the "Enter" key on your keyboard.
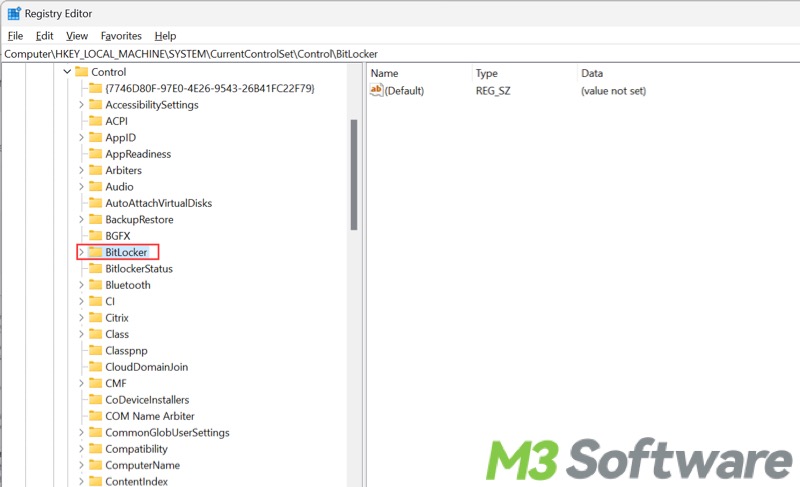
- Follow the path: HKEY_LOCAL_MACHINE\SYSTEM\CurrentControlSet\Control\BitLocker.
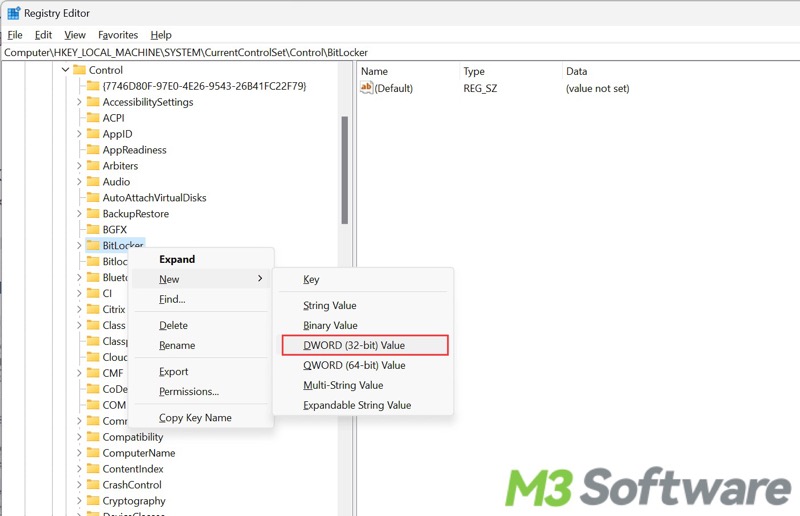
- Right-click on the "BitLocker" folder, move the mouse cursor to "New", and Choose "DWORD (32-bit) Value"
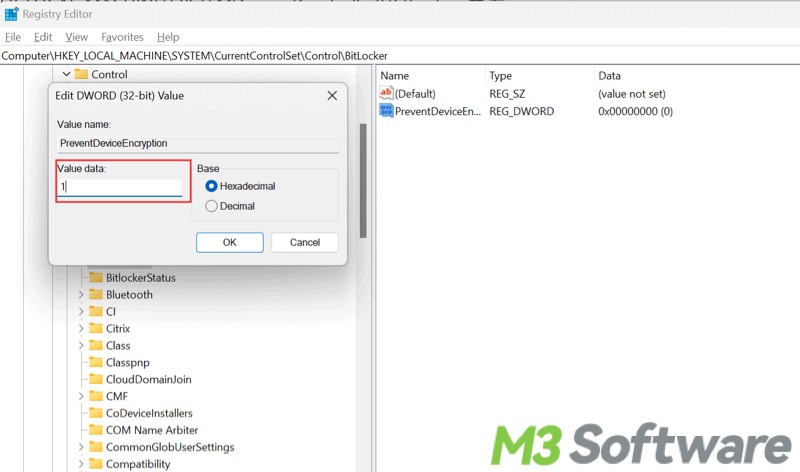
- Rename it as "PreventDeviceEncryption" (Note: No gap among words).
- Double-click the newly created “PreventDeviceEncryption” on the right and set the value data to 1.
Modify Windows 11 image to prevent automatic BitLocker encryption during Windows 11 24H2
Modifying the Windows 11 IOS image is another simple way to prevent BitLocker from being automatically enabled during Windows 11 reinstallation. The Rufus application is what you need to modify the ISO.
- Download Rufus from the official website.
- Download the Windows 11 24H2 image from the official website.
- Insert a USB flash drive into your PC's USB port.
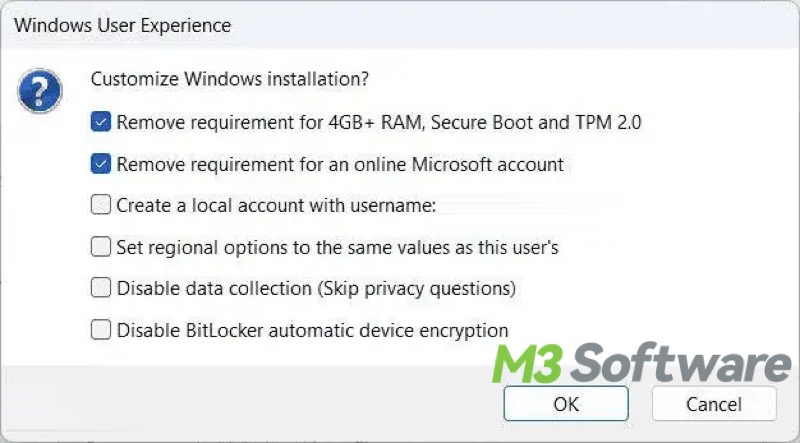
- Select the Windows 11 24H2 image and click Start. You will be prompted to the Windows User Experience window.
- Tick the checkbox of “Disable BitLocker automatic device encryption.”
- When the bootable drive is created, you can start installing Windows 11 on your PC.
Bonus Tips: How to turn off BitLocker on Windows
Windows 11 24H2 enables BitLocker by default, so you can follow the steps below to check BitLocker's status and turn off BitLocker if you want to.
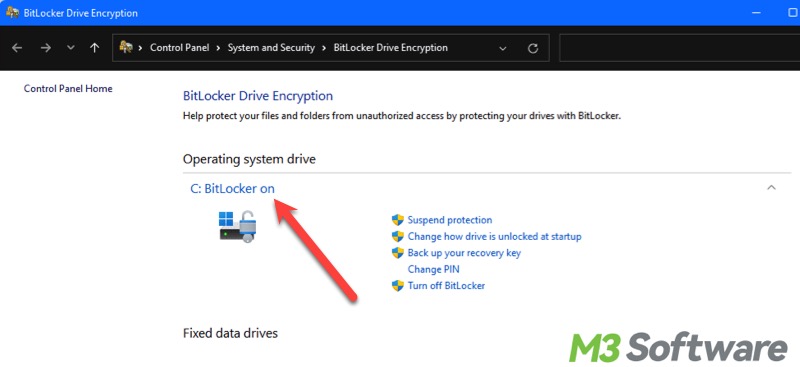
First of all, you need to check BitLocker status via the Control Panel to make sure whether the BitLocker has been enabled or not:
- Type “Control Panel” in the Windows search bar and open it.
- Go to “System and Security > BitLocker Drive Encryption."
- All the BitLocker encrypted drives are listed in this pane. If the BitLocker encryption is enabled, it will show “BitLocker On”. Otherwise, it shows “BitLocker off.”
You can refer to this article for more convenient ways to check BitLocker's status: 5 Best Ways to Check BitLocker Status on Windows!
Turn off BitLocker via the Control Panel
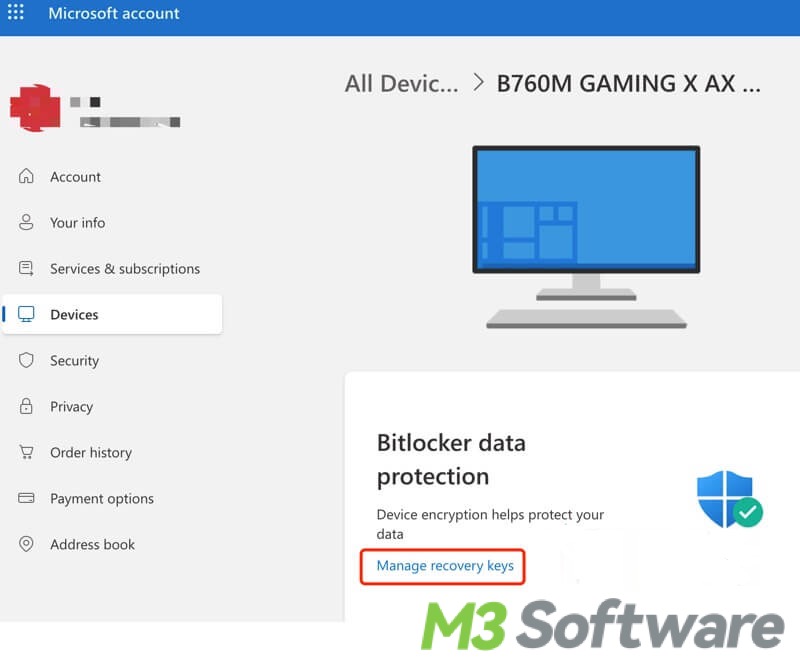
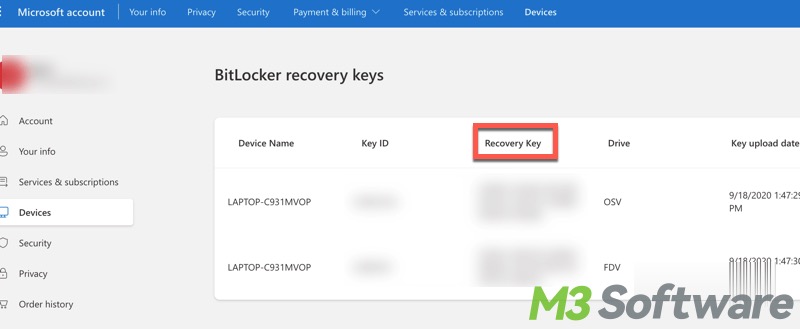
After checking the BitLocker status in the Control Panel, you can also turn off BitLocker on the same page. Prior to this, you need to sign into your Microsoft account to find the BitLocker recovery key, which is used to unlock or turn off BitLocker, and automatically saved to your Microsoft account when BitLocker is enabled.
- Sign in to your Microsoft account.
- Tap on “Devices” from the left side panel, find your device, click “Info & support”, and click “Manage recovery keys.”
- The BitLocker recovery keys will be listed.
- Open Control Panel > System and Security > BitLocker Drive Encryption
- Locate the encrypted drive and click “Turn off BitLocker.”
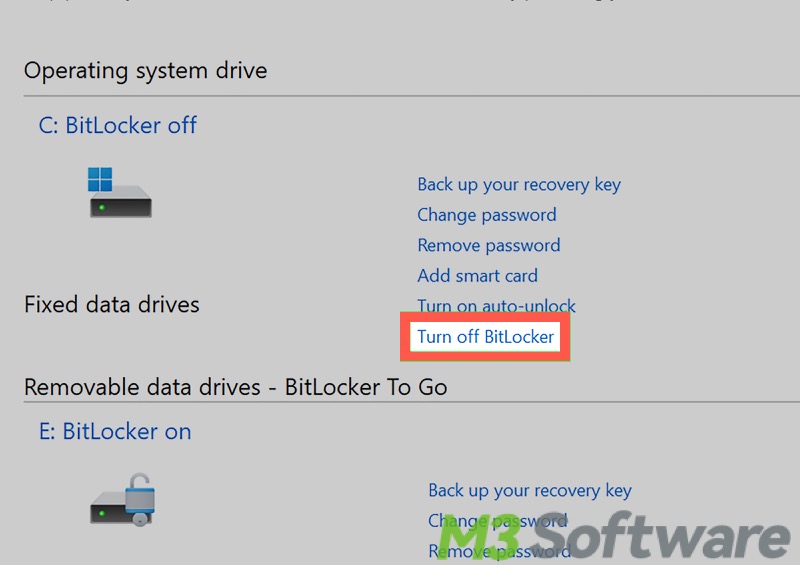
- Input the recovery key to turn it off.
In addition, you can disable BitLocker via File Explorer, Command Prompt, and PowerShell. Check this post for more details: How to Disable BitLocker Encryption in Different Ways?
You can share this post and tell your friends what happens to BitLocker encryption in Windows 11 24H2.
