
Written by
Yuri ZhangSummary: This post illustrates the unallocated partition's disadvantages and solutions if you want to use it as a normal partition on Windows.
Unallocated space lacks a file system (e.g., NTFS, FAT32), so it can't store data or be accessed by the operating system until partitioned and formatted. It isn't mounted or assigned a drive letter, making it invisible in file explorers. However, it can be seen in disk management tools.
Confused about what it is and what to do with it? Let's dive into the unallocated partition's characteristics and practical ways to handle it.
What is an unallocated partition?
An unallocated partition refers to a portion of a storage device (such as a hard disk drive or solid-state drive) that is not assigned to any partition or volume. This space is not formatted with a file system and is therefore unusable by the operating system for data storage until it is allocated and formatted.
Improper cloning or migration of disk data can also leave portions of the disk unallocated. More commonly, reducing the size of an existing partition can create unallocated space adjacent to it. Unallocated space can arise when a partition is deleted, corrupted, or when a new disk is initialized but not partitioned.
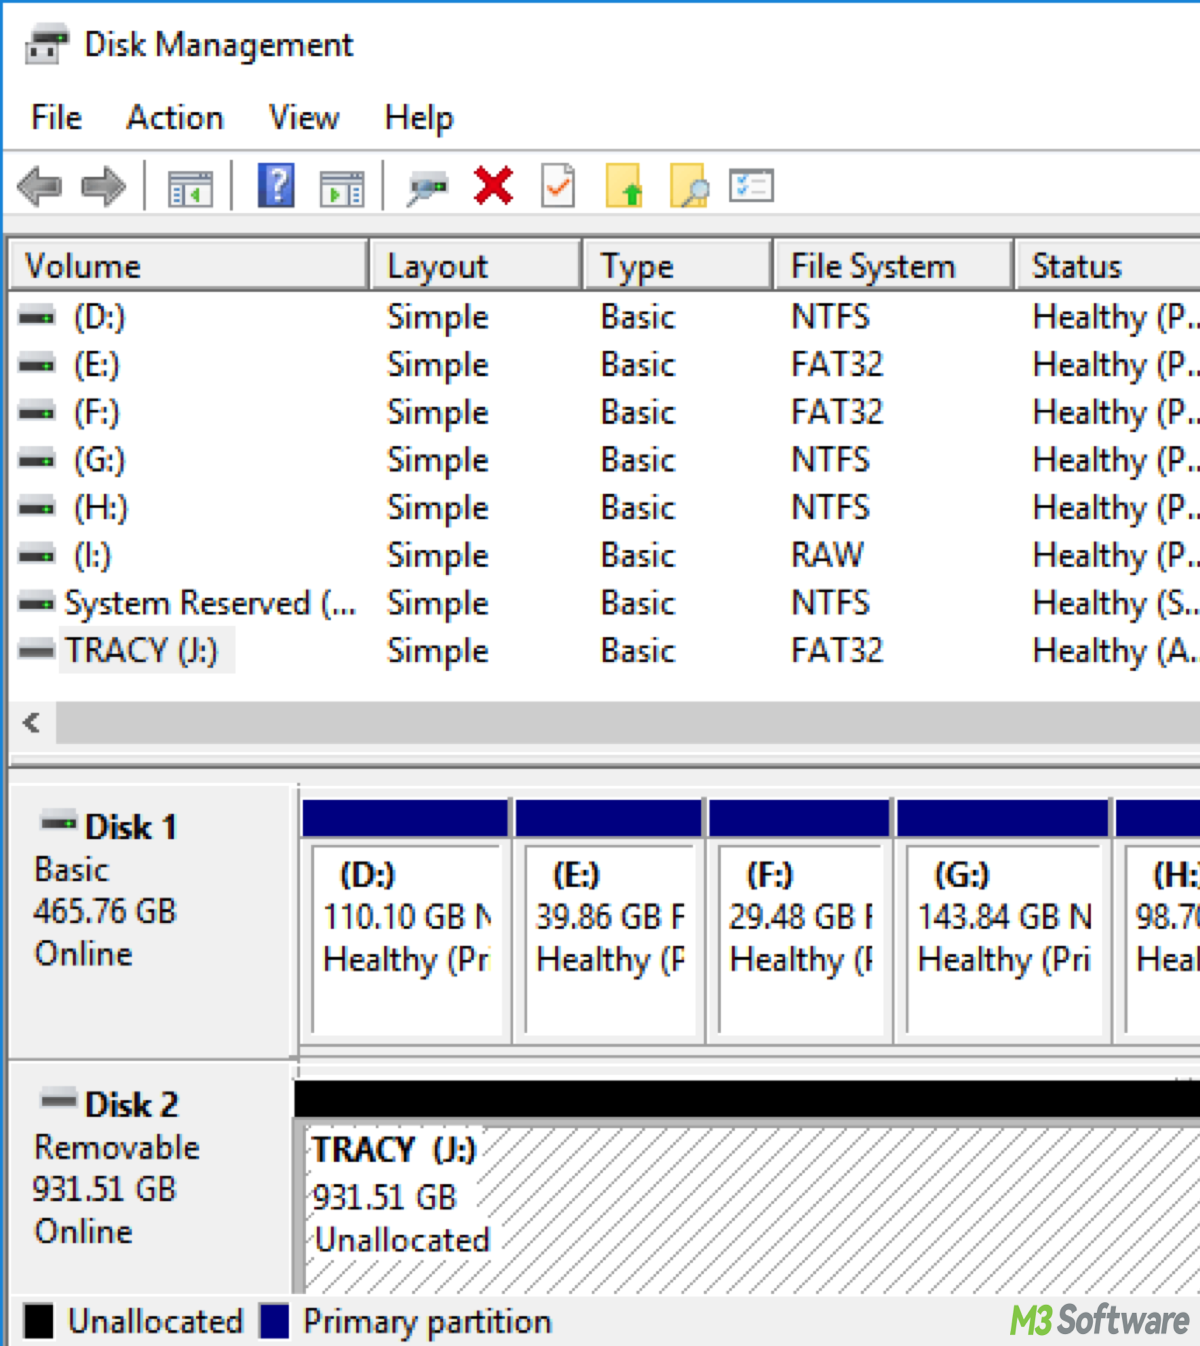
It appears in disk management utilities as free space that is not part of any existing partition. The operating system typically displays unallocated space with a black bar in graphical disk management tools like Windows Disk Management.
Issues of unallocated partitions:
- Unallocated partition not showing: Sometimes, unallocated space may not be visible in certain command-line utilities like DiskPart due to partition table corruption or hardware recognition issues.
- Unable to extend the partition: The inability to extend a partition using unallocated space can be due to the space being non-adjacent or blocked by recovery partitions.
- Unallocated partition not formatting: This may indicate disk write-protection, hardware errors, or corrupted sectors.
Share these insights and keep reading about how we can utilize the unallocated partition.
Management and solutions to an unallocated partition
There are comprehensive measures to tackle unallocated partitions for all Windows users.
Creating a new partition
Unallocated space on a Windows disk can be turned into a usable partition by creating a new simple volume. Here are detailed steps:
- Press Win + X.
- Click Disk Management.
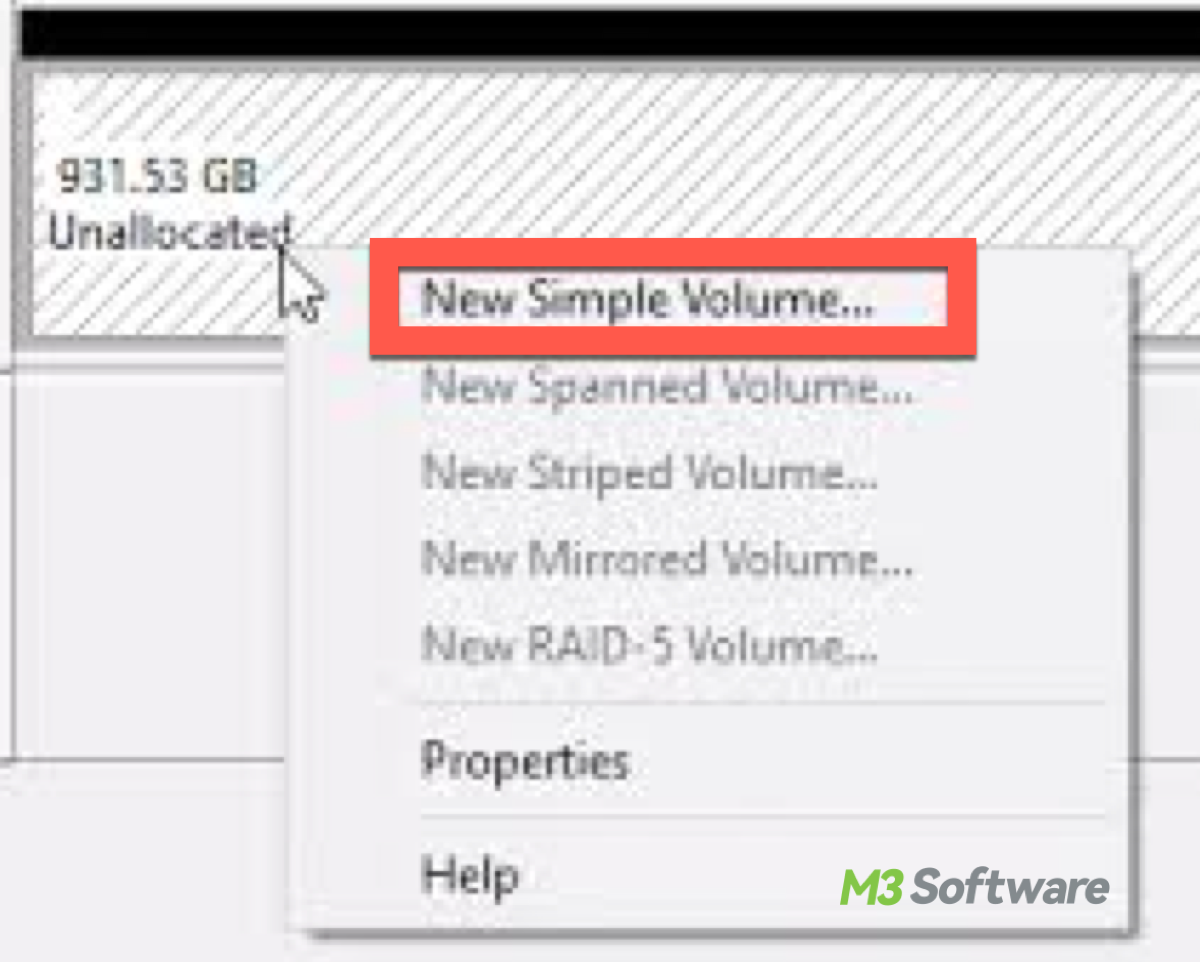
- Locate the unallocated space (black bar).
- Right-click it, then choose "New Simple Volume".
- Follow the new simple volume wizard: Set the volume size/ Assign a drive letter (e.g., D:)/ Choose a file system (NTFS is recommended for Windows)/ Complete the format and finish.
In the end, the space becomes a new partition ready to use in File Explorer.
Extending existing partitions
Windows allows us to extend an existing partition into adjacent unallocated space. Steps:
- Open Disk Management.
- Right-click the partition you want to expand (e.g., C:).
- Click "Extend Volume".
- The wizard will appear. Select the unallocated space.
- Click Next and Finish.
If “Extend Volume” is greyed out, it means the unallocated space is likely not adjacent or blocked by another partition (e.g., Recovery). In that case, use a third-party tool such as MiniTool Partition Wizard or AOMEI Partition Assistant to move or merge partitions.
Summary
An unallocated partition is disk space that is not assigned to any partition or formatted with a file system. It is unusable until a partition is created and formatted. Unallocated space can arise naturally during disk management operations or due to errors. Managing unallocated space requires proper tools and understanding of disk partition schemes. With appropriate steps, unallocated space can be reclaimed for productive use.
Share this article if you think it is beneficial.