
Written by
Yuri ZhangSummary: This post clarifies a detailed knack on how to downgrade to Windows 10 with special attention to data security and vital precautions. And you can capture more essence at a glance in m3datarecovery.
Why opt for the downgrade? Many PC users react critically that Windows 11 now is not mature enough, including security updates, compatibility, and user interface. We have so many fellow suffers in any forums and there are actual examples of PC users.
It is claimed that the issue starts with File Explorer, and then gets stuck everywhere as of using the right-click menu to rename or create a file so restarts have to be forced so often. Some documents in the Office always load into the empty display, reloading must be operated.
Even several reinstallations cannot solve the above issues. after the downgrade, the system goes smoothly. For your information, there is a table to showcase the contrast of Windows 10 and Windows 11:
| Feature | Windows 10 | Windows 11 |
| Download (Latest to oldest updates) | Windows 10 Download | Windows 11 Download |
| Start Menu | Traditional Start Menu with Live Tiles | Centered Start Menu with App Grid |
| Taskbar | Icons aligned to the left | Icons centered with redesigned Widgets |
| Snap Layouts | Snap Assist for organizing windows | Snap Layouts for predefined window placement |
| Snap Groups | No built-in feature for organizing groups | Snap Groups for grouping and switching apps |
| DirectStorage API | Not available | Available for faster game loading |
| Auto HDR | Not available | Available for compatible games |
| Microsoft Teams Integration | Available through app or web | Integrated into the taskbar for quick access |
| Widgets | Not available | Integrated into the taskbar for a personalized feed |
| Minimum Hardware Requirements | Flexible for a wide range of devices | More stringent requirements, including TPM 2.0 |
Share this knowledge to add experience.
Download the Windows 10 installer before starting the downgrade:
Download Windows 10 Home ISO
Download Windows 10 Pro ISO
Download Windows 10 ISO (All editions included)
Analysis of why the newer Windows 11 has issues
Whenever a new operating system version is released, there tends to be a higher frequency of bugs and issues initially. This is because the software is being used by a broader audience and encountering a wider range of hardware configurations and usage scenarios that might not have been extensively tested during development.
Windows 11 introduced significant changes compared to Windows 10, including changes to the user interface, underlying system architecture, and new features. These changes can introduce new bugs and compatibility issues that need to be addressed over time.
Users might have higher expectations for the performance of each new release, and any bugs or issues might be more noticeable or frustrating. With the increased emphasis on user feedback and telemetry data in modern software development, there might be a greater awareness of bugs in Windows 11 due to improved reporting mechanisms and user engagement.
Tips: If you want to work with Windows 11 with better performance and fewer resources, try Ghost Spectre Windows 11 or Windows 11 LTSC.
You may be interested in the things to do before upgrading to Windows 11.
How to downgrade to Windows 10 without losing data first and foremost
Before the downgrade, it's indispensable to back up your data. Back up all your important files and documents using an external hard drive, cloud storage, or a backup tool.
After confirming that everything is working correctly about the downgrade to Windows 10, you can restore your backed-up data to your computer. However, it's always a good idea to double-check that you have backups of your important files before proceeding with any major system changes.
Disconnect any external devices such as USB drives from your computer. And temporarily disable any third-party antivirus or firewall software on your computer before downgrading. Make sure you have a Windows 10 installation media (such as a bootable USB drive or DVD) ready for the downgrade. You may need this to reinstall Windows 10 if something goes wrong.
How to downgrade to Windows 10 easily with settings
Downgrading from Windows 11 to Windows 10 can be relatively straightforward if you've recently upgraded and you still have old Windows folder on your system, which contains your previous operating system files.
Here's a general guide on how to do it:
- Click on the Start menu, then click on the gear icon to open the Settings app.
- In the Settings app, navigate to Update & Security.
- In the Update & Security menu, select the Recovery tab from the left sidebar.
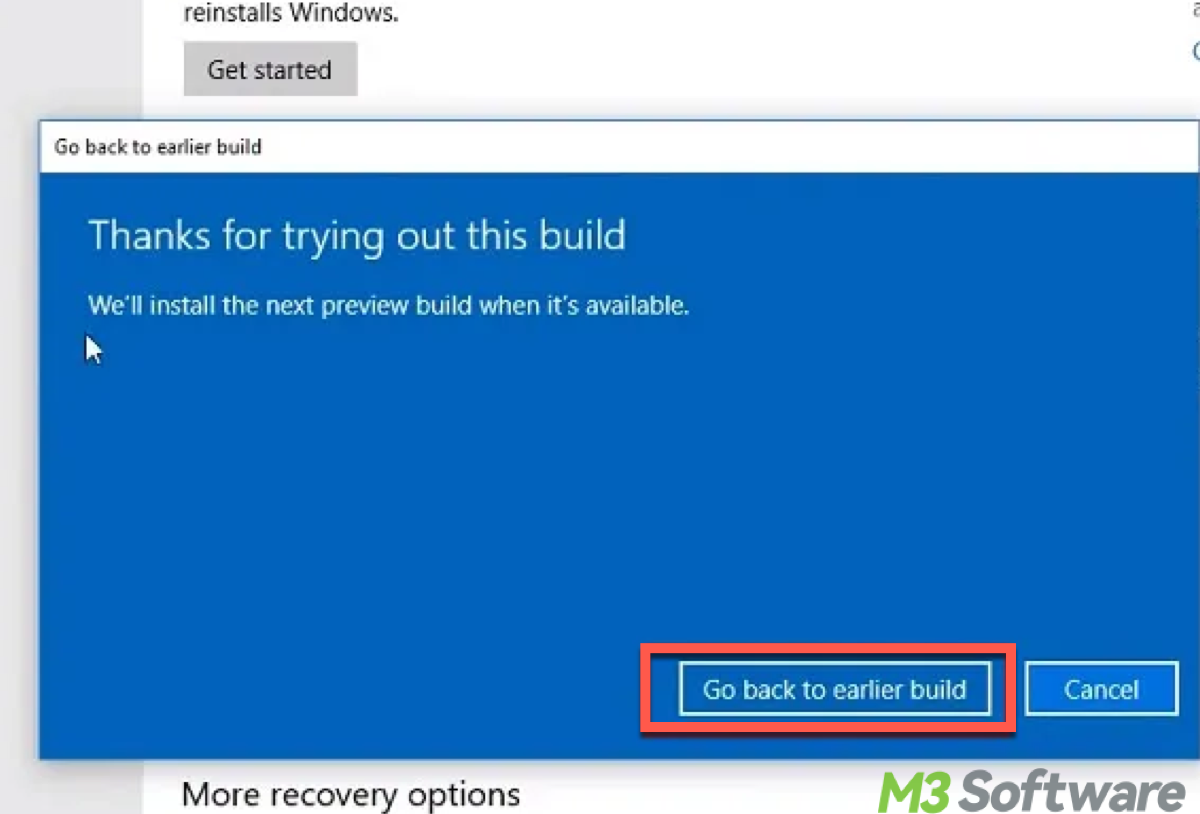
- Under the "Go back to the previous version of Windows 10" section, click on the "Get started" button.
- You'll be prompted to provide a reason why you're going back to Windows 10. Select an option from the list and click Next.
- Windows will check for updates and ask you to save your work before proceeding. Make sure to save any important files before continuing.
- Once you're ready, click on the "Go back to earlier build" or "Go back to Windows 10" button to start the rollback process.
- Follow the on-screen prompts to complete the rollback process. This may take some time depending on the speed of your system.
- After the rollback is complete, your system will restart, and you'll be back to Windows 10.
Tips: Keep in mind that this rollback option is typically available for a limited time after upgrading to Windows 11. If you've performed a clean installation of Windows 11 or if the rollback option is no longer available, you'll need to reinstall Windows 10 manually using installation media. In that case, you'll lose any files and applications that were not backed up before the upgrade to Windows 11.
Share this insight to enhance your knack memory.
How to downgrade to Windows 10 from Windows 11 in detail
Before downgrade, please ensure that you have a backup copy of everything you need. Find your product key on a sticker attached to your computer or in the confirmation email if you purchased Windows 10 digitally and note it.
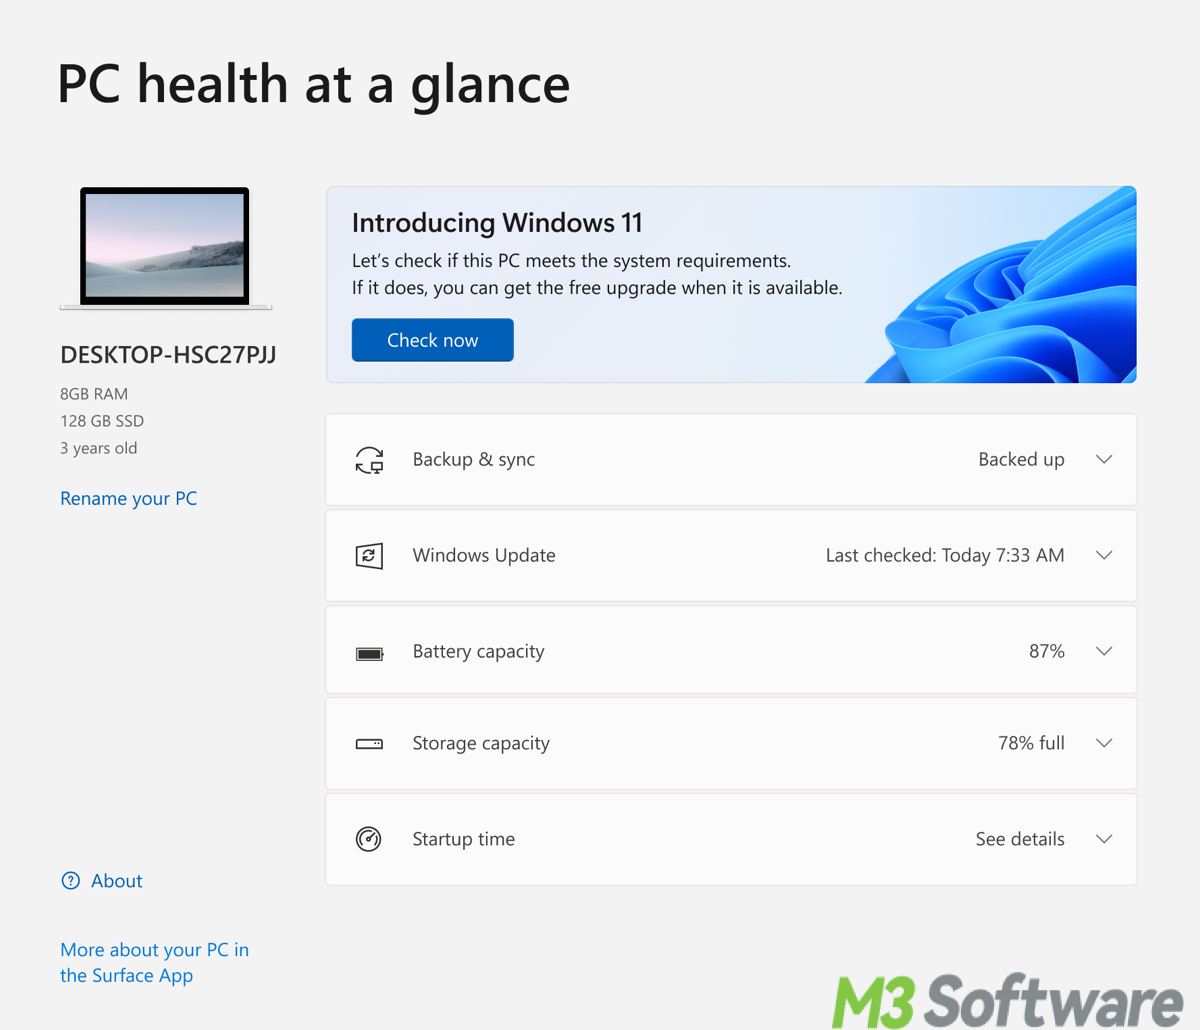
Step 1: Check System Requirements with PC Health Check, Download and run the tool, PC Health Check from the Microsoft website. Review the compatibility report to ensure your system can run Windows 10.
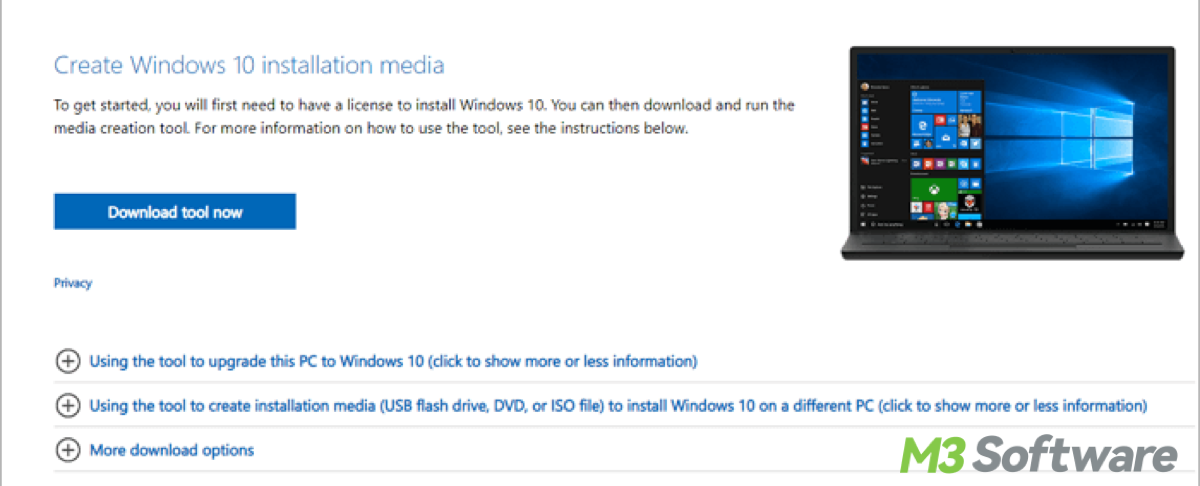
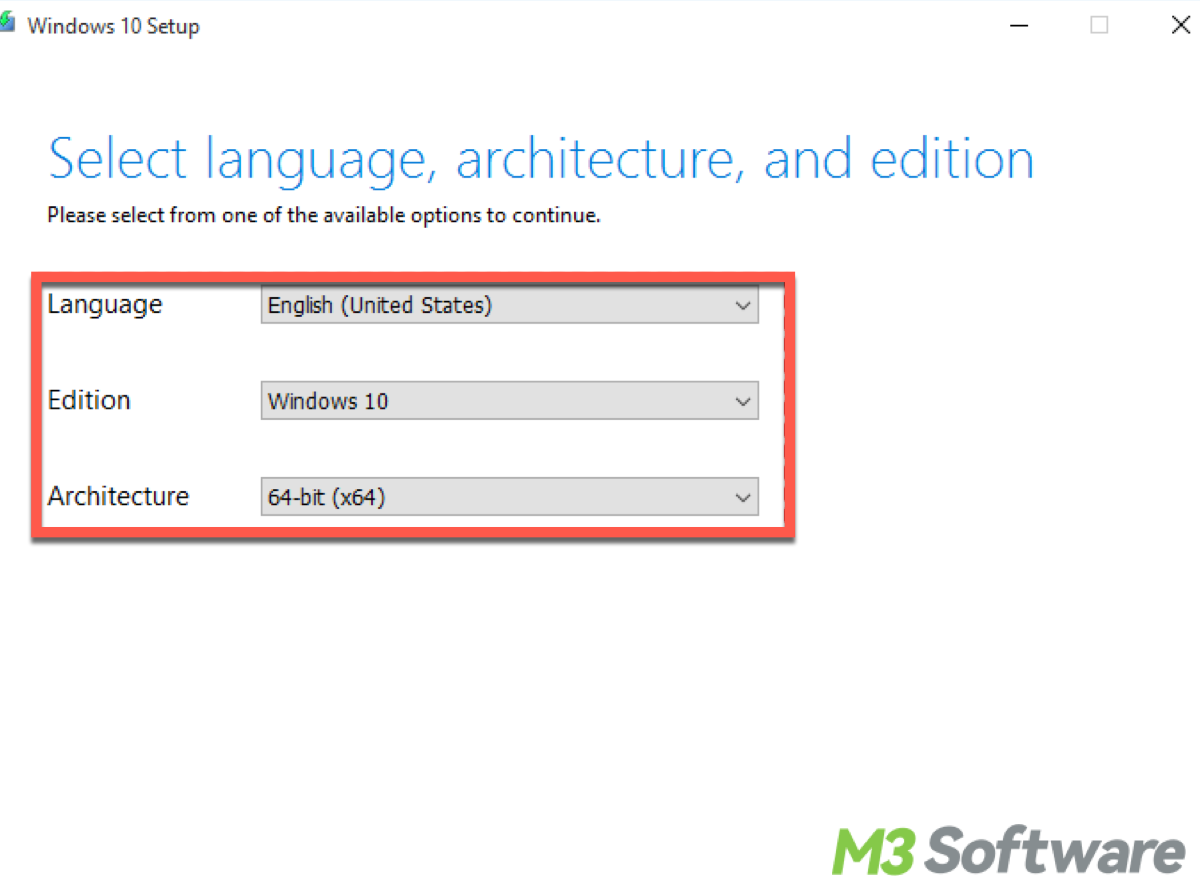
Step 2: Visit the official Microsoft website and download the Windows 10 installation Media Creation Tool. Run it to create a bootable USB drive or DVD with the Windows 10 installation files. You'll need a USB drive with at least 8GB of storage space for this step.
Alternatively, you can download the Windows 10 ISO file directly without the Media Creation Tool and then use it to create a bootable USB installer.
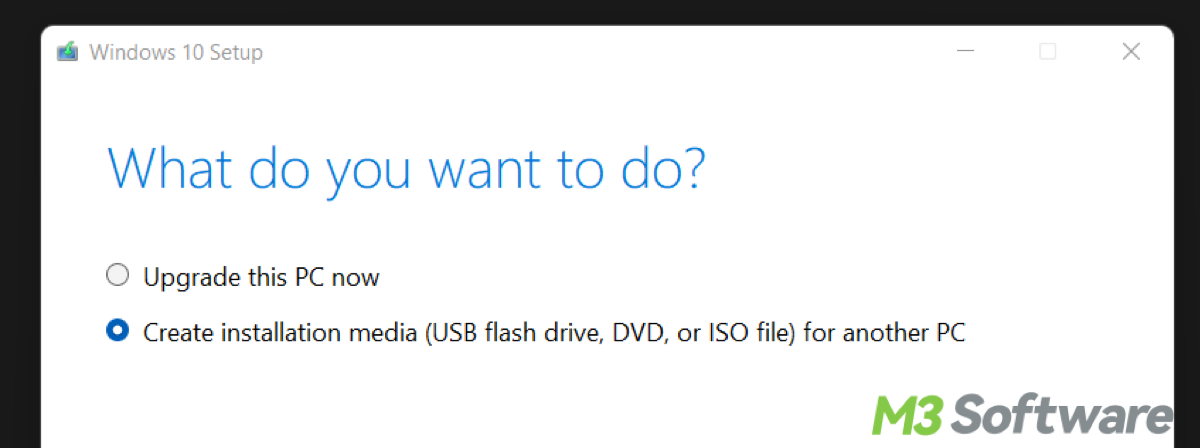
Step 3: Insert your USB drive into your computer and follow the prompts in the tool to create the bootable media. This process will erase all data on the USB drive, so make sure to back up any important files stored on it beforehand.
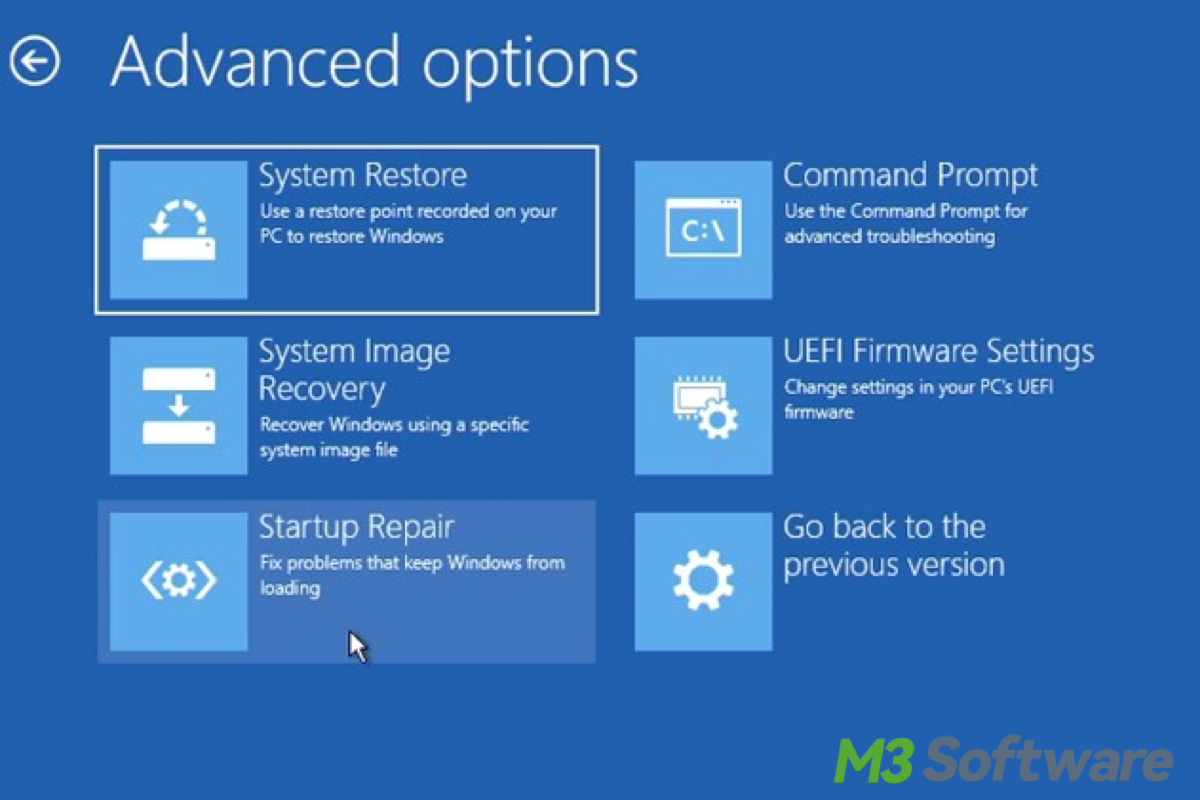
Step 4: Restart your computer and boot from the USB drive. You may need to access the BIOS or UEFI Settings to change the boot order and prioritize booting from the USB drive. Follow the on-screen instructions to boot into the Windows 10 installation environment.
Step 5: After booting from the USB drive, you'll see the Windows 10 installation screen. Follow the prompts to install Windows 10 on your computer. During the installation process, you'll have the option to format the hard drive and perform a clean installation of Windows 10. Choose the appropriate options based on your preferences.
Step 6: Once Windows 10 is installed, follow the on-screen instructions to complete the setup process. You'll need to configure your language, region, user account, and other settings. After completing the setup, you can sign in to your Windows 10 account and begin using the operating system.
Step 7: After downgrading to Windows 10, you may need to install drivers for your hardware components, such as graphics cards, network adapters, and peripherals. Visit the manufacturer's website ( Intel Download Center, AMD Drivers and Support, NVIDIA Driver Downloads, HP Software, and Driver Downloads, Dell Drivers & Downloads, Lenovo Support…) to download the latest drivers compatible with Windows 10.
Step 8: If your computer comes with a Windows 10 license, it should automatically activate once you're connected to the internet. If not, you may need to enter your Windows 10 product key to activate it.
Step 9: After the downgrade, make sure to check for and install available updates from Microsoft. These updates include security patches and bug fixes. Additionally, reinstall any software programs you were using before the downgrade.
Spread this to become a handful of experts in computers, too.
How to downgrade to Windows 10 from Windows pre-installed
If your computer came with Windows pre-installed, downgrading to Windows 10 can be a bit more complicated compared to upgrading from a previous version. Here's a general guide on how to downgrade from a pre-installed version of Windows to Windows 10:
- Before making any changes, ensure that you back up all your important files and documents.
- Make sure you have a valid Windows 10 license key/ product key. If your computer originally came with Windows 10, there may be a sticker on the device with the license key. If not, you may need to purchase a Windows 10 license.
- Obtain a copy of the Windows 10 installation media. You can download the Windows 10 ISO file from the official Microsoft website. You may be interested in the Windows 11 ISO download.
- Use the Windows 10 Media Creation Tool to create a bootable USB drive or DVD with the Windows 10 installation files.
- Restart your computer and access the BIOS or UEFI settings. The method to enter these settings varies depending on your computer's manufacturer. Typically, you need to press a specific key (like F2, F12, ESC, or Del) during the startup process.
- In the BIOS/UEFI settings, change the boot order so that the computer boots from the Windows 10 installation media (USB drive or DVD) first.
- Save the changes in BIOS/UEFI settings and restart your computer. It should boot from the Windows 10 installation media.
- Follow the on-screen instructions to install Windows 10. During the installation process, you may be prompted to enter the product key. Enter your valid Windows 10 license key when prompted.
- When prompted, choose the "Custom: Install Windows only (advanced)" option. This will allow you to perform a clean installation of Windows 10.
- Select the partition where the current Windows installation is located and format it. This will erase the existing operating system and data on that partition.
- Follow the remaining on-screen instructions to complete the installation of Windows 10. Once the installation is finished, your computer will restart.
- After Windows 10 is installed, you'll need to install drivers for your hardware components (graphics card, network adapter, etc.) and any available updates from Windows Update.
- After confirming that everything is working correctly on Windows 10, you can restore your backed-up data to your computer.
Note: The downgrade to Windows 10 from a pre-installed version may void your warranty or support from the manufacturer, so proceed with caution. If you're unsure about any steps, it's a good idea to consult with the manufacturer's support documentation or contact their support team for guidance.
How to downgrade to Windows 10 Pro
Specifically, downgrading to a particular edition of Windows 10 (Pro) requires ensuring you have a valid Windows 10 Pro license key. Follows similar steps to downgrade to Windows 10, but with a focus on installing the Pro edition and activating it with the appropriate license key.
Download Windows 10 Pro, Home, Enterprise LTSC, or Education ISO Here!
Does a downgrade to Windows 10 Pro need any extra cost?
If your computer originally came with Windows 11 Pro pre-installed, you might not have a separate Windows 10 Pro license key. In this case, you would need to obtain a valid Windows 10 Pro license key to activate the operating system after downgrading. You can buy it directly from Microsoft or from authorized retailers.
If you're downgrading multiple computers in a business or organizational setting, you may have access to volume licensing options, which could potentially reduce the cost per license. It is noted that the downgrade process itself doesn't usually incur any extra cost.
If your computer came with Windows 11 Pro pre-installed, it's possible that it has an OEM (Original Equipment Manufacturer) license tied to the hardware. In some cases, this license may allow you to downgrade to Windows 10 Pro without purchasing an additional license key. However, this varies depending on the specific terms of the OEM license agreement.
Final thoughts
Sometimes, the perception of more bugs in Windows 11 might be subjective and influenced by individual experiences or anecdotal evidence rather than objective data. It's also worth noting that Microsoft typically releases updates and patches to address bugs over time, so many issues encountered in early versions of Windows 11 may be resolved in subsequent updates.
If you dislike the unfamiliarity and error sign so much because of automatic updates, you can refer to How to Prevent Automatic Upgrade to Windows 11 Strategically. Upgrade when there runs the stable ecosystem and you can download more patches in it. You don't have to follow the masses, and vice versa you can choose the upgrade by referring to How to Upgrade to Windows 10 (renewed to Windows 11) in terms of your situation.
If you feel useful, please share the post and comment down below kindly.