
Written by
Wilsey YoungVirtual memory in Windows is a memory management feature that allows the Windows to use both RAM and a portion of the hard drive or SSD to simulate additional memory. It enables the operating system to run larger workloads or more applications simultaneously. More importantly, virtual memory effectively prevents system crashes or errors even if the physical RAM is full.
However, relying heavily on the virtual memory may result in performance degradation, system glitches, or errors, such as high memory usage, frequent system freeze, the exception breakpoint has been reached, or more.
This article shows how to manage virtual memory in Windows 10/11, which could be effective when your system encounters problems or errors mentioned above.
How does virtual memory work?
When your PC's RAM runs out of space, Windows transfers some of the data that is not currently being used to the pagefile (aka pagefile.sys file) stored on your hard drive. This process frees up RAM for active processes. 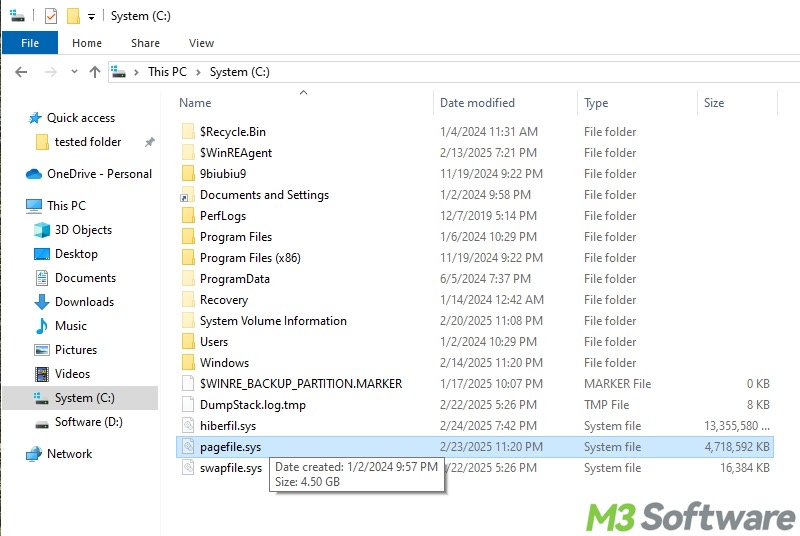
When an application needs data that's not in RAM but stored in the page file, a page fault occurs, and the system retrieves the data from hard drive back into RAM. This process is slower than using RAM directly but allows the system to keep running even when RAM becomes full.
When the data in the page file is needed again, Windows swaps it back into RAM.
You can tap on the following buttons to share the post quickly
How to manage virtual memory in Windows 10
Here's a recommended virtual memory formula from Microsoft:
- Minimum size = 1.5 × the amount of RAM
- Maximum size = 3 × the amount of RAM
For example, if your PC uses 8 GB (8192 MB) physical RAM, the minimum size of virtual memory should be 12288 MB, and the maximum size should reach 24576 MB.
Here are the detailed steps to manage virtual memory in Windows 10:
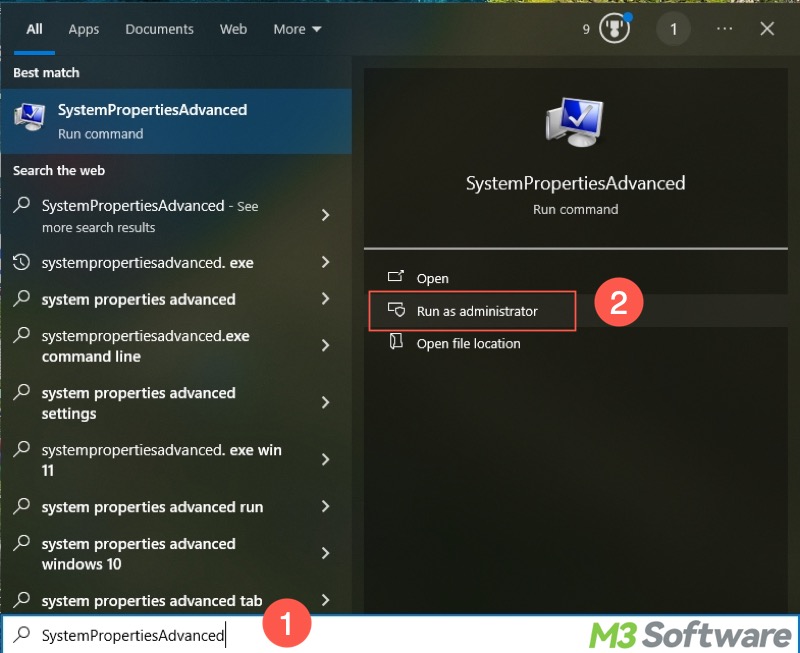
- Press the Windows+S keys to open the Windows search box.
- Type “SystemPropertiesAdvanced” in the search box and tap on "Run as administrator."
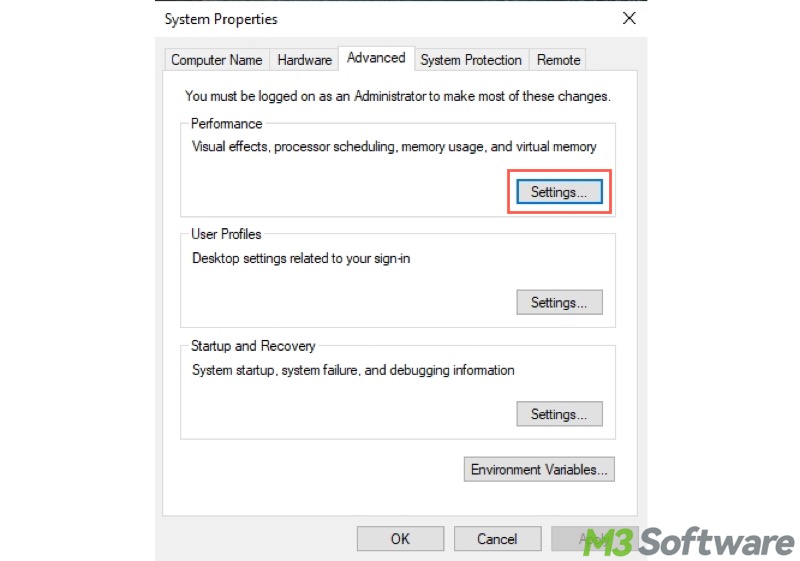
- Go to the "Advanced" tab and click "Settings" under the “Performance” section.
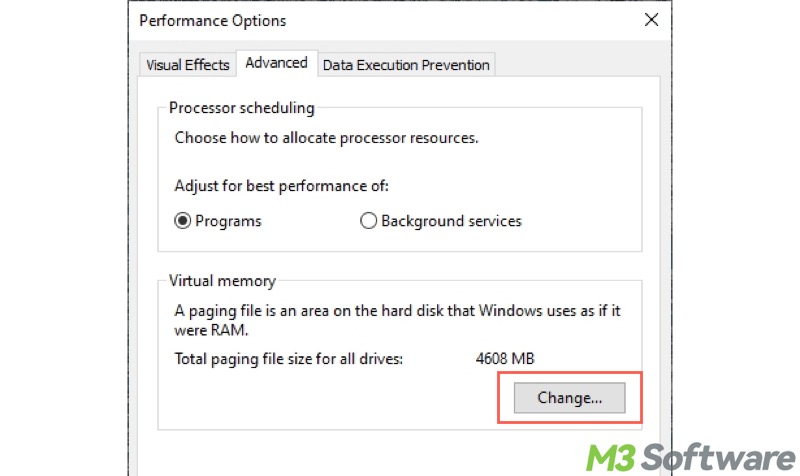
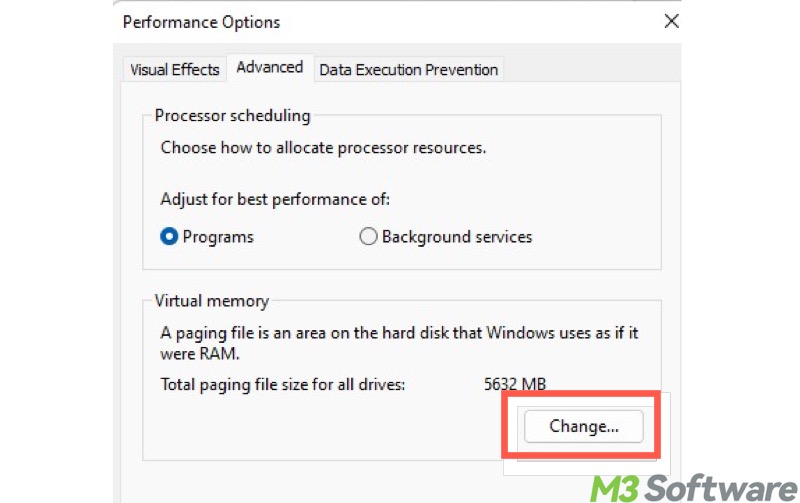
- Go to the "Advanced" tab again and click the "Change" button under the "Virtual memory" section.
- If you want the system to manage virtual memory automatically, ensure "Automatically manage paging file size for all drives" is selected.
- If you want to custom virtual memory size, uncheck "Automatically manage paging file size for all drives," and choose "Custom size",
- Input the value, and tap on the "Set" button.
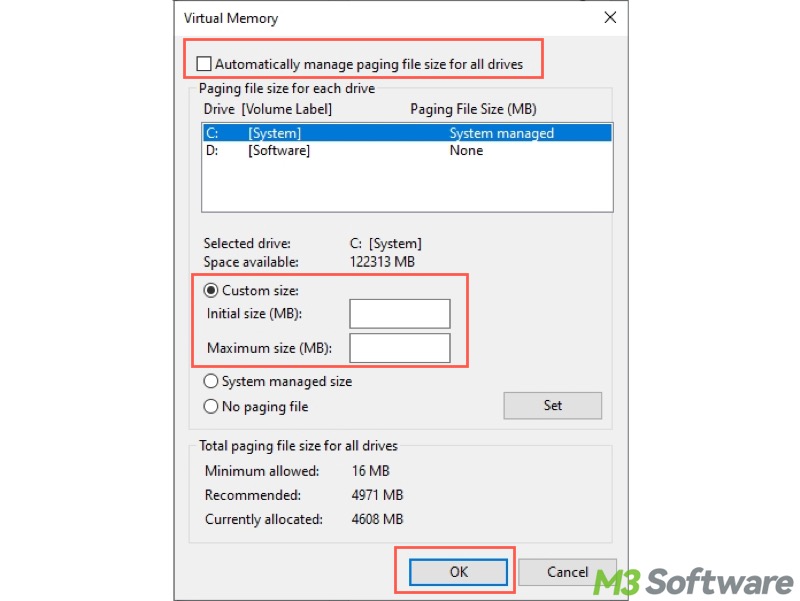
- Click the "OK" button and restart your PC.
Note: Avoid disabling the page file completely, as some programs and features rely on it.
How to manage virtual memory in Windows 11
Recommended virtual memory formula:
- Minimum size = 1.5 × the amount of RAM
- Maximum size = 3 × the amount of RAM
Here's how to manage virtual memory in Windows 11:
- Press the "Windows+S" keys to launch the Windows search box.
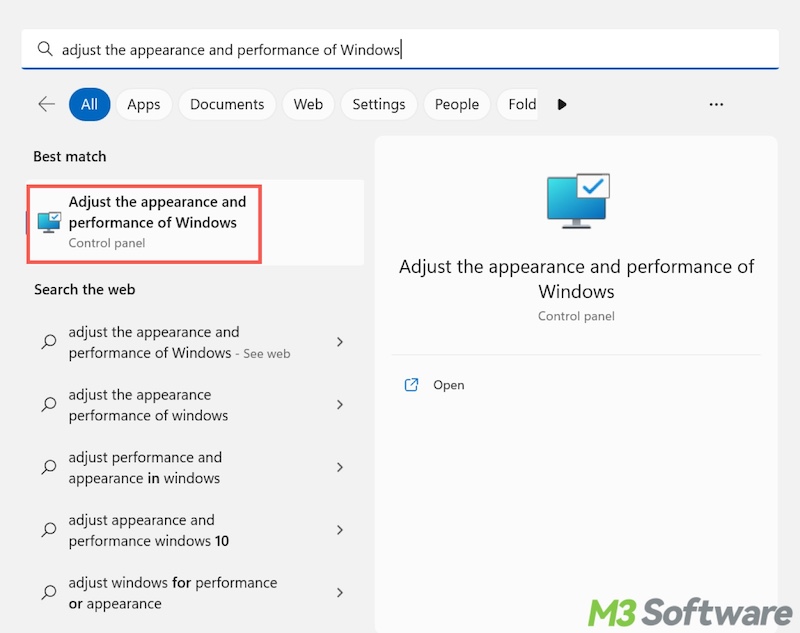
- Open the Windows search box, type "Adjust the appearance and performance of Windows" in it, and click the result to open.
- Go to the "Advanced" tab and click the "Change" button under the "Virtual memory" section.
- If you want to custom a virtual memory size, uncheck "Automatically manage paging file size for all drives."
- Choose "Custom size" and input the value for initial size and maximum size.

- Click the "Set" button and click "OK" to save the changes.
- Restart your PC.
What do you make of this post? Please share it with your friends if you find it helpful.
FAQs about how to manage virtual memory
A
Virtual memory is a feature in Windows that uses part of your hard drive or SSD (via a file called pagefile.sys) as additional RAM. It helps your system run more programs than your physical memory alone could handle. When your RAM is full, Windows moves inactive data to the page file. This prevents crashes and keeps the system running smoothly.
A
To manage virtual memory in Windows: 1. Press the Windows+S keys to open the Windows search box. 2. Type SystemPropertiesAdvanced in the search box and tap on Run as administrator. 3. Go to the Advanced tab and click Settings under the Performance section. 4. Go to the Advanced tab again and click the Change button under the Virtual memory section. 5. Uncheck Automatically manage paging file size for all drives. 6. Choose Custom size, input the value, and tap on the Set button. 7. Click OK and restart your PC.
A
Technically yes, but not recommended. Some applications and features rely on the page file. Disabling it can cause crashes, system errors, or problems with large files.