
Written by
Wilsey YoungSummary: This post shows how to recover deleted temp files using built-in tools in the Windows operating system or a professional data recovery tool: iBoysoft Data Recovery for Windows. -m3datarecovery.com
We might sometimes accidentally delete important files in Windows, or the files could be lost for various reasons.
If you are looking for ways to retrieve deleted temp files or folders in Windows, you are in the right place. This post primarily introduces how to recover deleted temp files through the built-in tools or third-party software in Windows.
How to recover deleted temp files in Windows 10
You can easily recover deleted temporary files in Windows 10 through the Recycle Bin, File History, or iBoysoft Data Recovery for Windows.
You can click the buttons below to share this post
How to recover deleted temp files in Windows 10 through the Recycle Bin
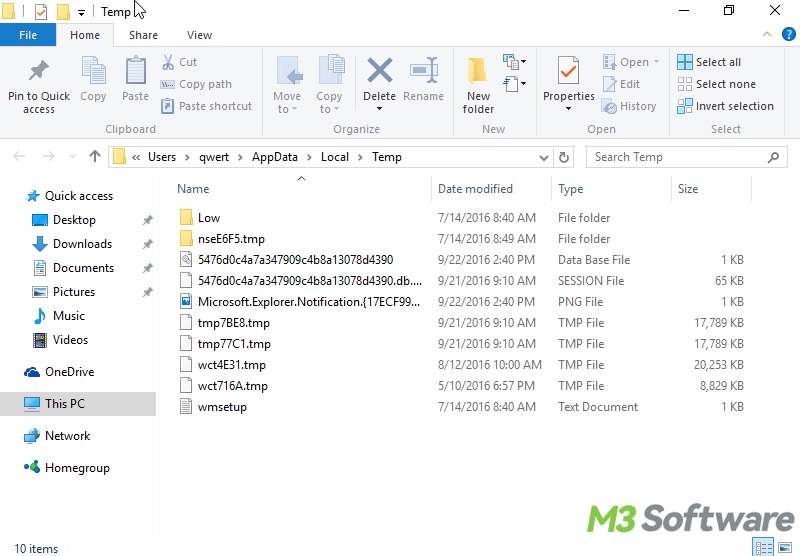
The first thing you can do after temp files or folders are deleted is to check the Recycle Bin in Windows, unless you permanently deleted them by using the Shift+Delete keys, which would bypass the Recycle Bin.
Here's how to recover deleted temp files in Windows 10 through the Recycle Bin:
- Double-click the Recycle Bin on the Windows desktop.
- Carefully check if the deleted temp files or folders exist.
- Right-click on the temp files or folders you want and click the Restore button.
- The selected temp files or folders will be restored to the original location.
If the Recycle Bin does not contain the deleted temp files or folders, adopt the following method.
How to recover deleted temp files in Windows 10 through a data recovery tool
Suppose the deleted temp files or folders are not in the Recycle Bin; it typically implies that the temp files or folders are formatted or permanently removed, and this also happens when malware, virus, disk corruption, and other external factors are involved.
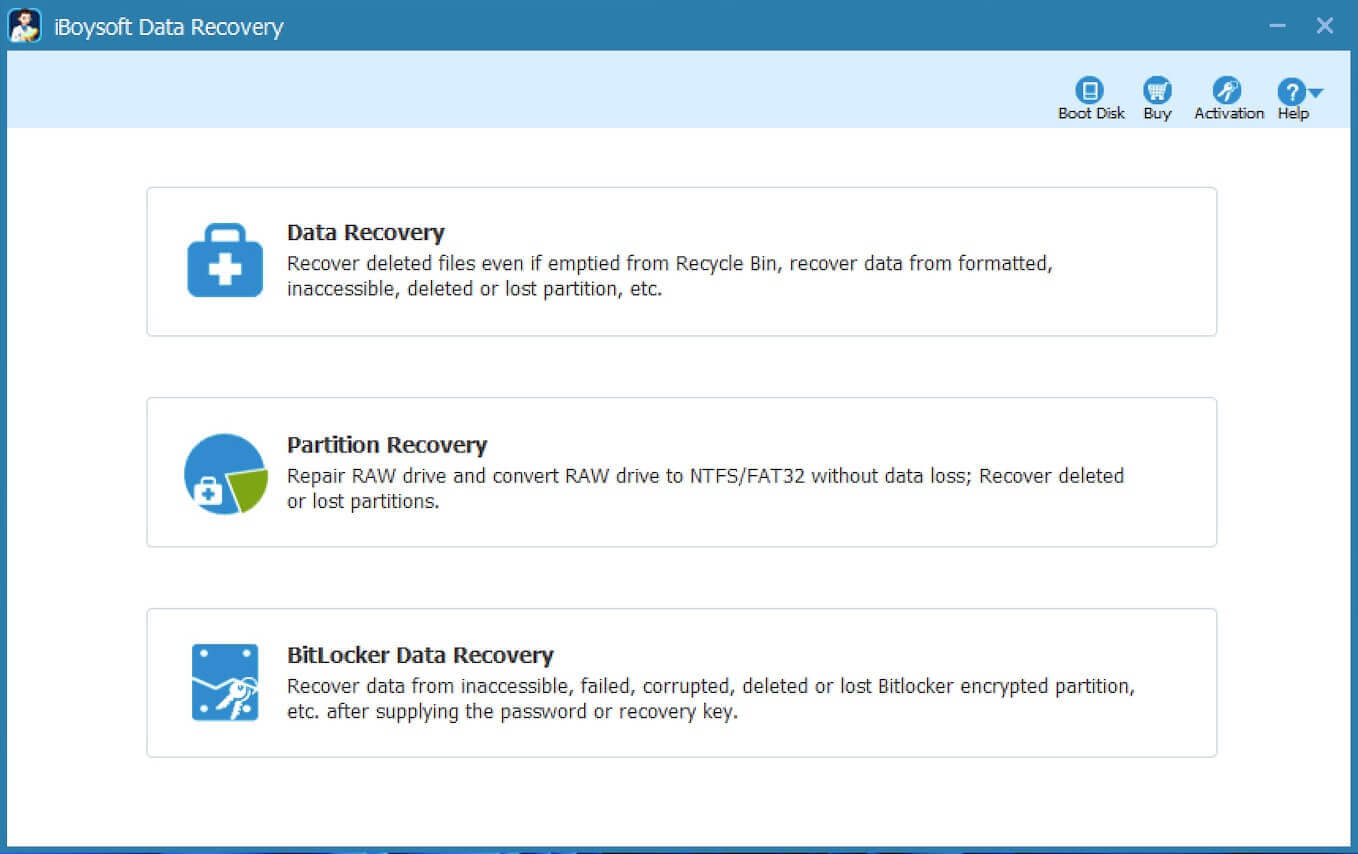
Under these circumstances, restoring deleted temp files or folders can be completed through a reliable data recovery tool. iBoysoft Data Recovery for Windows, a professional and user-friendly tool, can help you recover deleted or lost files from SSD, HDD, USB drive, or other storage devices.
More importantly, this tool can also work like a charm in formatting, file system corruption, missing partition, or a RAW disk. Over 1000 types and formats of files are supported. Compatible systems are Windows 11/10/8.1/8/7/Vista/XP and Windows Server 2019/2016/2012/2008/2003.
Here's how to recover deleted temp files in Windows 10 through iBoysoft Data Recovery for Windows:
- Download, install, and launch iBoysoft Data Recovery for Windows.
- Choose the Data Recovery module in the main interface.
- Choose the drive or partition where the temp files or folders are located.
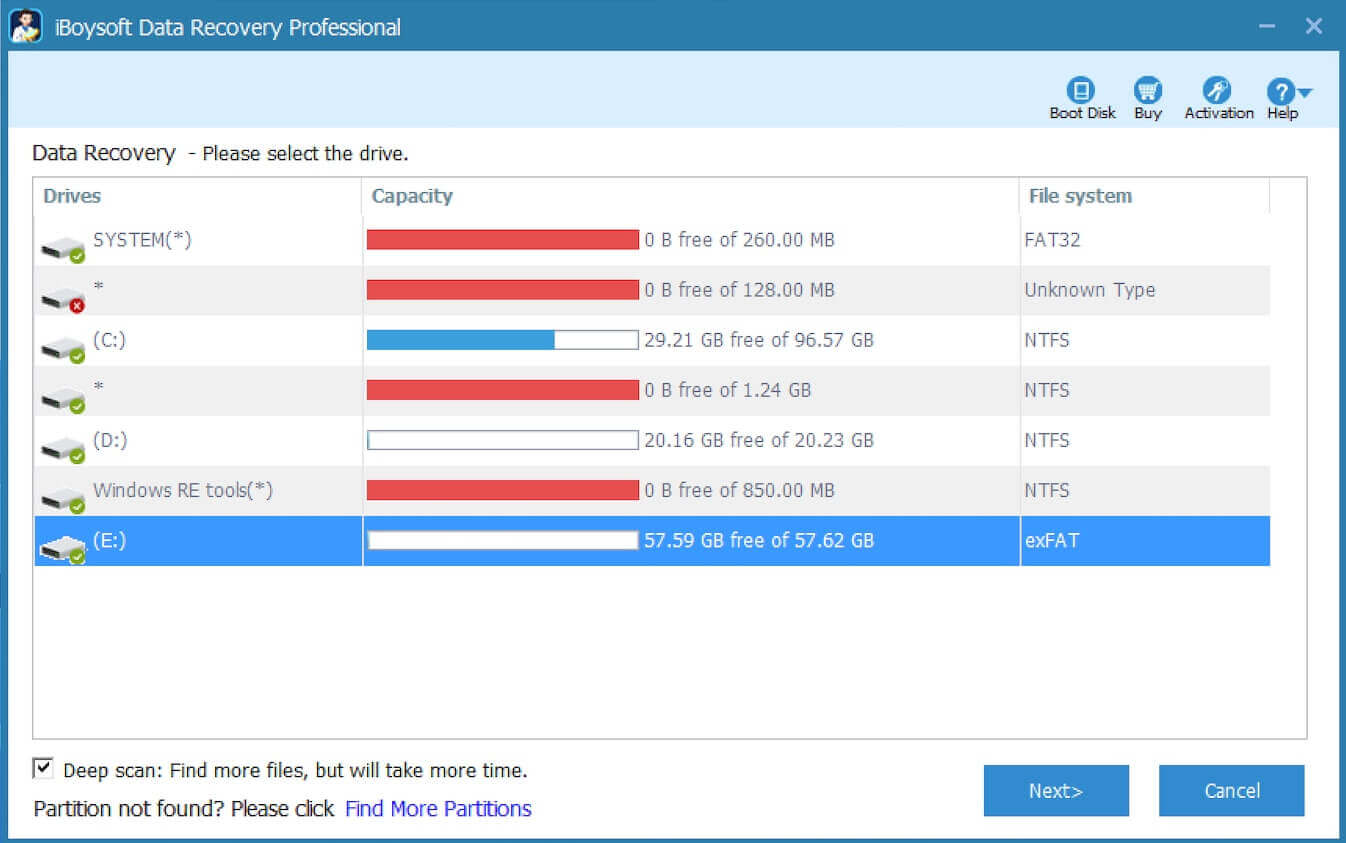
- Click the Next button to scan for all lost or deleted files.
- Preview the found files in the scanning results. This can check if the files are recoverable.
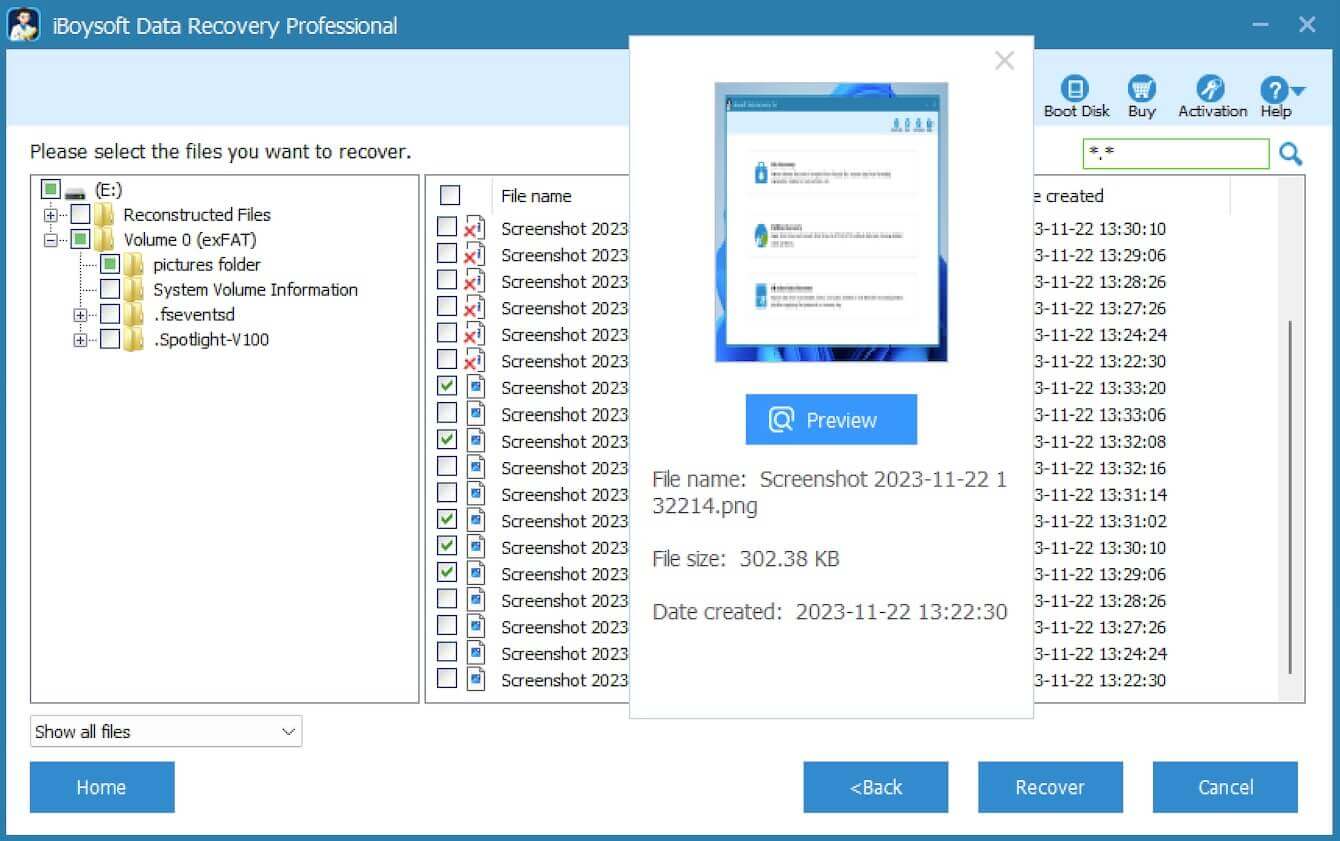
- Tick the temp files or folders you want and click the Recover button.
- You must save them to a different and healthy partition to prevent overwriting.
You can share this wonderful data recovery tool with your friends
How to recover deleted temp files in Windows 10 through the File History
File History is a built-in backup feature in Windows that helps automatically back up copies of your personal files and folders and save them to a designated storage device.
File History often comes into play in case of accidental deletion, file system corruption, or hardware failure. Essentially, it works by storing versions of files over time, so you can restore previous versions if needed.
Follow the steps below to check if the File History is enabled:
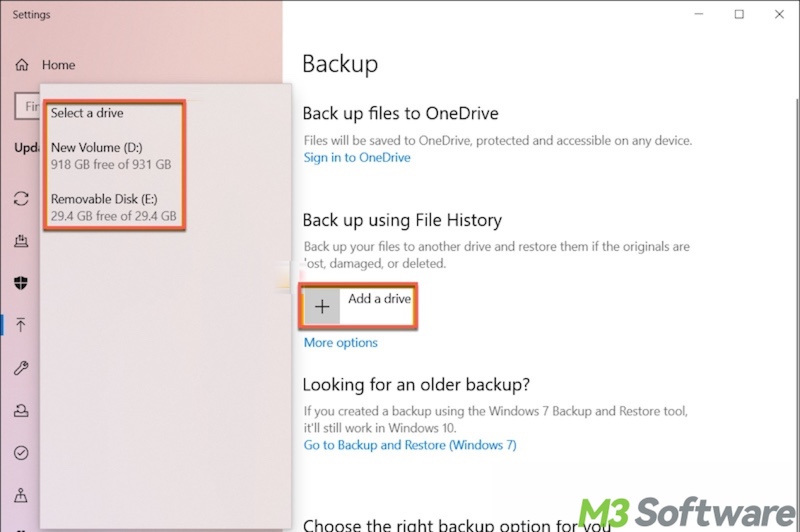
- Press the Windows+I keys on your keyboard to open Settings on Windows.
- Navigate to Update & Security > Backup
- Under the "Back up using File History" section, check if there's a drive has been selected.
If yes, here's how to recover deleted temp files or folders you want:
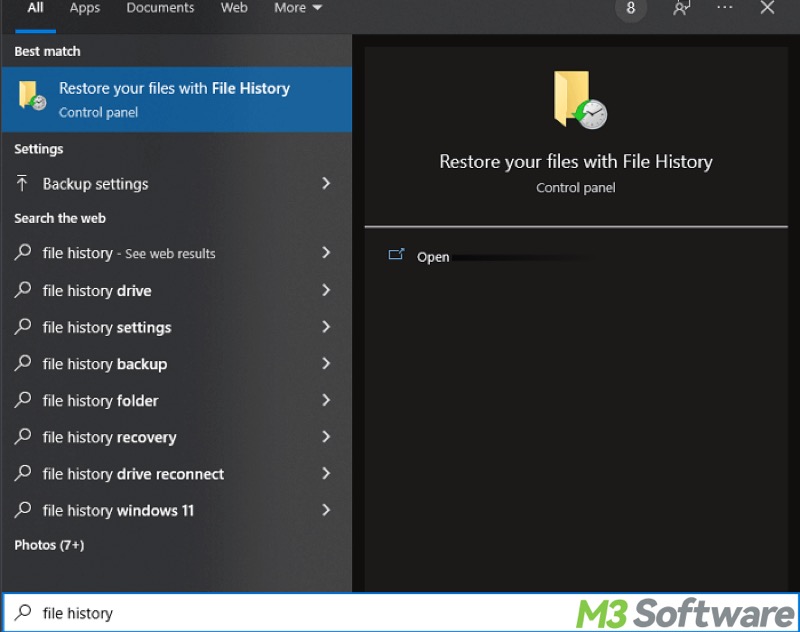
- Press the Windows+S keys to launch the Windows search box.
- Type File History in the search box and choose "Restore your files with File History."
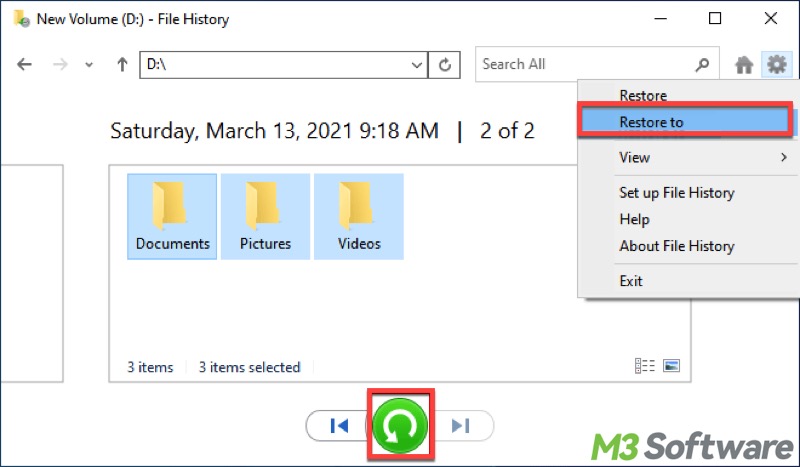
- Check all the files or folders in the File History interface and see if there are temp files you need.
- Select the desired files and click the green recovery button to restore. Alternatively, click the gear icon in the upper right corner and choose "Restore to."
Bonus Tips: How to prevent accidental loss of temporary files
Learning how to recover deleted temp files in Windows 10 is crucial, but it's worth understanding how to manage temporary files and prevent such data loss from happening again. Here are some matters needing attention:
Back up important temporary files regularly
Regularly backing up the important temporary files or cloning the partition is the best way to prevent accidental data loss. Giving little thought to the data backup may drag you into an awkward situation.
To back up important files in Windows, check:
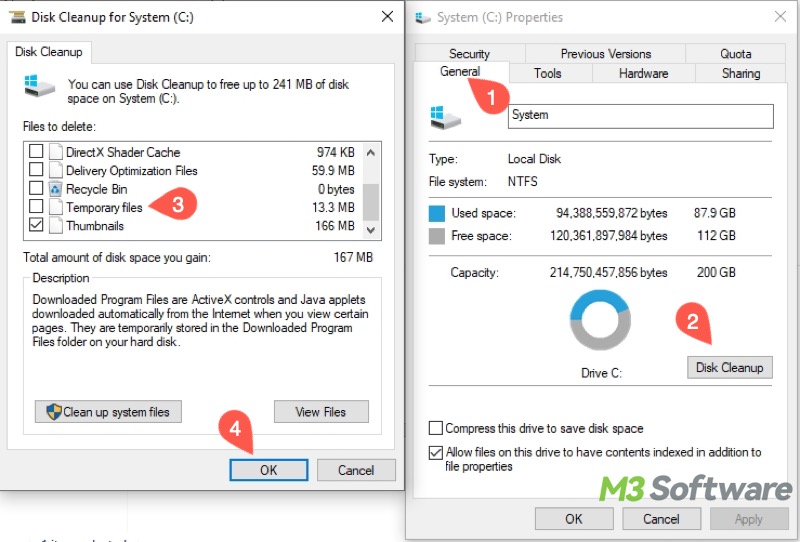
Be careful with disk cleanup
Be careful when using the built-in or third-party disk cleanup tool to free up disk space. Please ensure to verify the temporary files you want to retain or directly exclude temporary files before cleanup. Here's how the temporary files are deleted in the built-in Disk Cleanup tool on Windows:
- Open This PC or My Computer to open File Explorer.
- Right-click on the system drive, AKA C: Drive or Local Disk C:
- Click the Disk Cleanup button under the General tab. Make sure temporary files are not selected in Disk Cleanup.
Pay attention to Storage Sense
Storage Sense is a feature in Windows that helps manage and free up disk space by removing temporary files, system files, and data. You can follow the steps below to check whether Storage Sense is enabled and temporary files are included in its cleanup plan.
- Press the Windows+I keys or click the gear icon in the Start menu to open Settings.
- Choose System and tap on Storage.
- See if Storage Sense is enabled in the right panel.
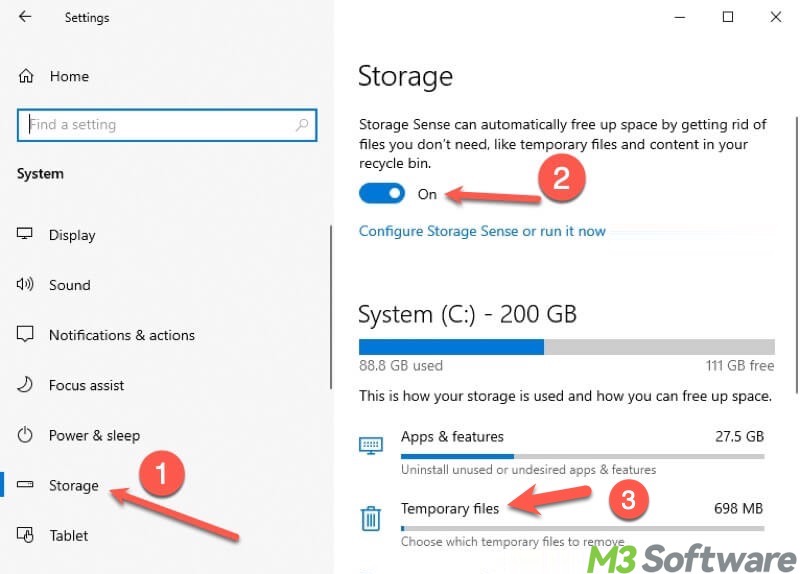
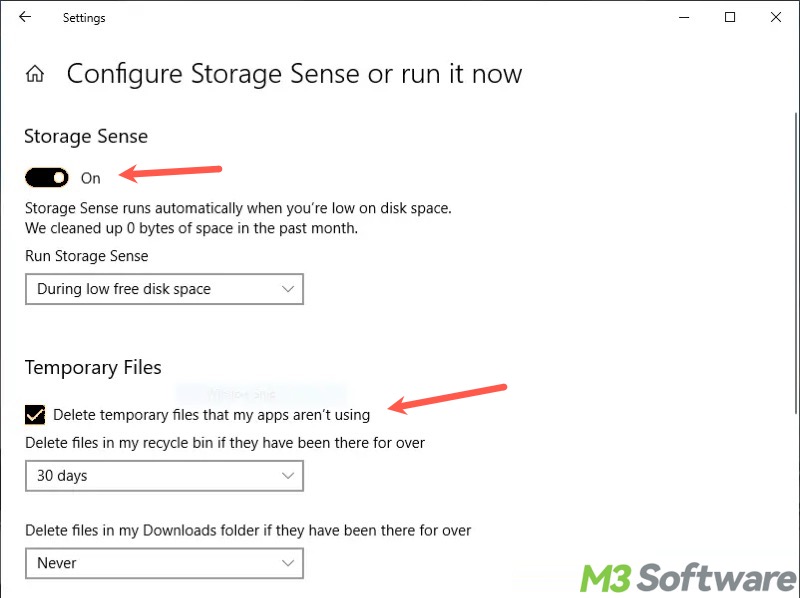
- Click "Configure Storage Sense or run it now."
- Directly switch off Storage Sense or uncheck "Delete temporary files that my apps aren't running.
Conclusion
The methods and tips above are about how to recover deleted temp files and prevent them from being lost. As a side note, the system typically hides some specific temporary files and deletes them once no longer needed. Therefore, ensure you have a backup of the temporary files you need so that they won't be removed by the system, Disk Cleanup, Storage Sense, or other tools in Windows.
Share this post if you find it helpful