
Written by
Wilsey YoungWindows update error 0x80248007 on Windows 11 indicates that the Windows Update service cannot access or retrieve the required update files, which could be corrupted, missing, or inaccessible. This error can occur when:
- Checking for updates: Windows cannot fetch the update list from Microsoft servers.
- Installing updates: The update files can't be validated or applied.
- Using Windows Update service: Such as the Windows Update section in Settings.
- In Windows Server environments: The metadata is corrupted or unavailable.
This post primarily introduces methods to fix the Windows update error 0x80248007 on Windows 11, which involves using various built-in tools and utilities on Windows.
Tips: Have you tried downloading the Windows 11 ISO update full installer and installing it directly?
Solutions to Windows update error 0x80248007
Various factors on Windows can interfere with the Windows update and trigger the Windows update error 0x80248007. The following solutions cover the corresponding causes. You may wonder why Windows update keeps failing on Windows 11.
Solution 1 - Run Windows Update troubleshooter
The built-in troubleshooting tool in Windows can help you identify the source of the problem and resolve it.
- Press the "Windows+I" keys to open "Settings."
- Select "Troubleshoot" from the left side panel.
- Click "Additional troubleshooters."
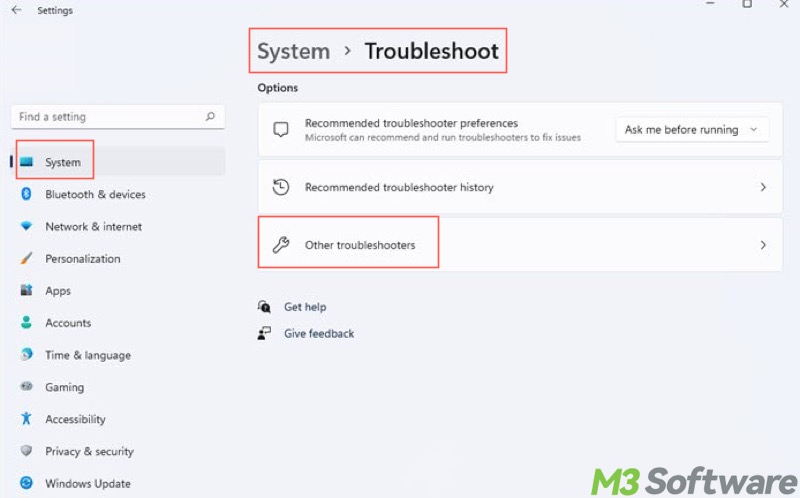
- Select "Windows Update" and tap on "Run the troubleshooter."

- Wait patiently until the scanning and repair are finished.
Solution 2 - Restart Windows update services
Windows update error 0x80248007 may appear when the Windows Update service is not working correctly. Restarting the service may remove the error:
- Press the "Windows+R" keys to launch the "Run" dialog box.
- Input "services.msc" and click the "OK" button.

- Locate "Windows Update" from the list and right-click on it to choose "Restart."
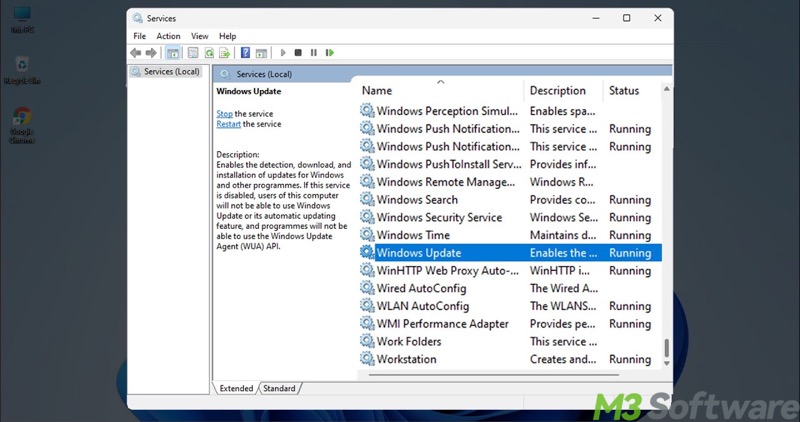
- Additionally, locate and right-click on "Windows Installer" to make sure this service is enabled.
You can click the following buttons to share the post quickly
Solution 3 - Empty the SoftwareDistribution folder
The SoftwareDistribution folder on Windows contains temporary files, logs, and a database for installing Windows updates. However, the damaged Windows update files may trigger the Windows update error 0x80248007. Emptying this folder aims to force Windows to recreate it cleanly the next time you check for updates.
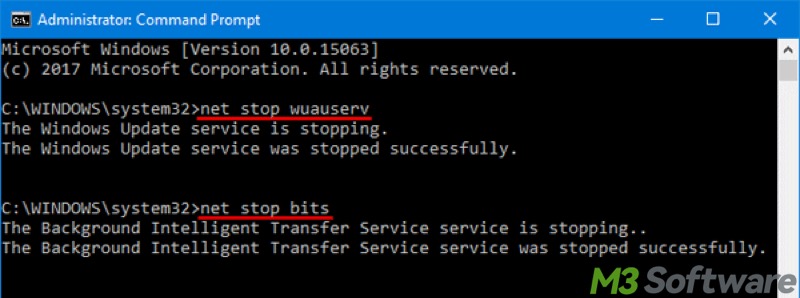
First of all, you need to stop the Windows Update service before emptying the SoftwareDistribution folder:
- Press the "Windows+S" keys on your keyboard to launch the Windows search box.
- Input "cmd" and select "Run as administrator."
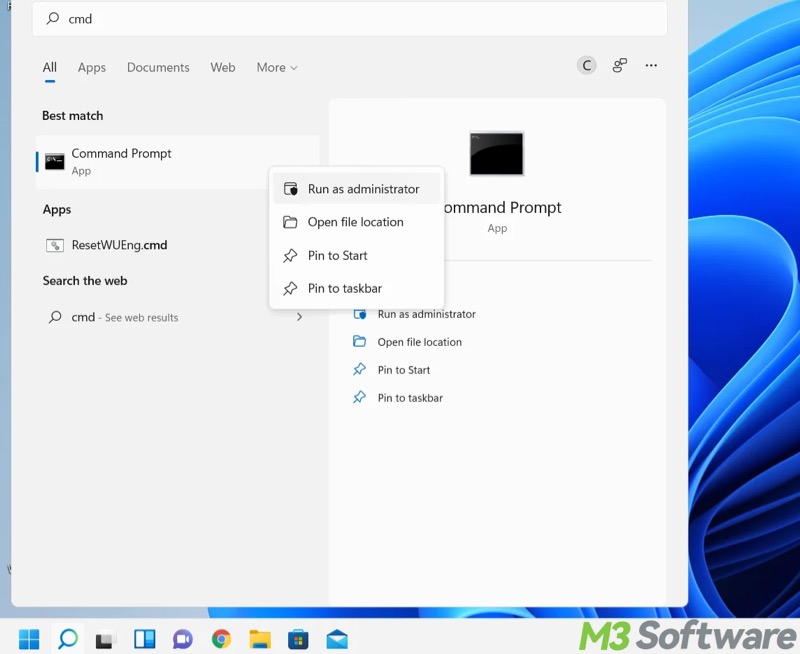
- Input “net stop wuauserv”, “net stop bits”, and hit the "Enter" key after each.
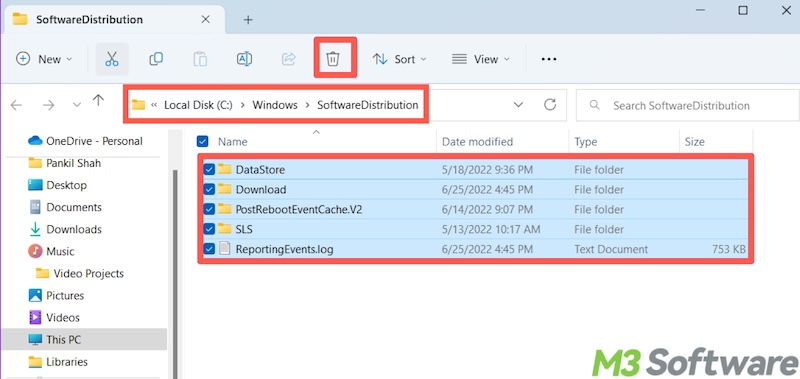
Next, locate and empty the SoftwareDistribution folder:
- Double-click the "This PC" or "My Computer" icon on the "Desktop."
- Go to: C:\Windows\SoftwareDistribution
- Select all the files and subfolders inside the SoftwareDistribution folder and right-click on them to delete.
Restart the Windows update service:
- Run the Command Prompt as an administrator.
- Input “net start wuauserv” and “net start bits” commands and hit the "Enter" key after each.
- Restart your PC
As a side note, you can delete Windows update files to free up disk space on your Windows PC.
Solution 4 - Run an SFC scan
Windows update error 0x80248007 may occur if there are corrupted system files. System File Checker (SFC) is a built-in utility that can help scan for corrupted system files. It also replaces corrupted system files with the correct version from a cached copy.
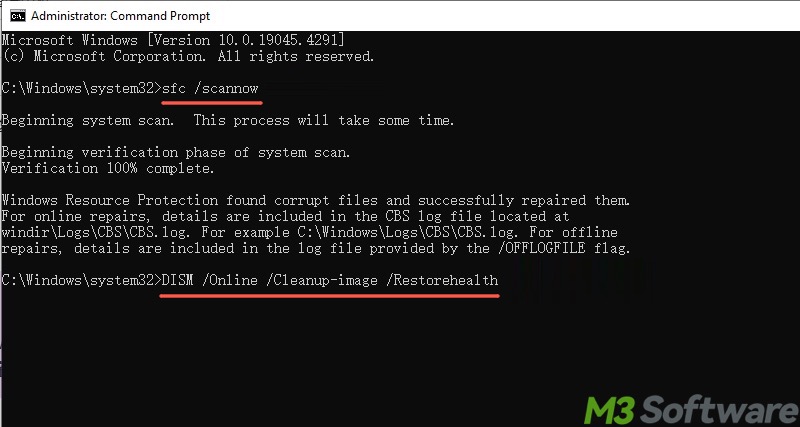
- Type "cmd" in the Windows search box and run Command Prompt as an administrator.
- Input "sfc /scannow" into the command window and press the "Enter" key on your keyboard.
- Wait patiently and see if any file is repaired.
- If the Windows 11 update error 0x80248007 persists after an SFC scan, run Dism /Online /Cleanup-Image /RestoreHealth
Solution 5 - Adjust group policy setting
Adjusting the following group policy setting may help remove the Windows update error 0x80248007.
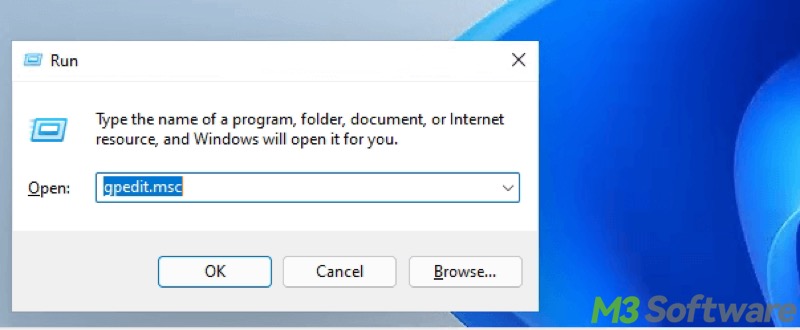
- Press the "Windows+R" keys on your keyboard to open the "Run" dialog box.
- Input "gpedit.msc" and click "OK."
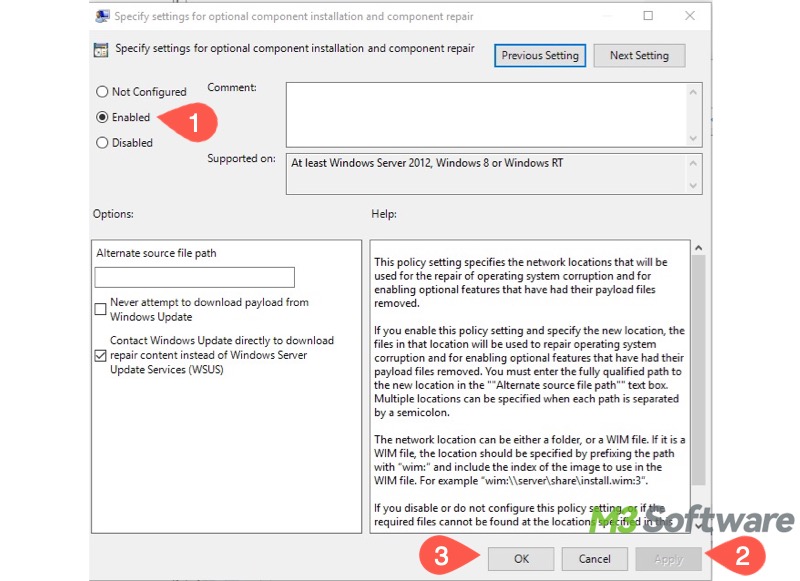
- Go to: Computer Configuration > Administrative Templates > System
- In the right panel, double-click "Specify settings for optional component installation and component repair."

- Choose "Enabled", click "Apply," and "OK."
- Restart your PC and see if the Windows 11 update error 0x80248007 persists.
Solution 6 - Install Windows updates from Microsoft Update Catalog
Manually downloading and installing the updates from Microsoft Update Catalog is another viable way to resolve the Windows update error 0x80248007.
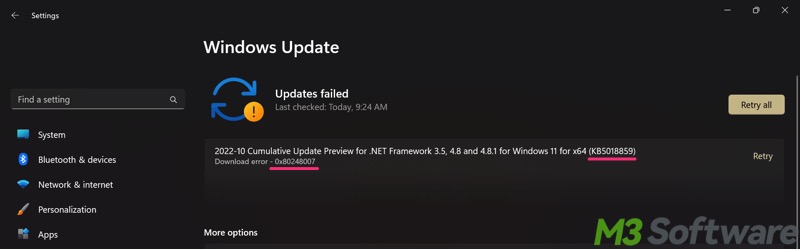
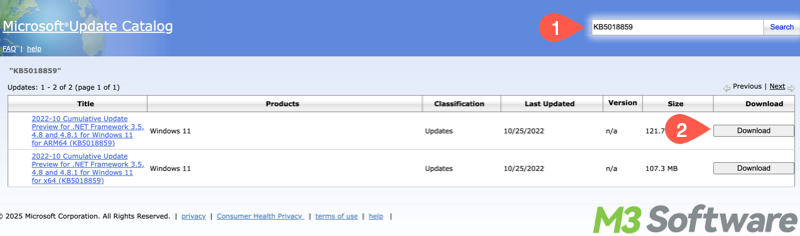
- Open Windows Update in Settings to check the KB number in Windows update download error 0x80248007, such as KB5018859.
- Visit Microsoft Update Catalog.
- Input the full KB number into the search box and search for it.
- Verify the update and click the "Download" button.
- Double-click the downloaded Windows update file to install.
- Restart your PC and check if the Windows 11 update error 0x80248007 recurs.
You can tap on the buttons below to share the post
FAQs about Windows update error 0x80248007
A
It’s an error code that appears when the Windows Update service can’t access or retrieve the required update files or metadata. This usually indicates a corrupted update database or missing update information.
A
The causes of Windows update error 0x80248007 could be: 1. Corrupted SoftwareDistribution folder. 2. Windows Update services are not running properly. 3. Damaged update database files. 4. The local group policy setting, Specify settings for optional component installation and component repair, is not enabled. 5. Corrupted system files.
A
Here are some common solutions to the Windows Update error 0x80248007: 1. Run Windows update troubleshooter through Settings. 2. Run sfc/ scannow through the Command Prompt with administrator privileges. 3. Empty the SoftwareDistribution folder. 4. Restart the Windows update service. 5. Enable the group policy setting: Specify settings for optional component installation and component repair.